I’ve posted it on here as a reference for anyone else thinking of doing the same conversion. The conversion itself is a piece of cake.... finding out how it all went together and worked took me 12 months of relentless research... having done it once, I could now do the conversion in 2 days...
Here’s the story... from the beginning...
As some of you already know, I’ve just bought an Elford Turbo setup which I intend to put into my 1984 series 3 RX7 and I thought I would start a thread about it.
I would have preferred to have bought a complete car for the parts but none are currently available so I bought the parts instead.
This leaves me with a few mysteries and problems to overcome.
I will need plenty of help and advice to do this install……
I have nothing to refer to for the throttle and choke linkages, fuel lines, engine and ignition wiring.
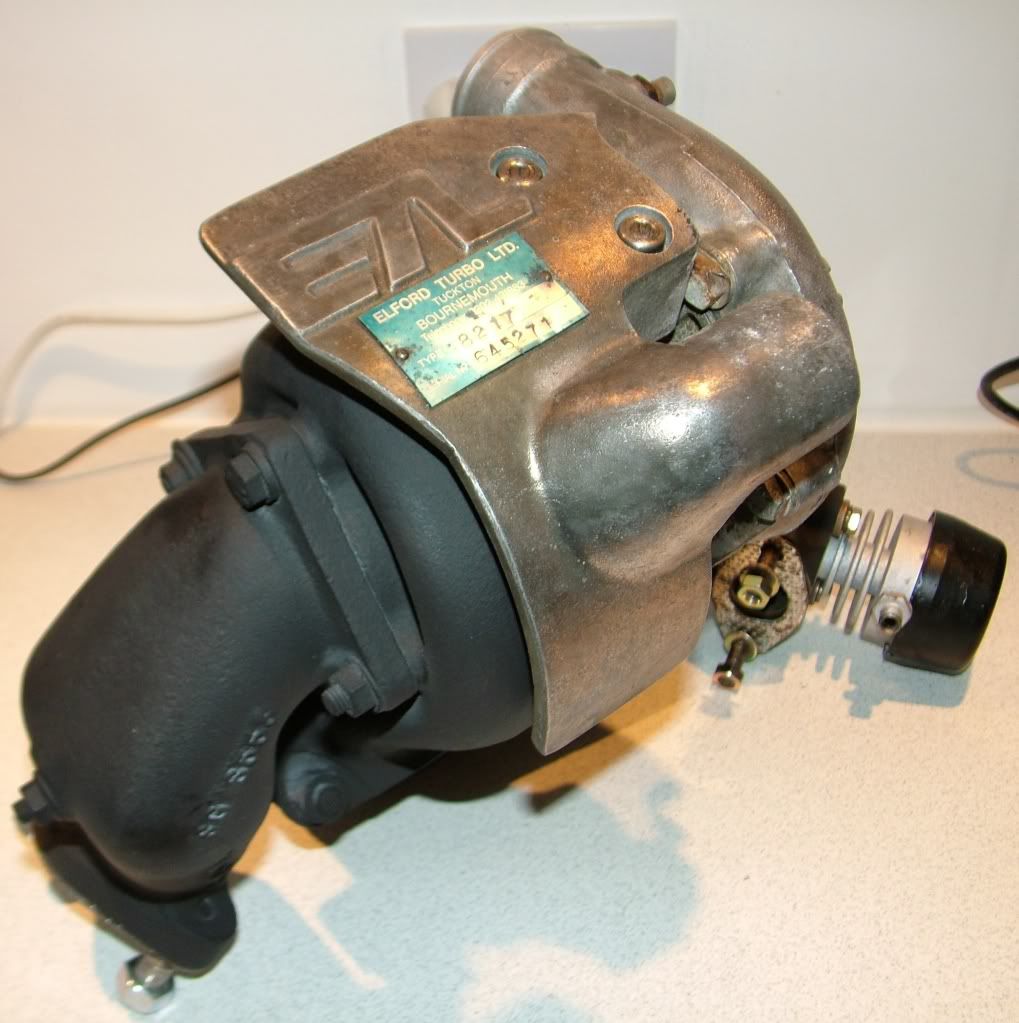
Elford Turbo Ltd ( ETL)are now long gone and as only around 500 or so conversions were ever done back in the 80’s, finding any information on the install will be a bit of a challenge.
As far as I know, there aren’t any diagrams or manuals showing how the conversion was done.
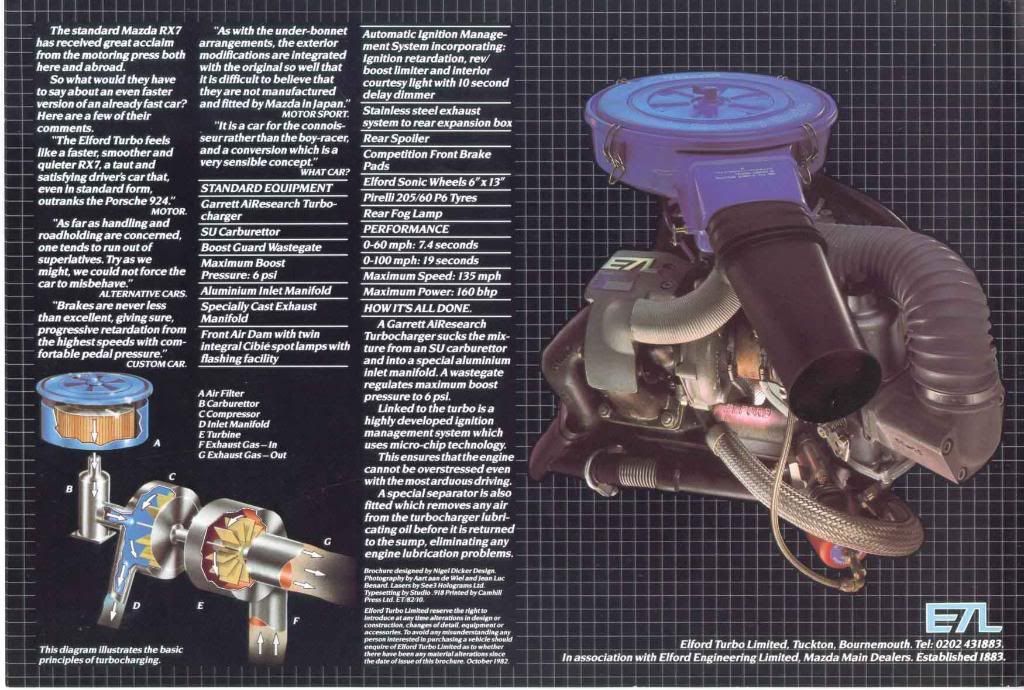
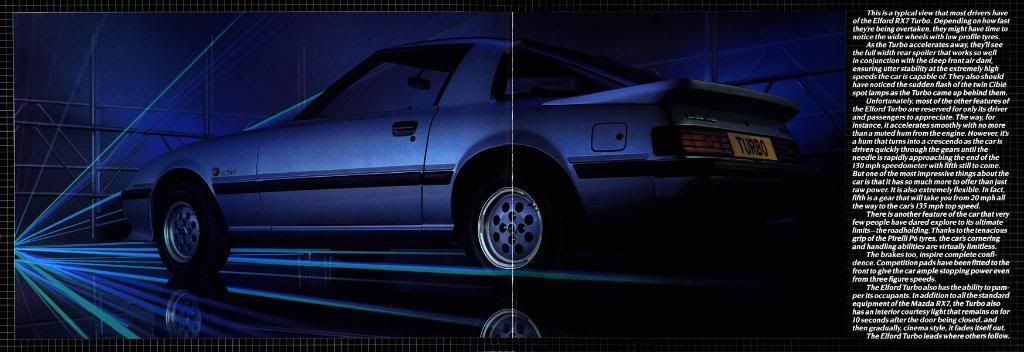
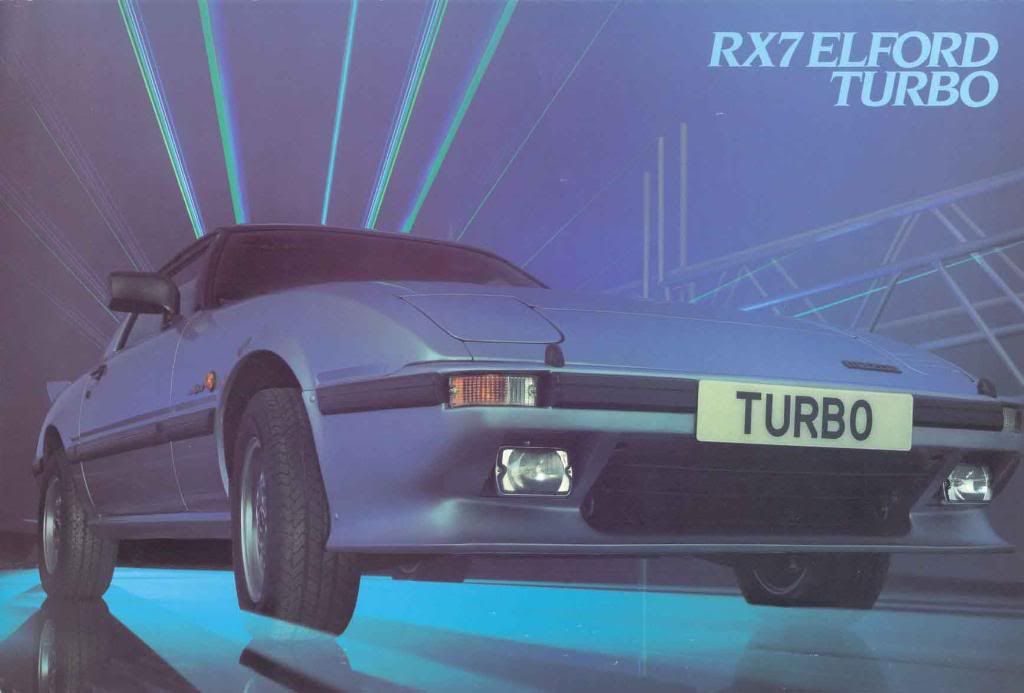
The only literature that I can find so far are a few old road tests and this old sales brochure...plus a price list.
I hope by starting this thread I will be able to pull together any information or advice anyone else can offer and also create a useful record of how it all went together to help anyone else wanting to do this conversion.
If anyone has any pictures of engine bays showing this conversion, please post up a copy, likewise any other info you come across which might help me.
I’ve been reading Albans thread about his gold car but as that was initially an Elford, he had a bit of a head start!.....
This conversion is starting from scratch!
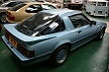
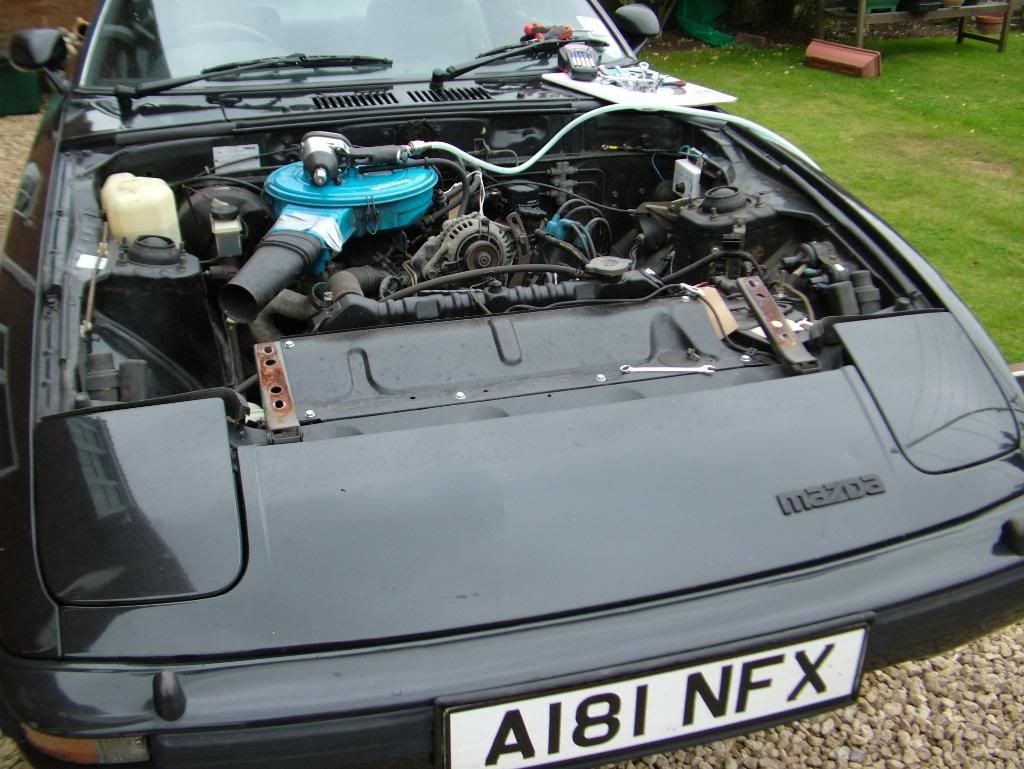
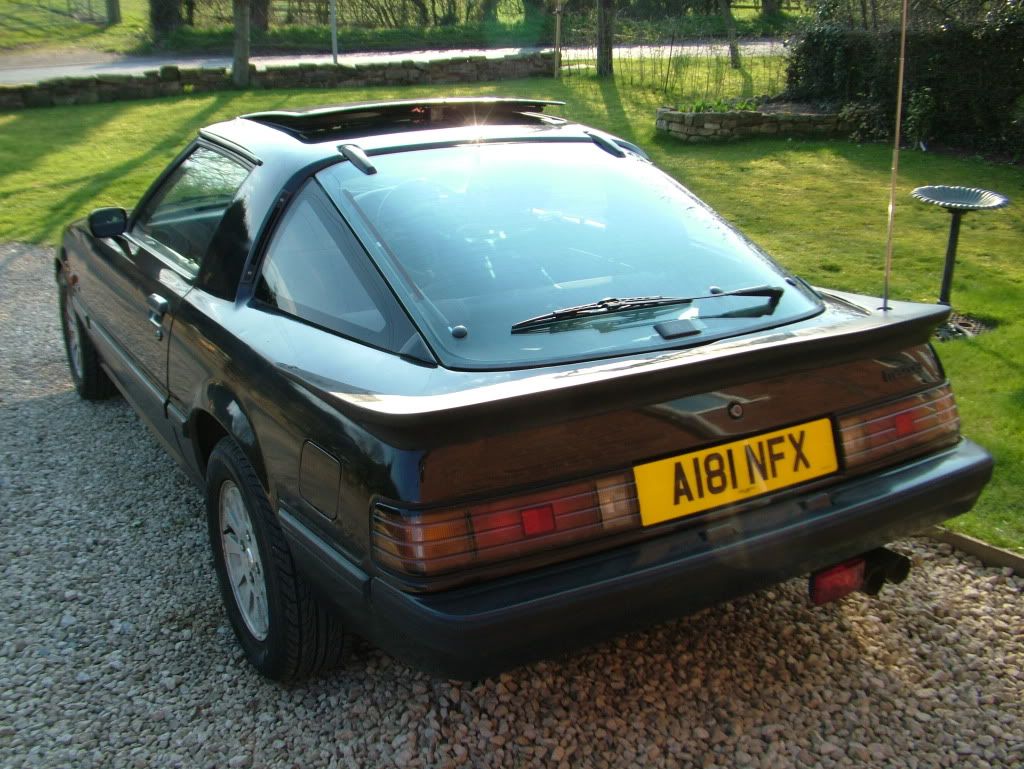
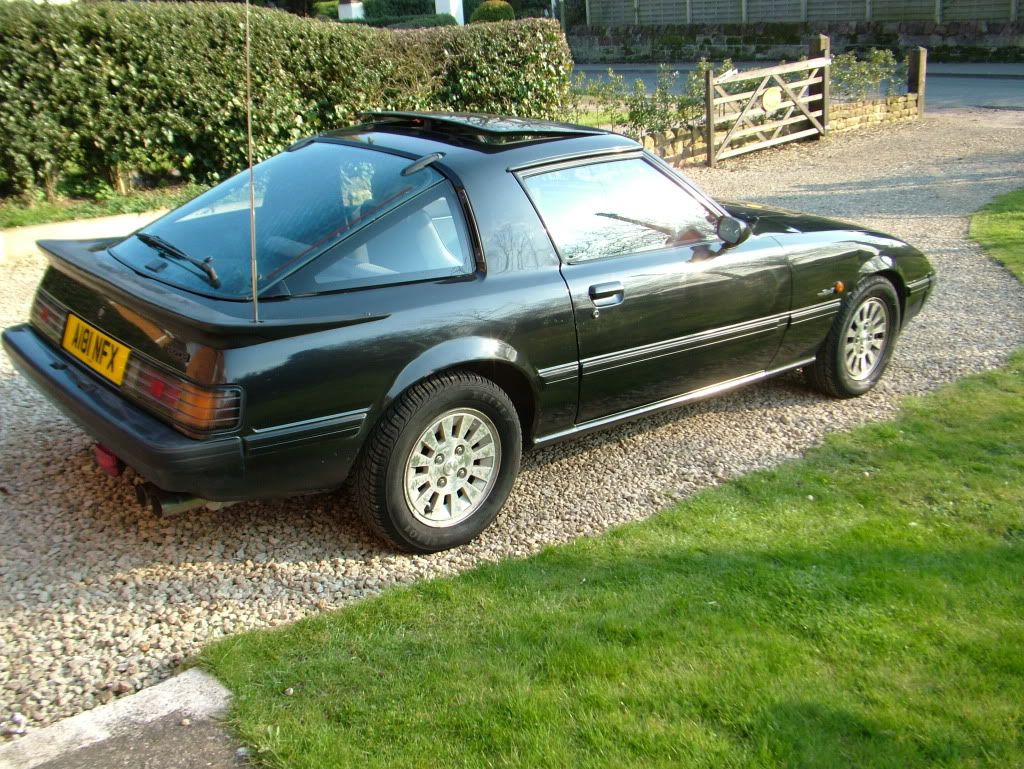
THE CAR
Here’s the car it’s going into…. A 1984 ‘A’ reg series 3 currently running the standard unmodified 12a engine…

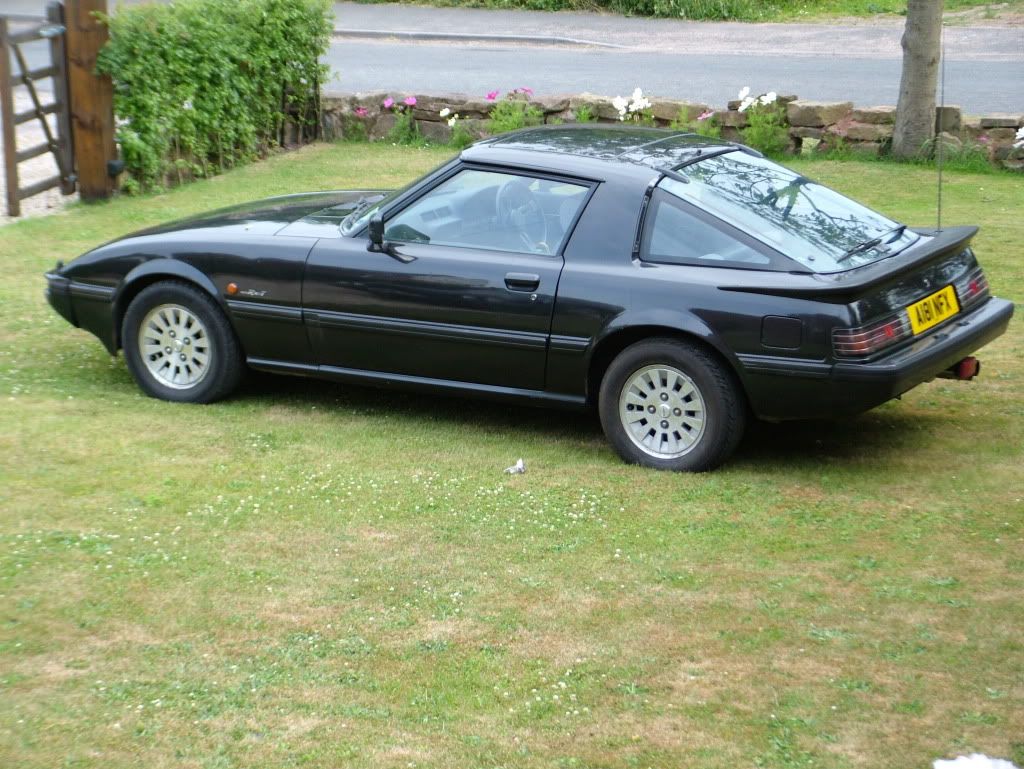
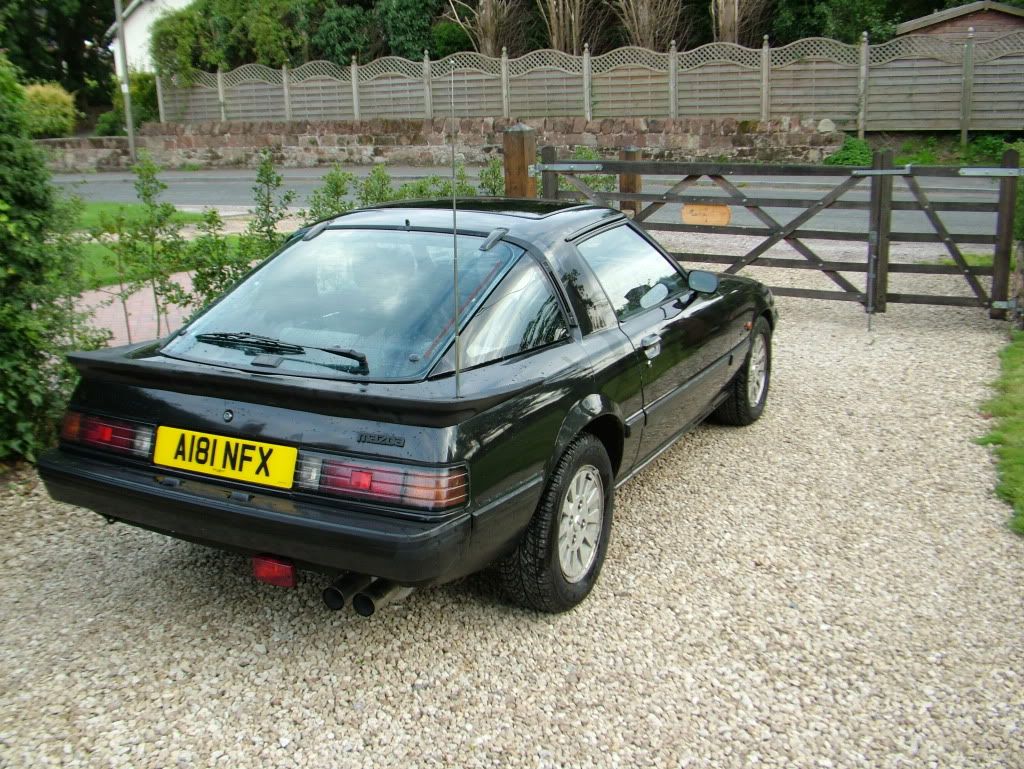
The car is completely standard with the exception of :
1. The exhaust which is a stainless ‘double s’ system from the engine to the back box which is the stock Mazda back box. The headers are also part of this after market system. The air pump and associated junk are long gone.
2. The car is currently running twin electric fans from a 1994 Toyota MR2 MK2 in place of the standard viscous fan.
3. Munroe adjustable gas rear shocks
4. Xenon headlights
The car runs fine in its current setup.
THE ELFORD PARTS
I bought these parts off Ebay for £200 in June 2010 and got:
12a Mazda engine with the full ETL conversion fitted to it.
Series 2 gearbox
Propshaft
Radiator
Oil Cooler
Control module
Assorted bits of the wiring loom inc coils
Elford stainless exhaust
Standard Mazda back box ( which Elford used )
The story…
The seller stated that he bought a white Elford RX7 some years back and as it was terminally rusty, he broke it for parts.
He stated that he hadn’t had it running but had been told that the engine had recently been rebuilt and had hardly been run since although he happily stated that he hadn’t got any paperwork to back that up.
I must have heard that story about 100 times over the last 30 years!
I only wanted the Elford bits so it the fact it came with a full engine that may or may not be ok was a just a bonus really.
The engine in my car is excellent and so I intend to swap the ETL parts over onto that.
I’m therefore starting with an engine known to be good so any running problems, shouldn’t be down to faults within the engine.
The seller also had the bodykit but:
it was buried in the depths of his storage shed so I couldn’t get to see it
He described it as having a lot of damage and needing a great deal of repairs
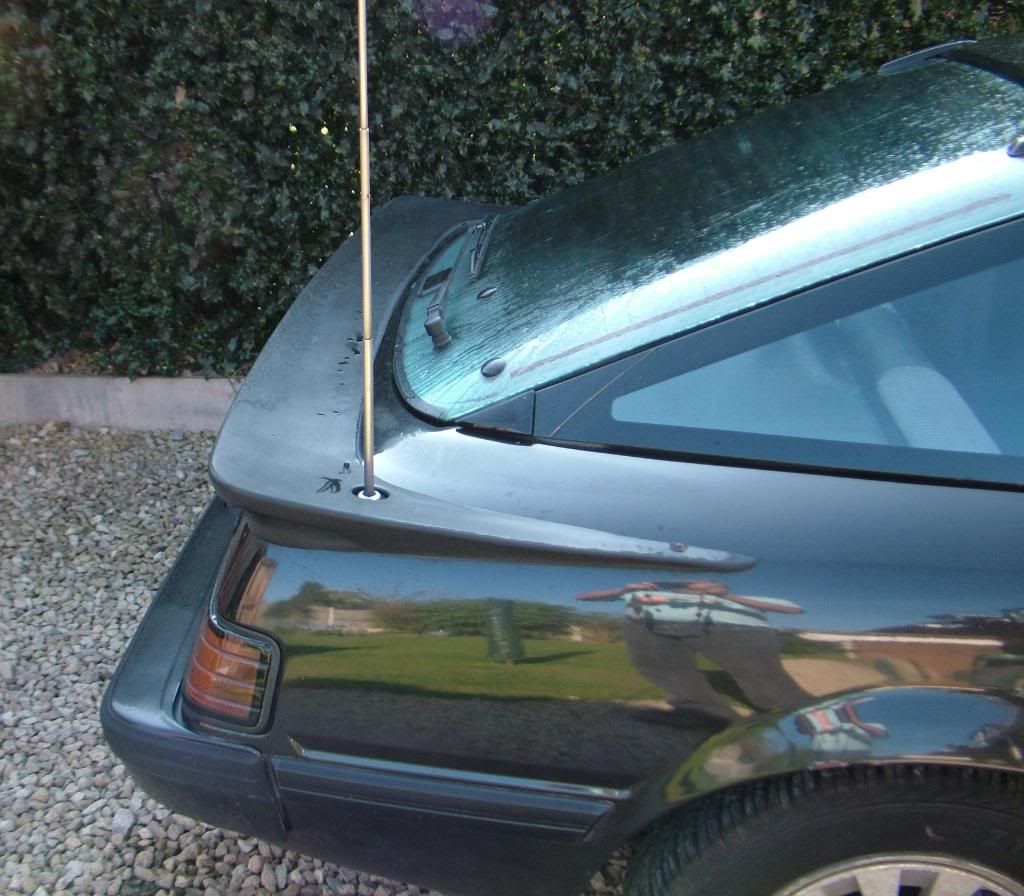
I’m still in the market for the Elford front and rear spoilers if anyone knows to any that may be for sale, plus the rear badge!
SUSSING OUT THE PARTS…
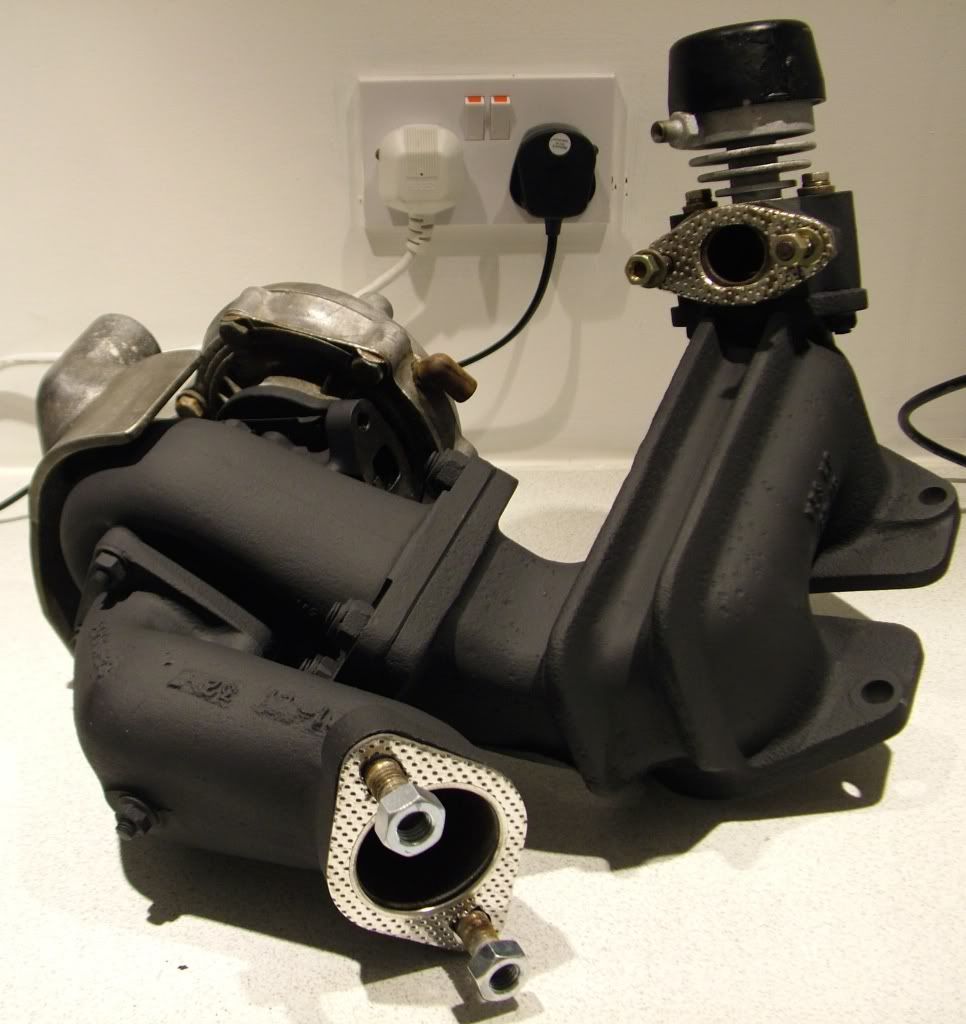
THE INDUCTION / TURBO
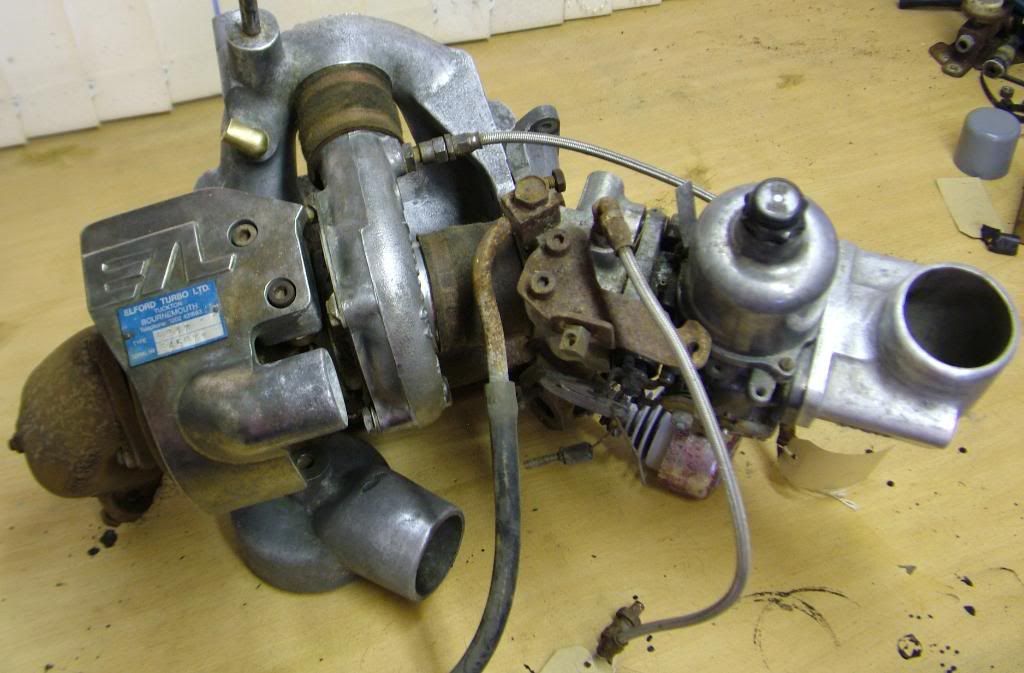
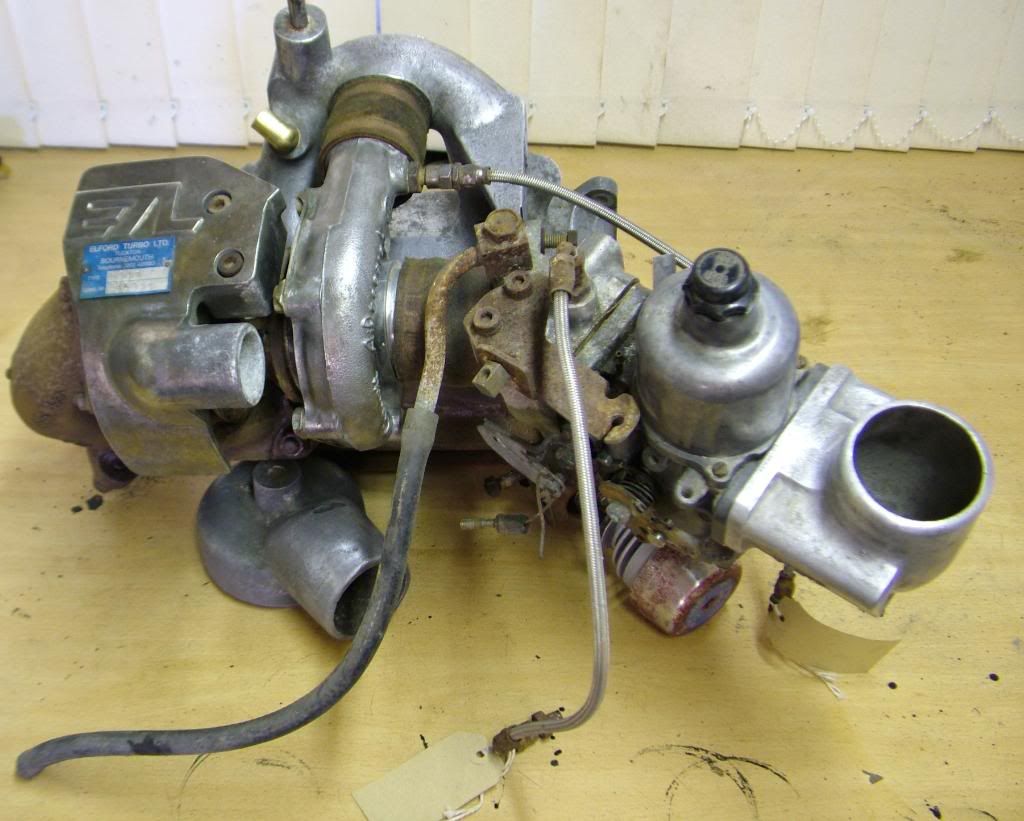
When I got the parts home I decided to 1st remove the whole turbo setup from the engine. I took plenty of photos to show where the oil and vacuum lines went and then unbolted the whole thing from the engine.
It came off as a complete unit and I then separated the various parts on the bench to clean them up.
The carb, a HIF44 SU, is seized and will need a rebuild.
The turbo, a Garrett AI Research, and the compressor spins freely, hopefully they will be ok.
I cleaned the manifolds up and put all the parts to one side for the time being whilst I checked out everything else.
ENGINE
I’d already decided that using my own engine was the way to go
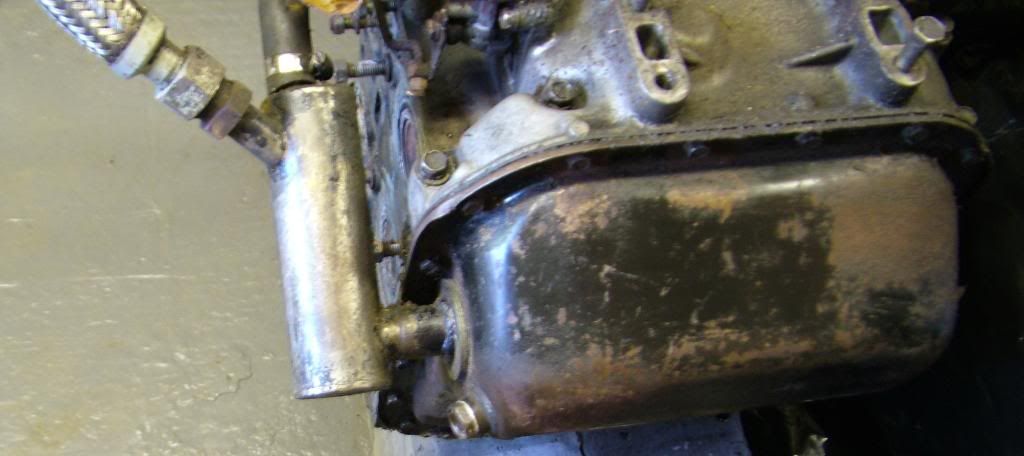
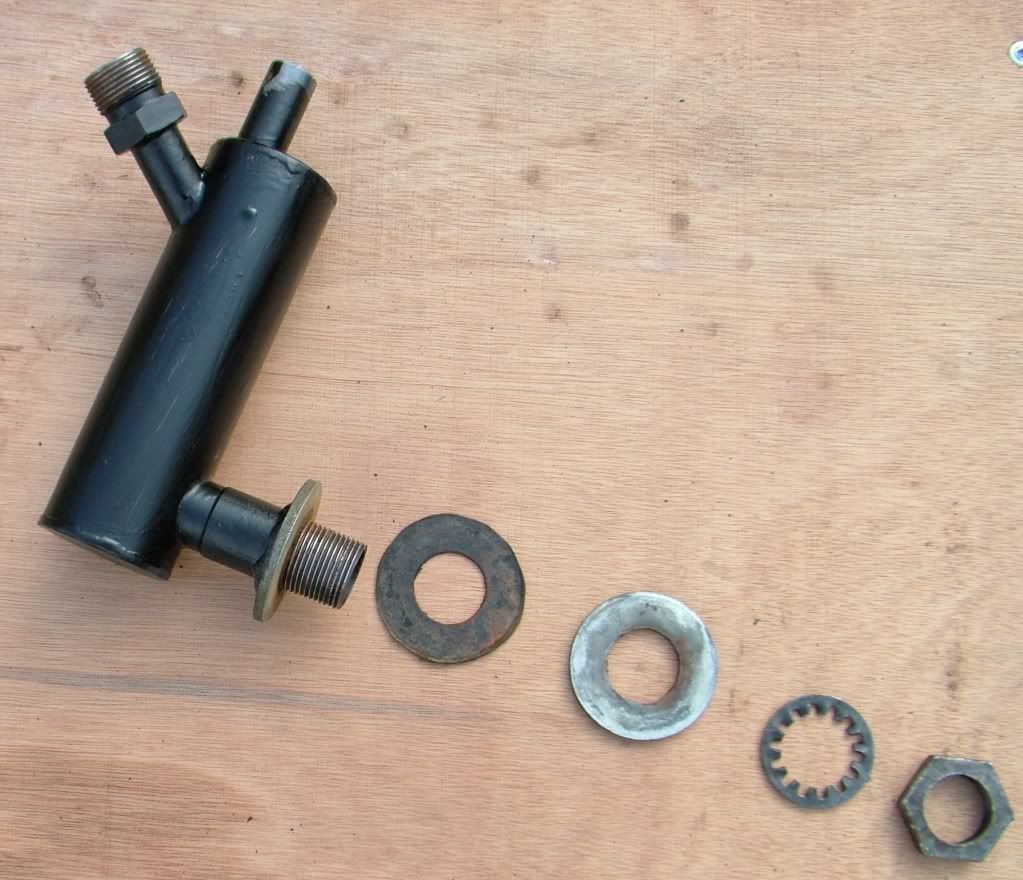
ETL used the standard 12a engine, same rotors and compression but modified the sump to incorporate a separator on the oil return line to remove any air and froth from the oil before it went back into the sump.
My first thought was to just swap the sump onto my engine whilst it was still in the car but after asking for advice on both forums, I’ve decided to lift the engine out and do it on the bench.
The exhaust, fuel lines and linkages need to be changed anyway plus my clutch release bearing is noisy so I might as well take the engine out and do that at the same time.
It’ll also be easier to put the manifolds back on and connect up the lines with the engine out of the car.
GEARBOX
I’ll be using my own existing gearbox, not this series 2 box.
Mines good, it fits my clutch etc and I can’t see any advantage in swapping them.
EXHAUST
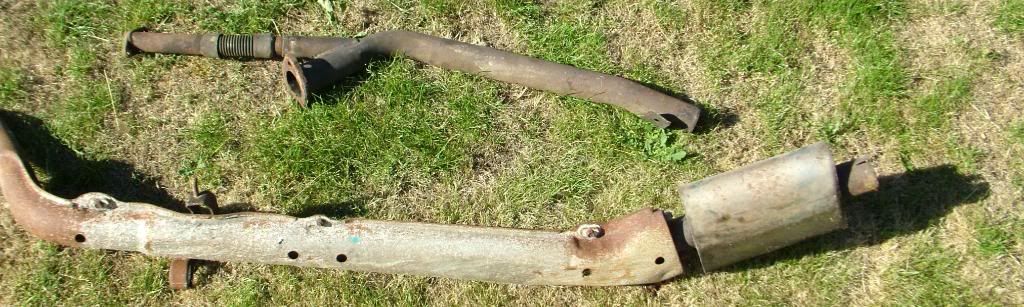
ETL used stainless from the manifold to the back axle to cope with the extra heat from the turbo but used the stock factory backbox.
The exhaust is in fine condition and just needs a coat of VHT paint.
PROPSHAFT & RADIATOR
Both ok but not needed for this project.
OIL COOLER
Scrap…. Dropped to bits as I picked it up. Does a 2nd gen cooler fit?
I want to lose the ‘beehive’ cooler and go to a front mounted one but I’m currently running a full depth series 3 radiator which I want to keep.
What do you reckon?
CONTROL MODULE

I took the cover off the Micro Dynamics control module to make sure it hadn’t suffered from water ingress and fried and it looks sound as.
It the date 14.08.83 written inside it, I presume from when it was made, so that gives some idea of the age of the parts.
LOOM
Loads of bits of wire taped together that I haven’t had chance to look at yet!
I cleaned up the turbo setup and painted the manifold with VHT paint...
Rebuilding the carb
After cleaning up all the Elford parts, I decided to refurb the carb…
Su carbs don’t like long periods of inactivity and solidifying fuel can cause havoc inside them. As I didn’t know how long this carb had been ‘off the road’, I decided not to take any chances.
The carb used in this application is a single HIF44 SU adapted for use with a turbo.
It is the same carb as used in the MG Metro turbo and Burlen Fuel Systems, who now own SU, still list the rebuild kit for the RX7 Elford turbo ( and the Metro turbo. It’s listed as part number CRK269 MG Metro HIF44 Turbo).
http://www.sucarb.co.uk/CarbEssentia...roductId=10543
The full rebuild kit costs £46.00 delivered from Burlen and comprises of all the parts required ( gaskets, o rings, throttle spindle, bushes, jet, seals, throttle disc, bolts etc, etc…)
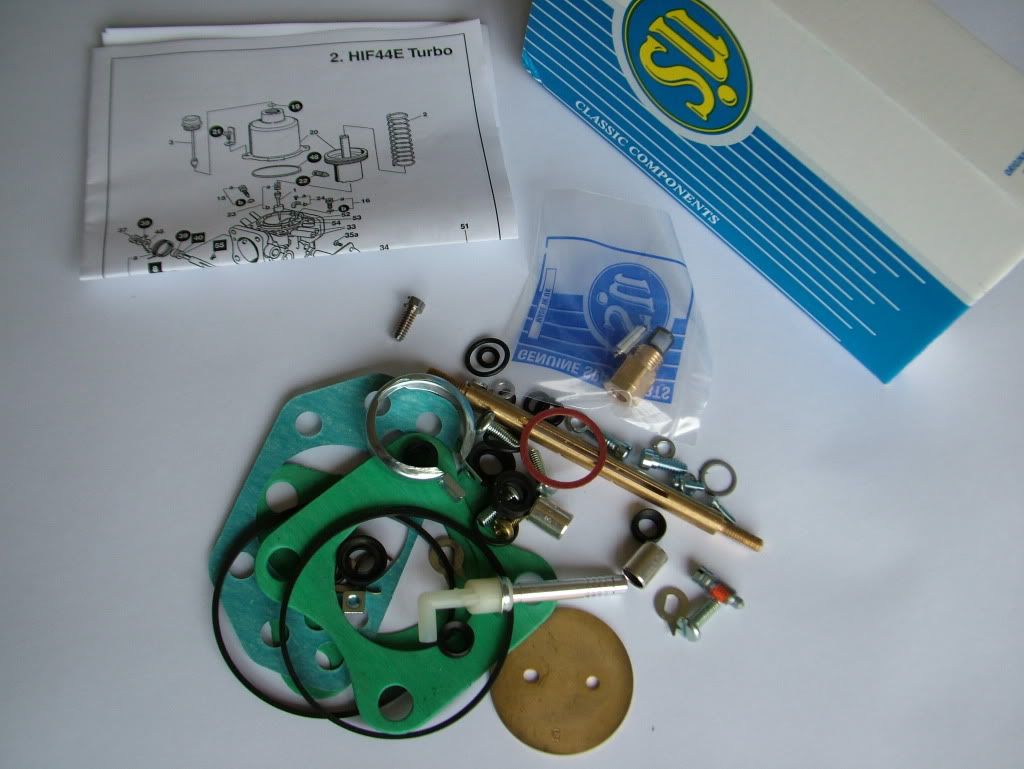
Included in the kit are some vague instructions and an exploded diagram but no corresponding key to say what each part actually is or where it goes… the instructions also only refer to the mg metro turbo application, not the elford.... although SU fail to mention this and the instructions supplied are misleading
The kit also comprises of all the parts for 2 slightly different models of carb but they are all mixed up together and it’s pretty much guesswork to suss out what goes where and which seals to use.
I took loads of photos, made plenty of notes and got a lot of rebuild info off the net.
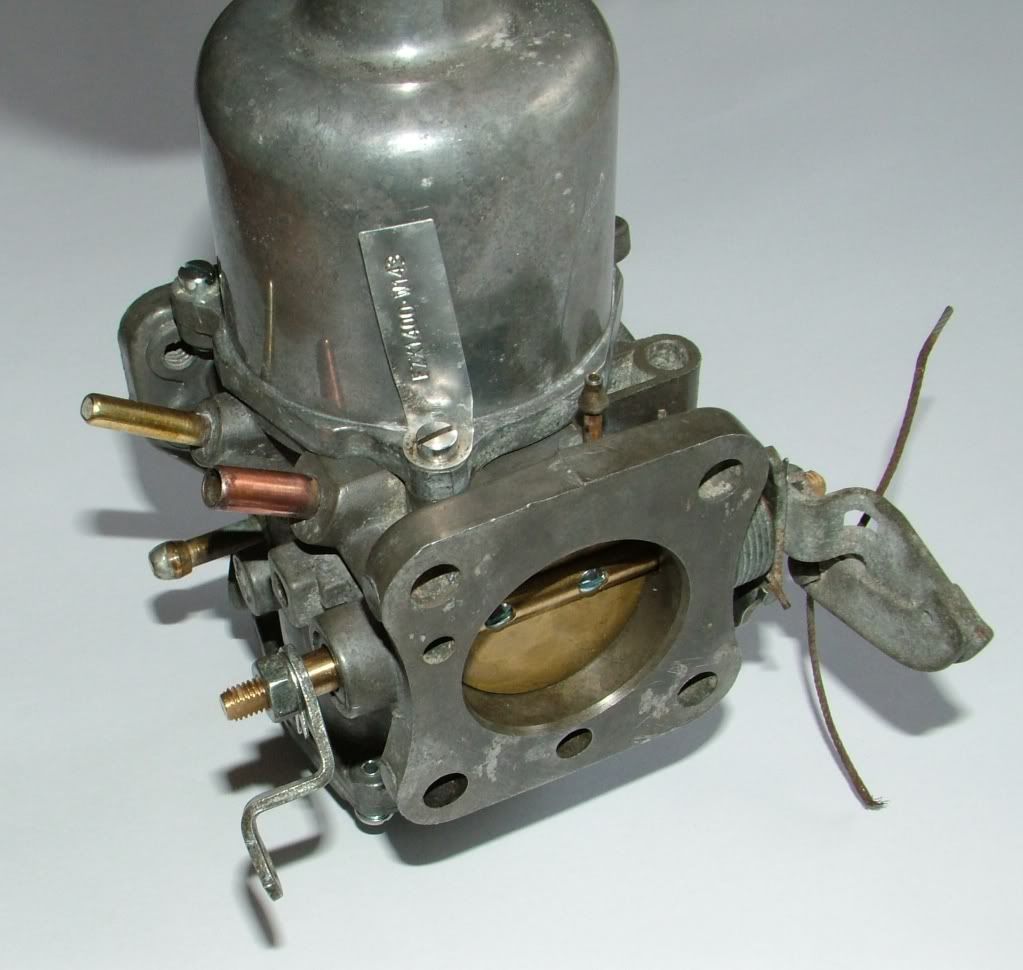
The carb fitted to my Elford setup was carb no. FZX 1400-W143 and the needle no.XW61T.
My carb was seized up. The choke was stuck solid, the jet was full of solidified fuel and the dashpot assembly was sticking.
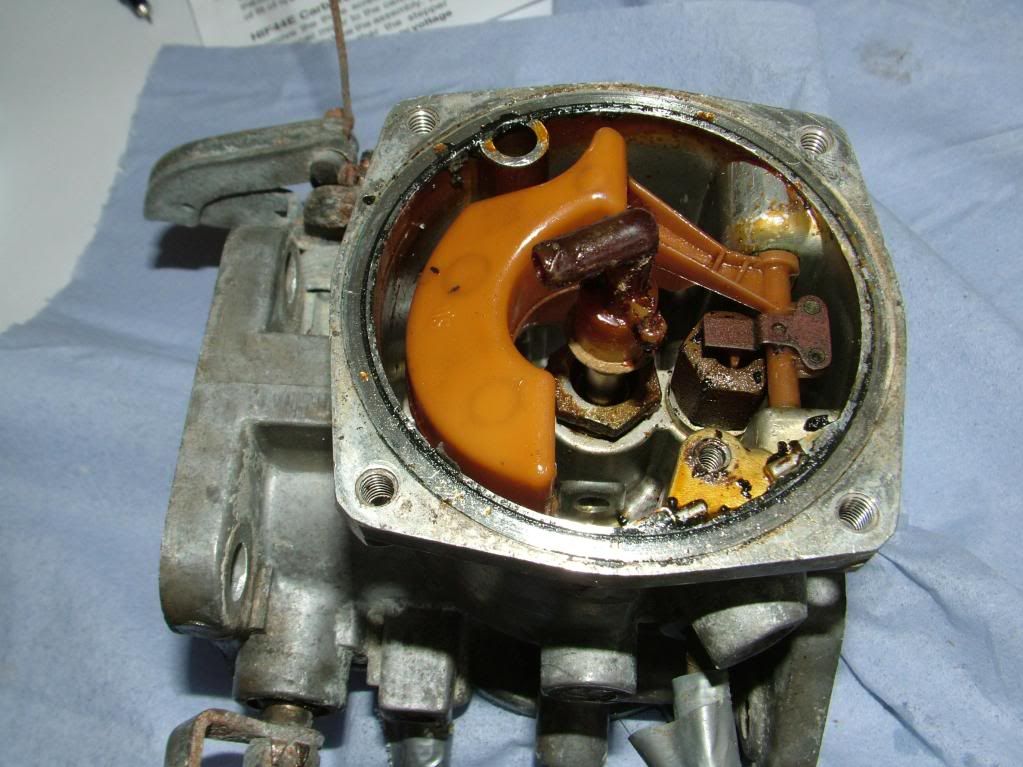
I stripped the carb body of all of its components and thoroughly cleaned it with carb cleaner and oven cleaner to remove the rock hard stale fuel which had dried on like brown varnish and which the carb cleaner wouldn’t touch.
It was then dried and blown out with a compressed air gun.
The rubber seals and o rings were in a very poor condition and had nearly disintegrated… there is no way this carb would have worked without a full rebuild.
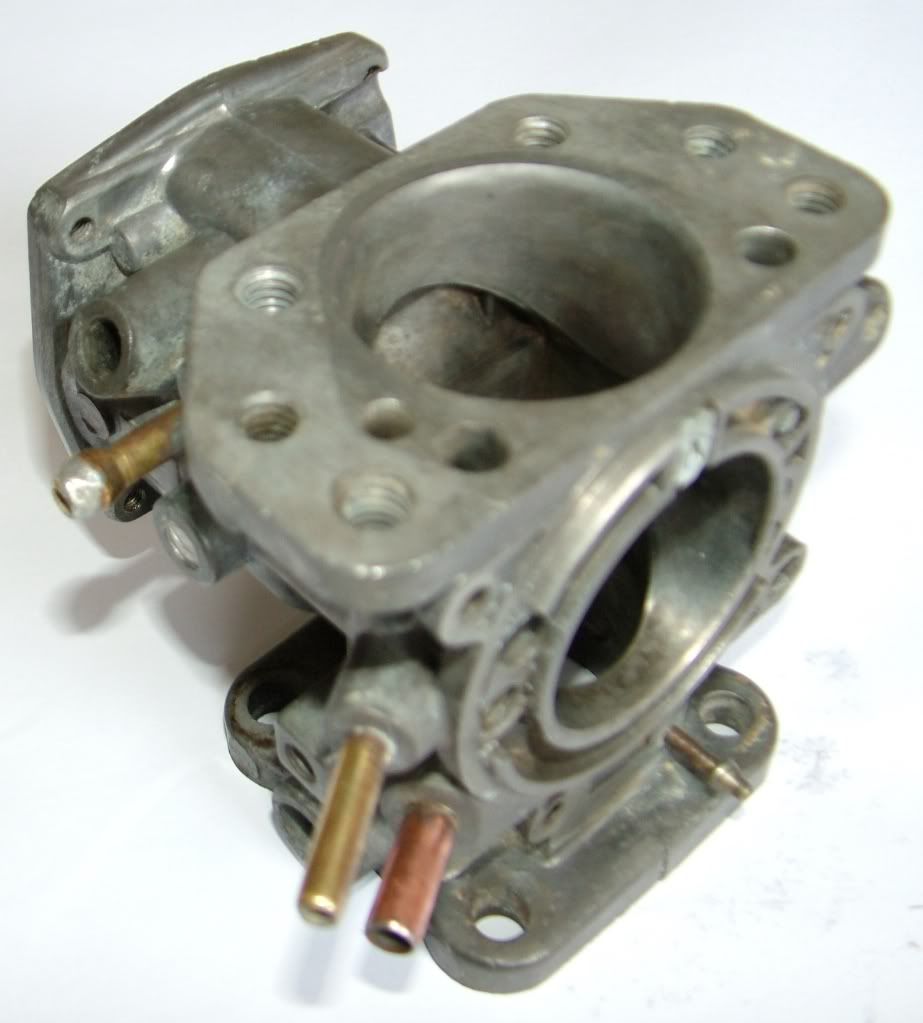
The throttle spindle sits in 2 polished stainless bushes which had to be pressed in and out of the carb body with a vice, a perilous thing to do with an aluminium carb body.
The SU instructions say to reverse the throttle spindle seals and choke lever seals, the idea being that the suction from the turbo causes them to seal tightly if they are reversed. This is wrong.
This is only the case in a blow through turbo application like the mg metro turbo, for a suck through turbo setup like the elford conversion, the seals should be fitted the usual way around.
Here’s the finished thing… it was a right bitch of a job!
Due to my other series 3 being in my garage and stuck over the pit with no suspension on it, I was going to put this conversion off until the spring but after my clutch exploded whilst thrashing it to overtake an artic on a dual carriageway, I decided that if I'd got to take the gearbox out, I might as well get on with it.
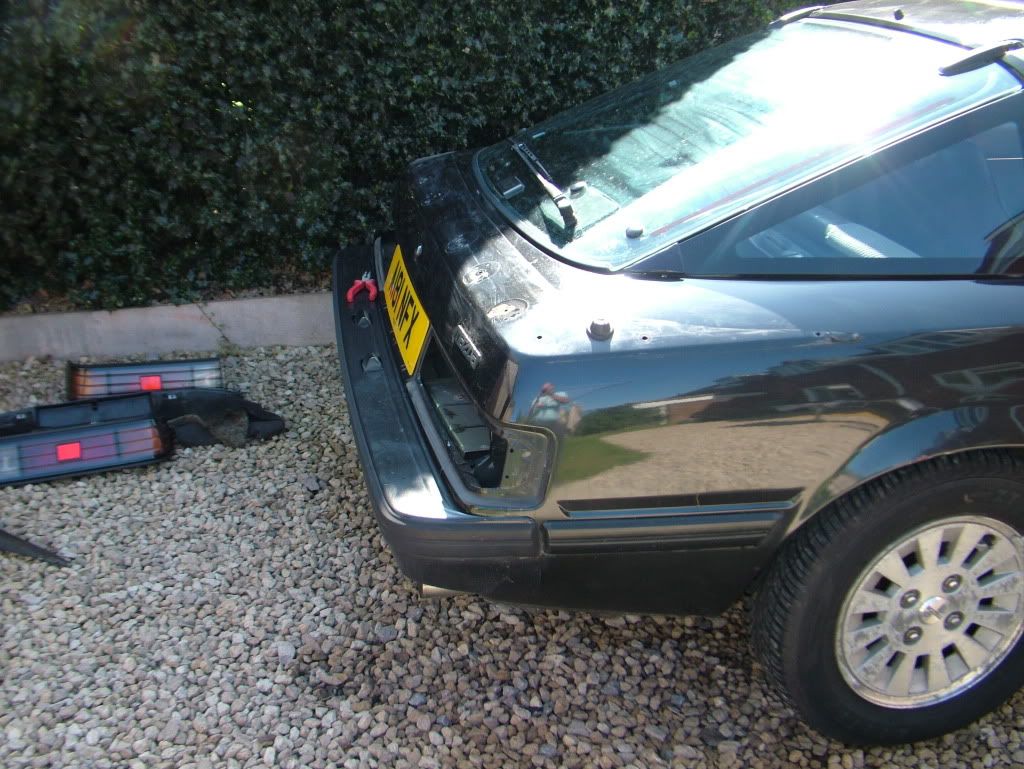
I started off by labelling everything up...
and then dropped the bonnet off ready to lift the engine...
after disconnecting everything and undoing the engine mounts I lifted the engine out...
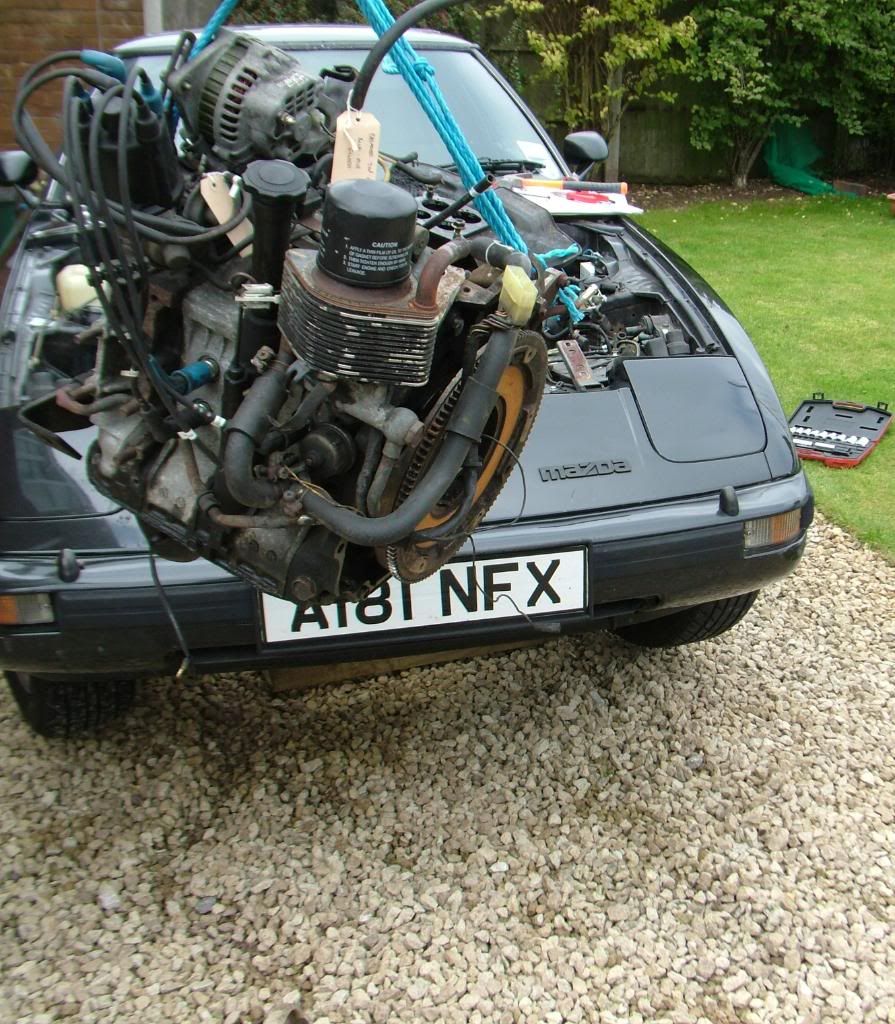
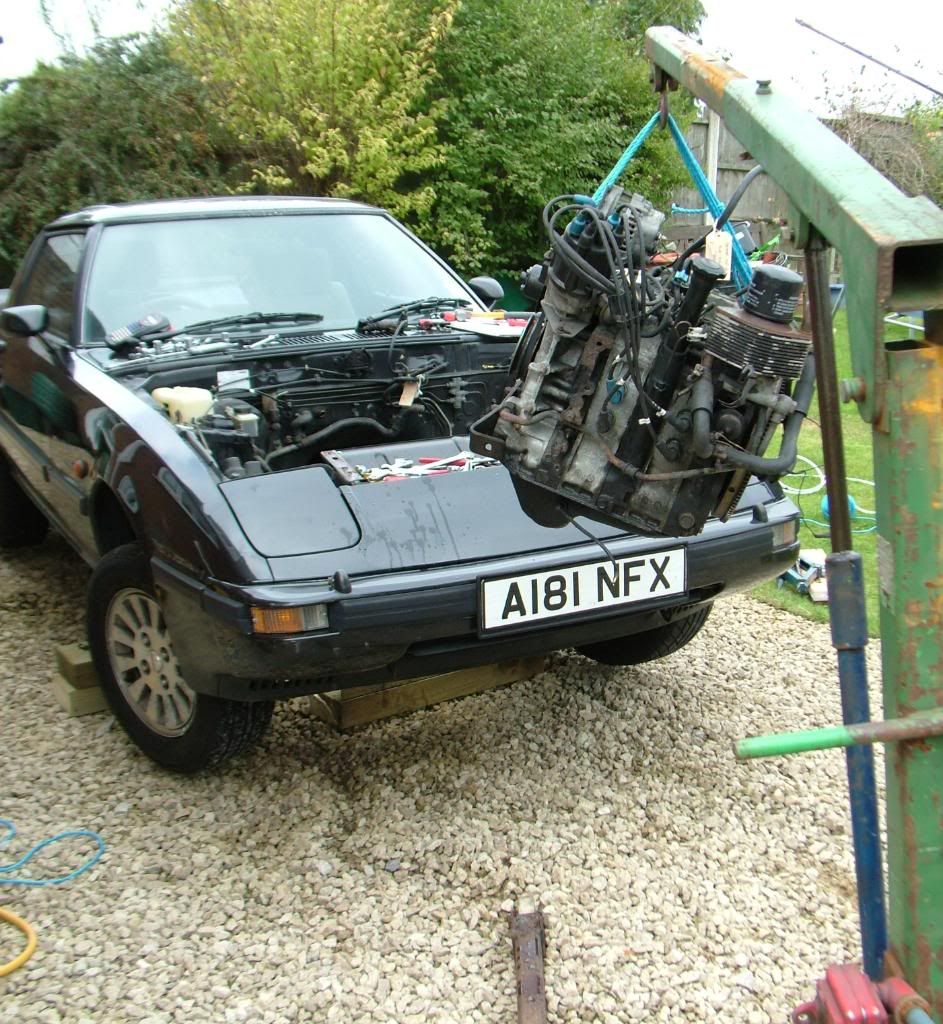
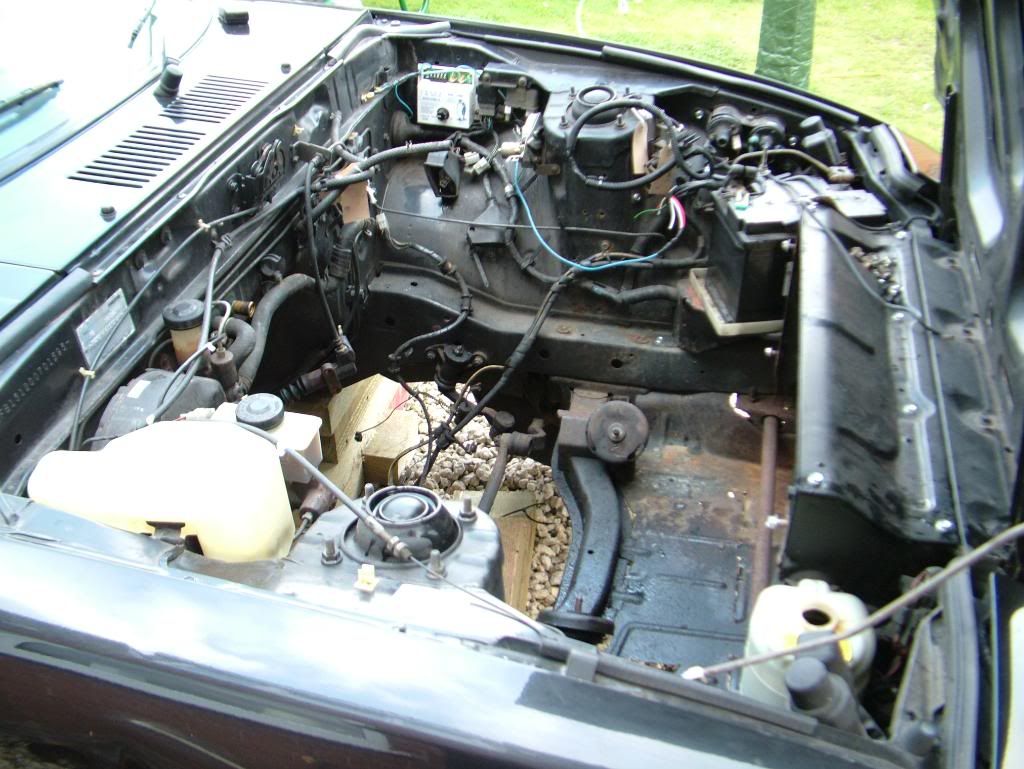
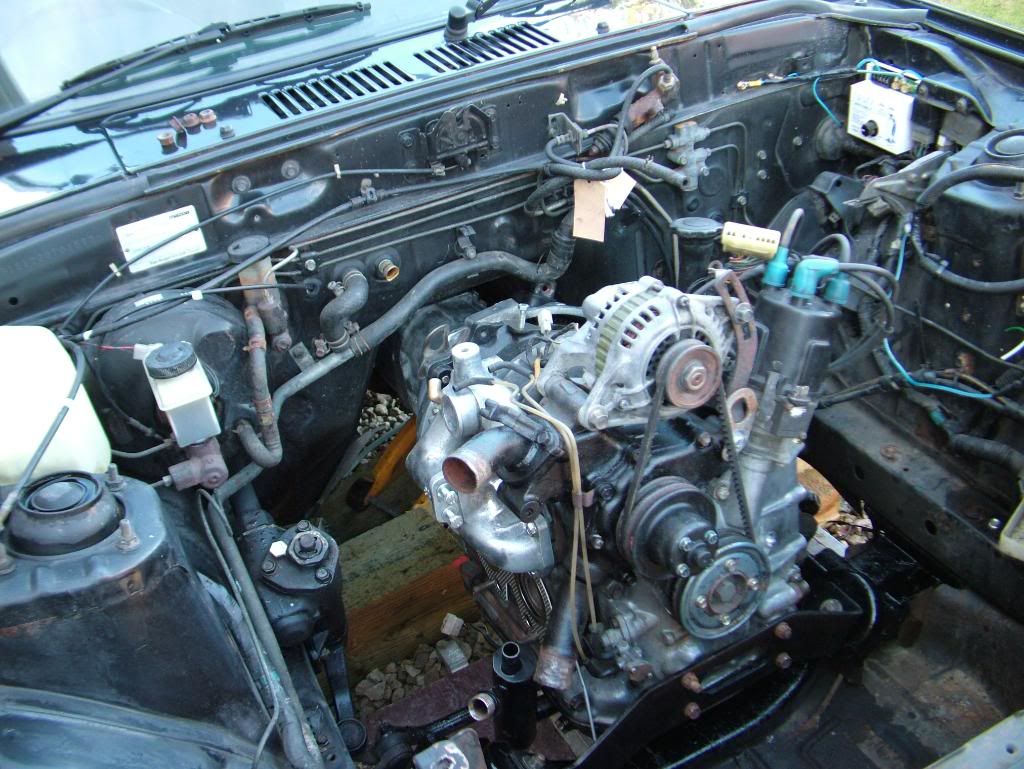
the empty bay waiting for the turbocharged engine...
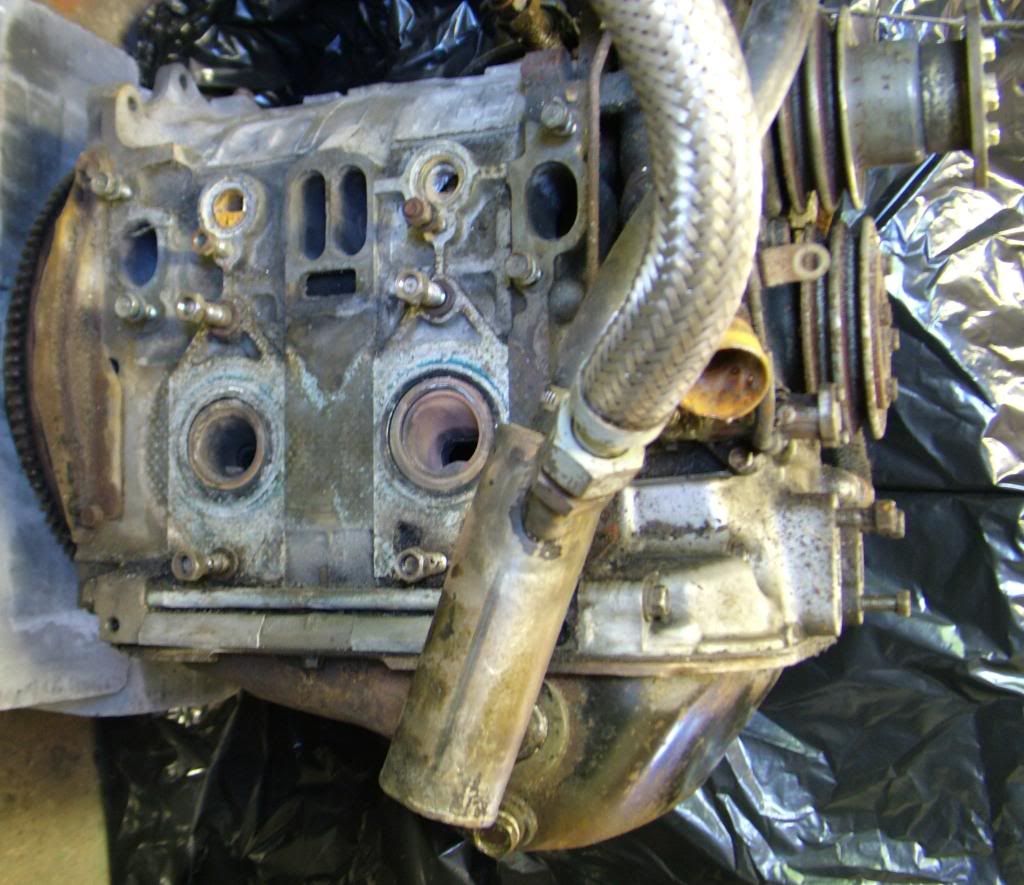
the complete 12a...
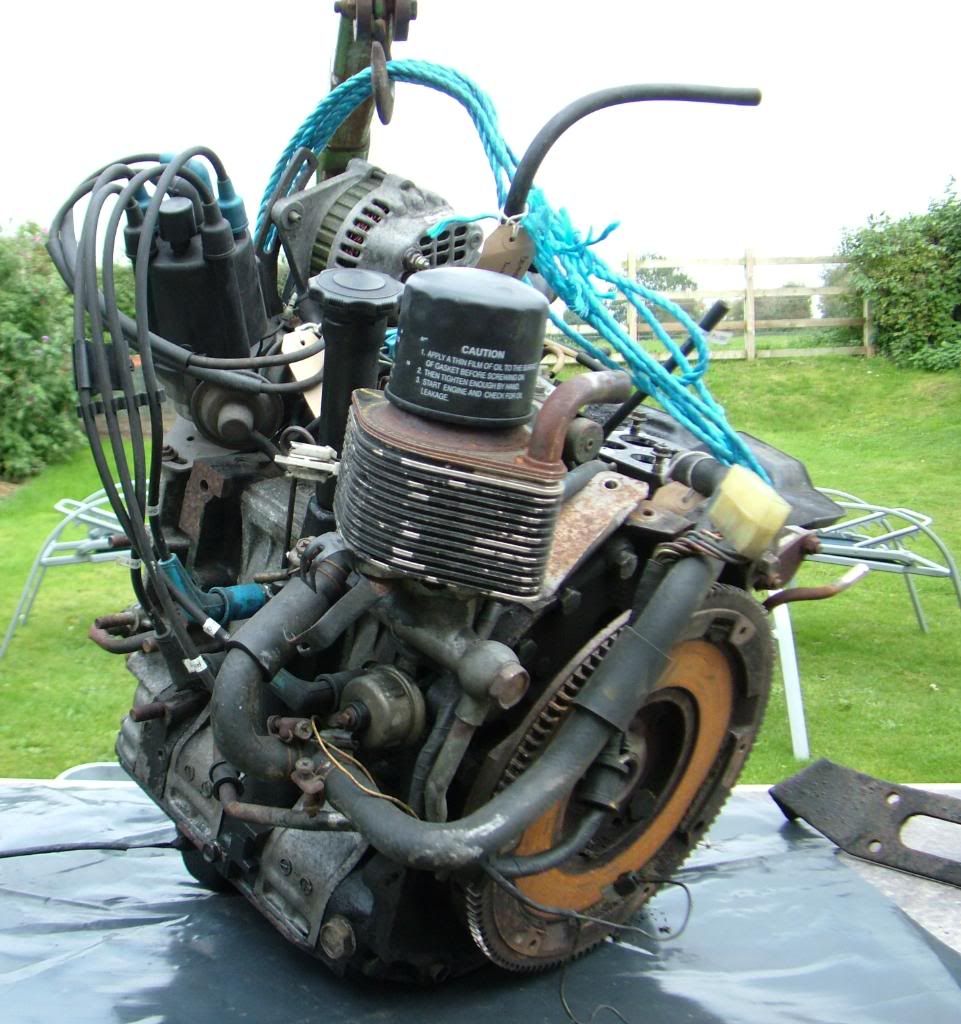
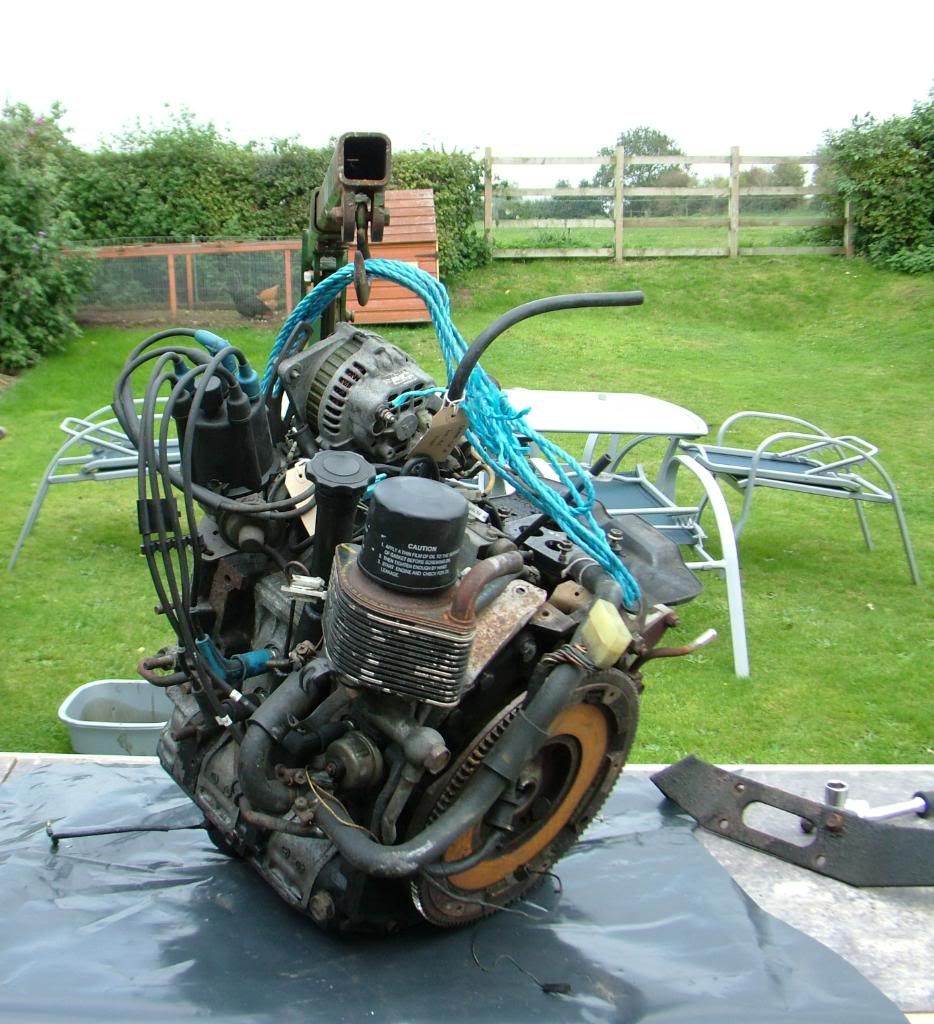
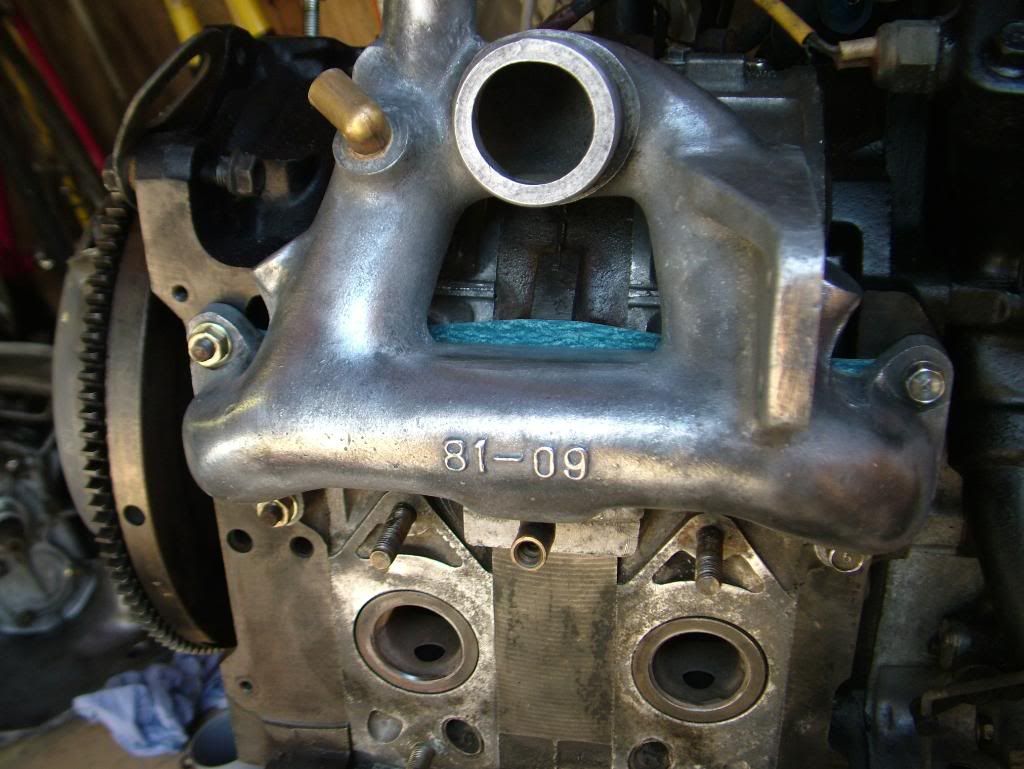
stripped off the inlet, emission control junk & beehive oil cooler, non of which is needed and gave the engine a clean up...
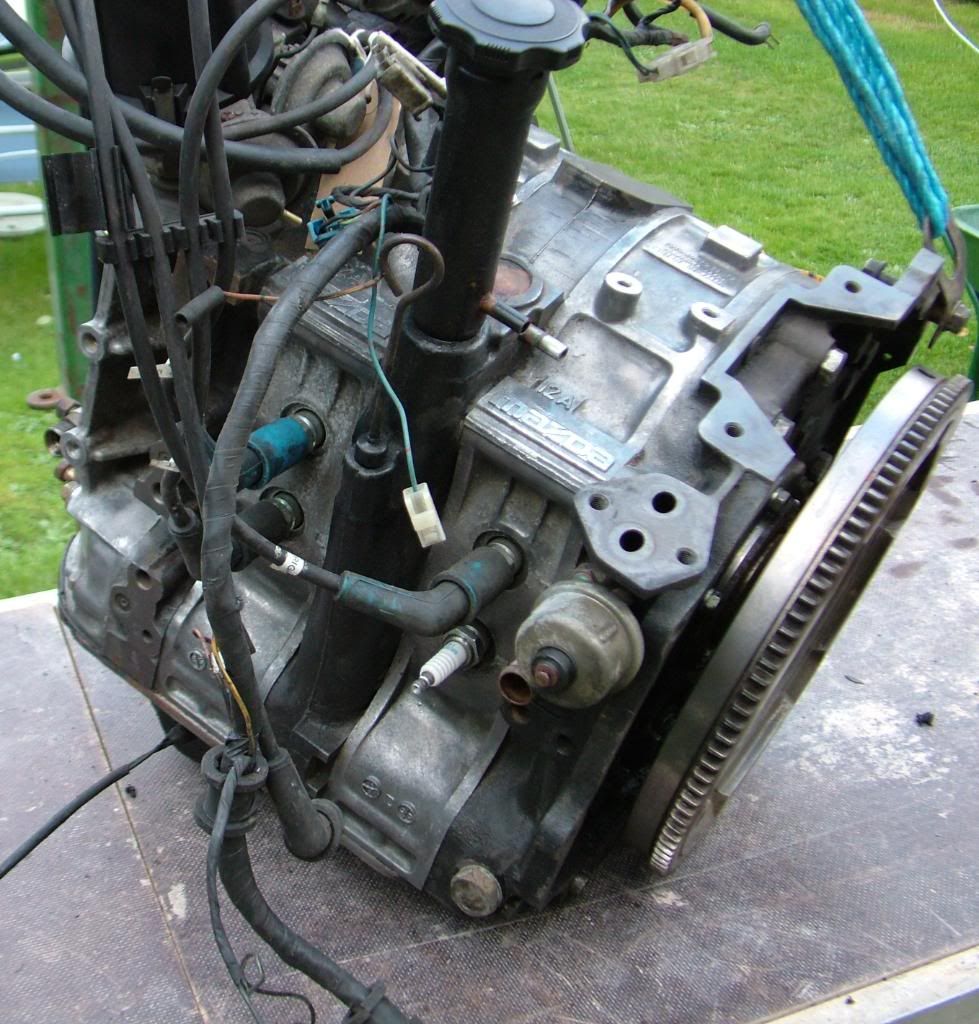
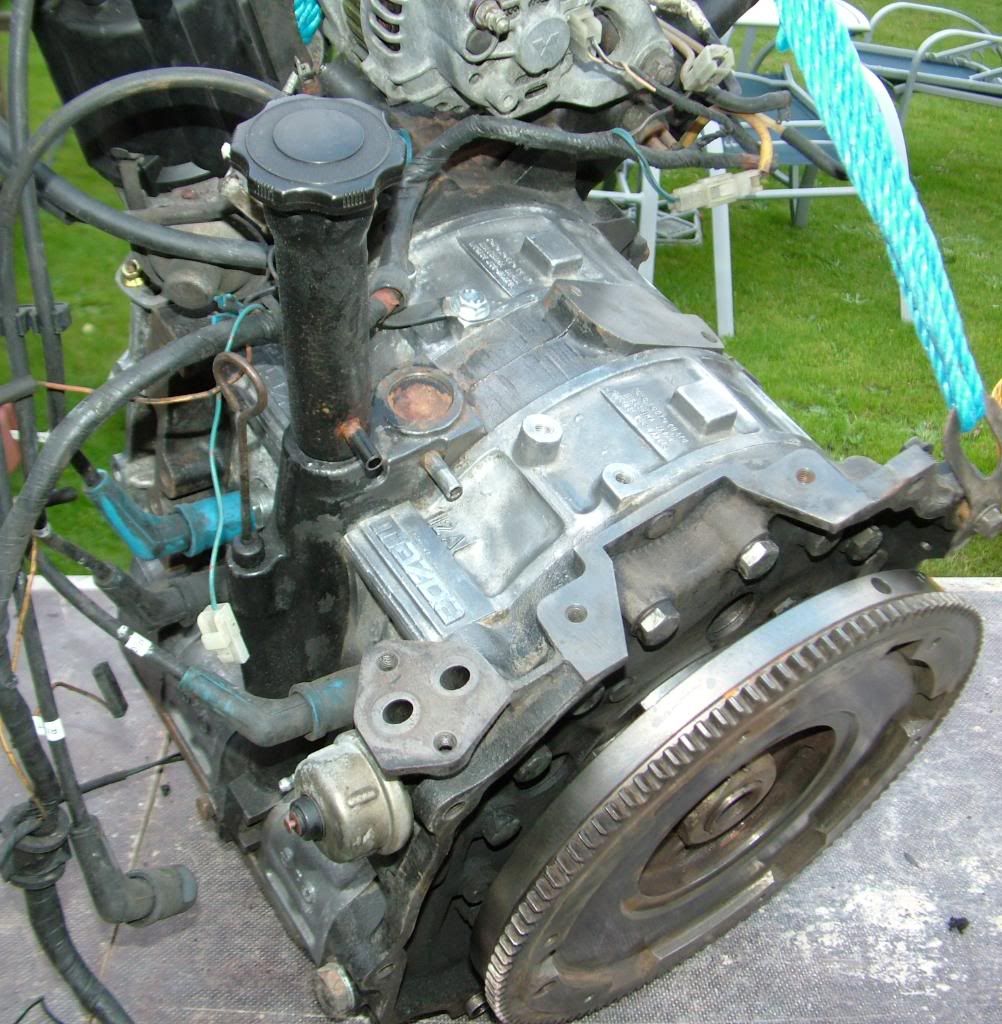
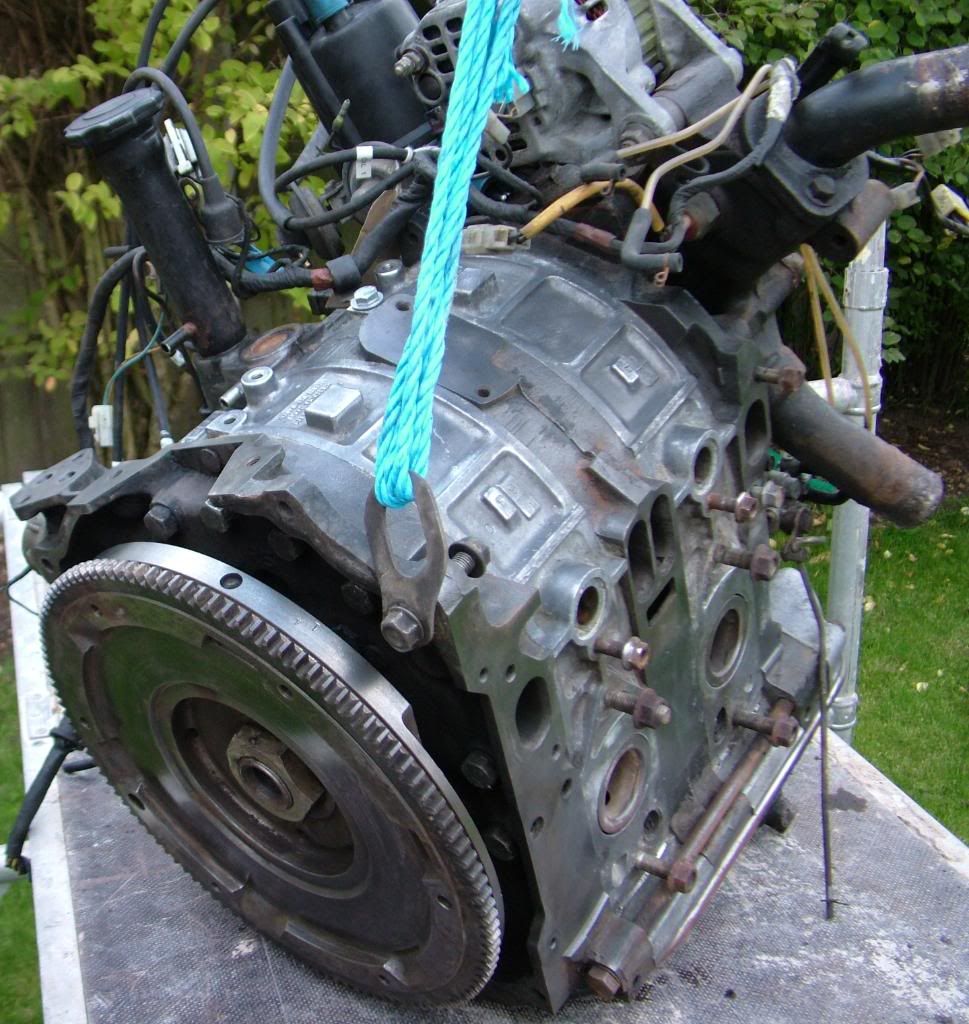
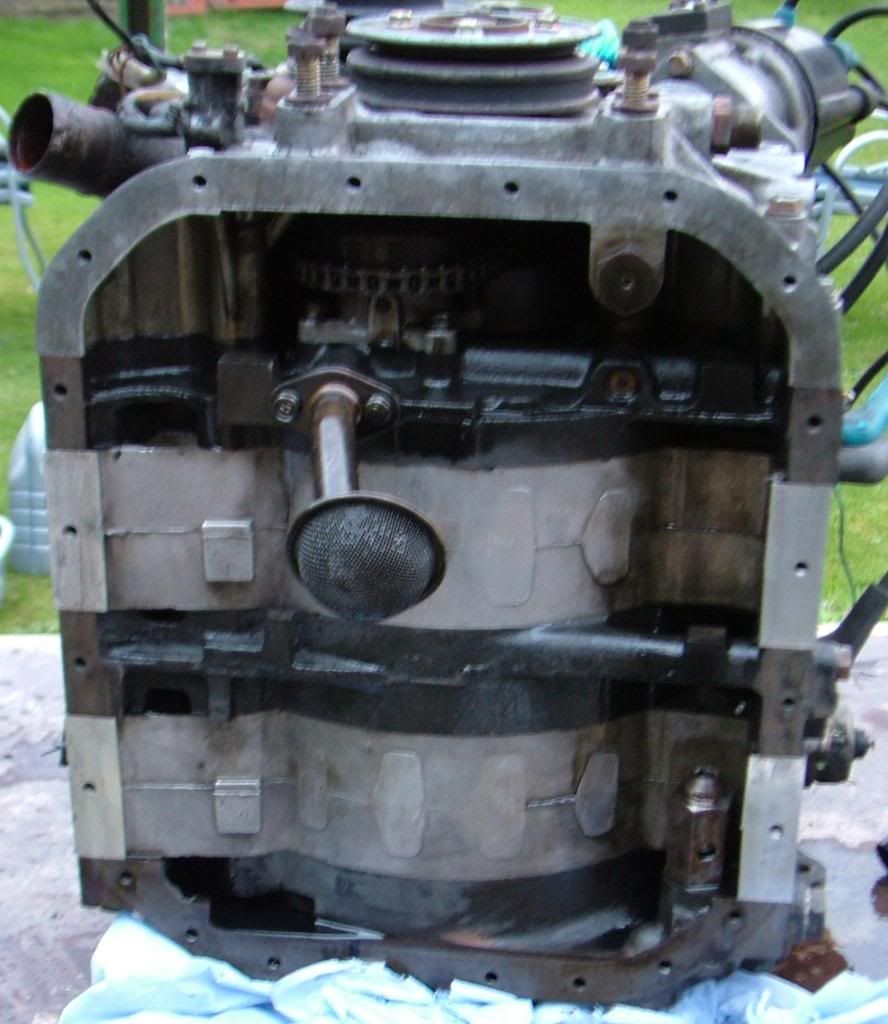
then took the standard sump off ready to fit the modified Elford sump...
I then ordered some gaskets and the clutch pinion bearing and seal so that I could put the clutch on, fit the gearbox and bolt up the turbo.
My engine had the sump bonded on with silicon and didn't have any leaks but elford had used a gasket to seal their sump. I decided therefore, to use a gasket as I was putting the elford sump onto my engine.
This plan went out of the window when I went to fit the sump.
I started to clean it up and found a pinhole in the bottom of the sump where it had been grounded at some point. I had 2 choices:
1. Weld up the elford sump
2. Use my existing sump and fit the oil return to it.
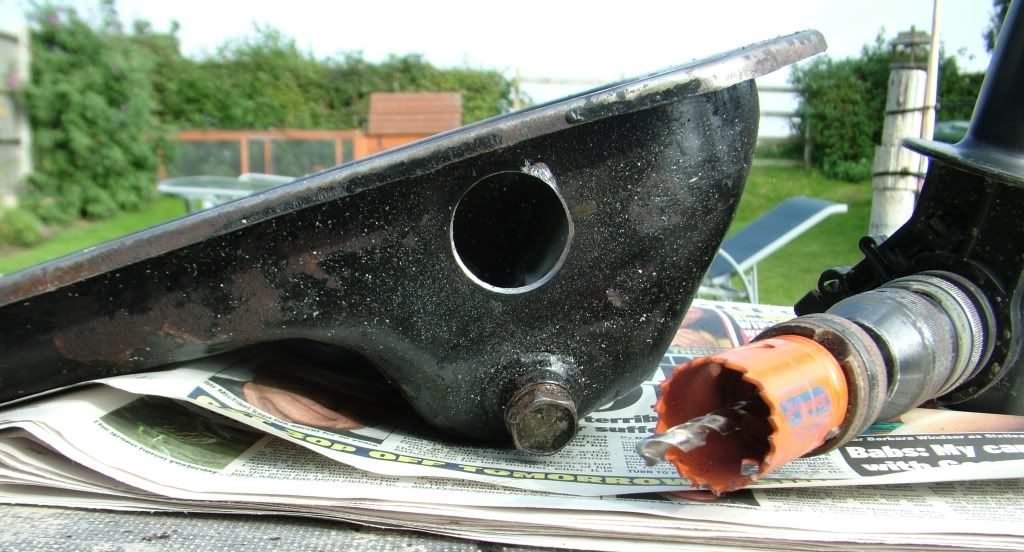
Rather than drag the mig out, I took some measurements, put a tank cutter through the side of the sump and then installed the oil return to my existing sump.
As this sump was originally bonded and sealed using silicon only, I went down this route again... no gasket, just cleaned the mating surfaces over and over again with brake cleaner and then bonded it up.
I put 2 beads of silicon around the bottom of the engine, one inside the bolt holes and the other outside the bolt holes. I then put the pan into place and put a dab of silicon into each bolt hole then put the bolts in, going round the pan slowly tightening them until I finished off torquing them up to the factory spec.
This is the RTV silicon I’ve used... cost me about a fiver from my local motor factors...
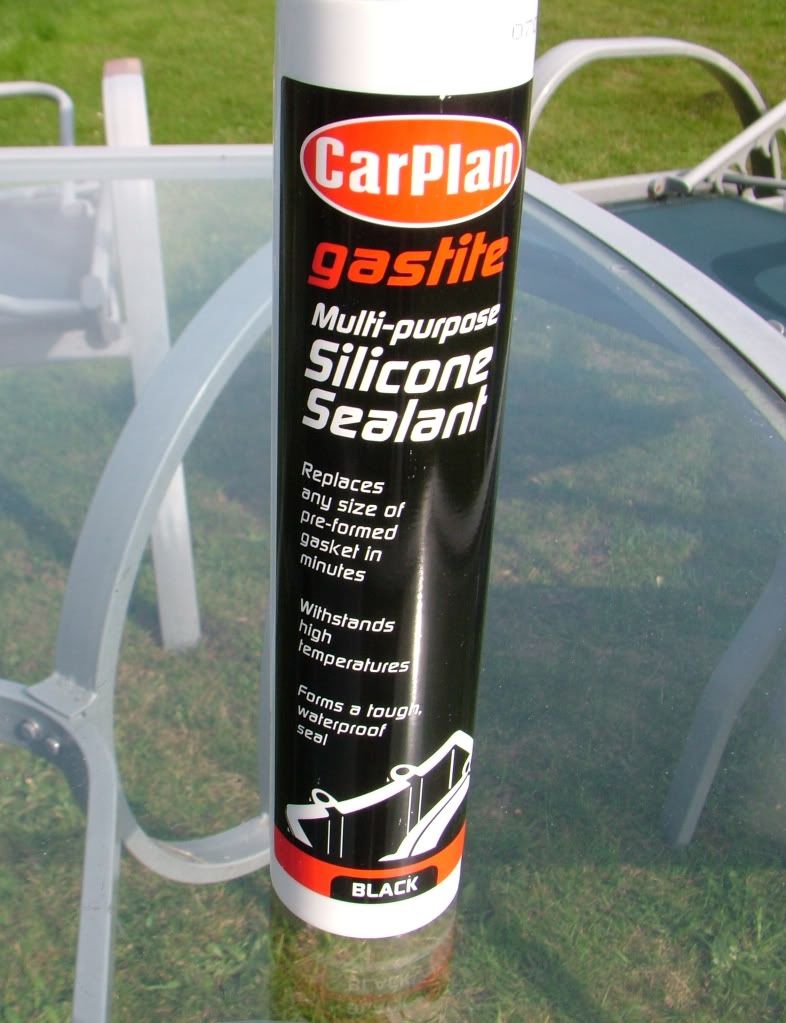
I'm pretty confident it will be ok but won't know until its all up and running.
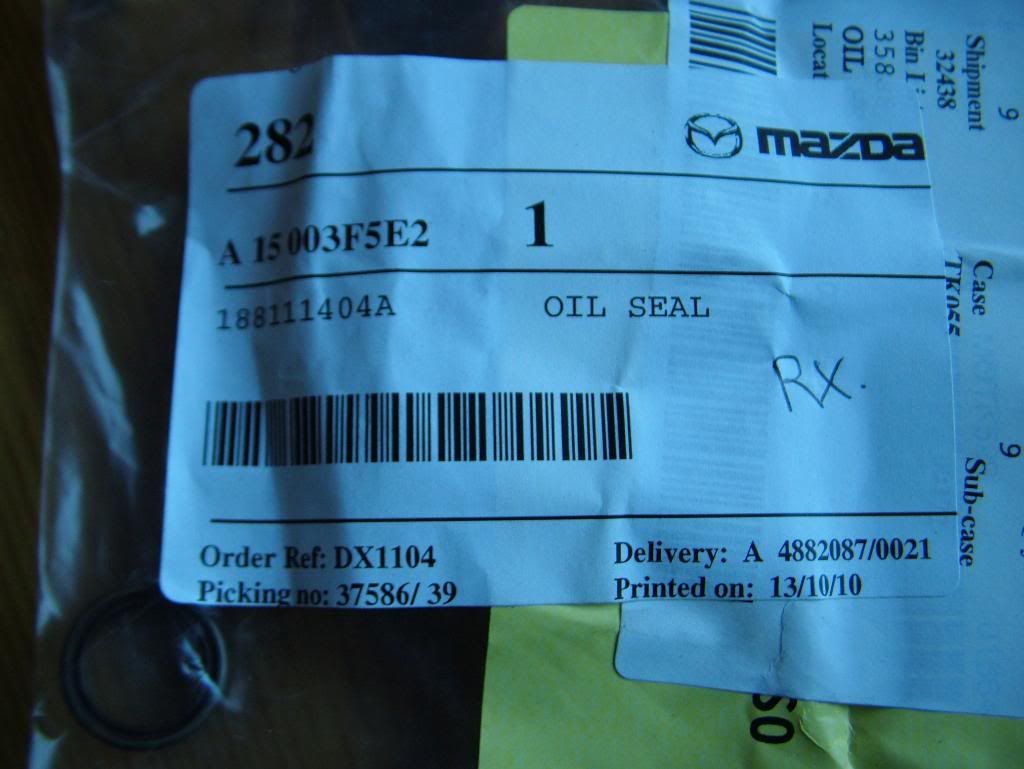
My gaskets and the pilot bearing and seal arrived. These are the part numbers. They might help someone else ordering some as they are standard to all 1st gens and they are all genuine Mazda with Mazda part numbers...
The inlet manifold gasket...
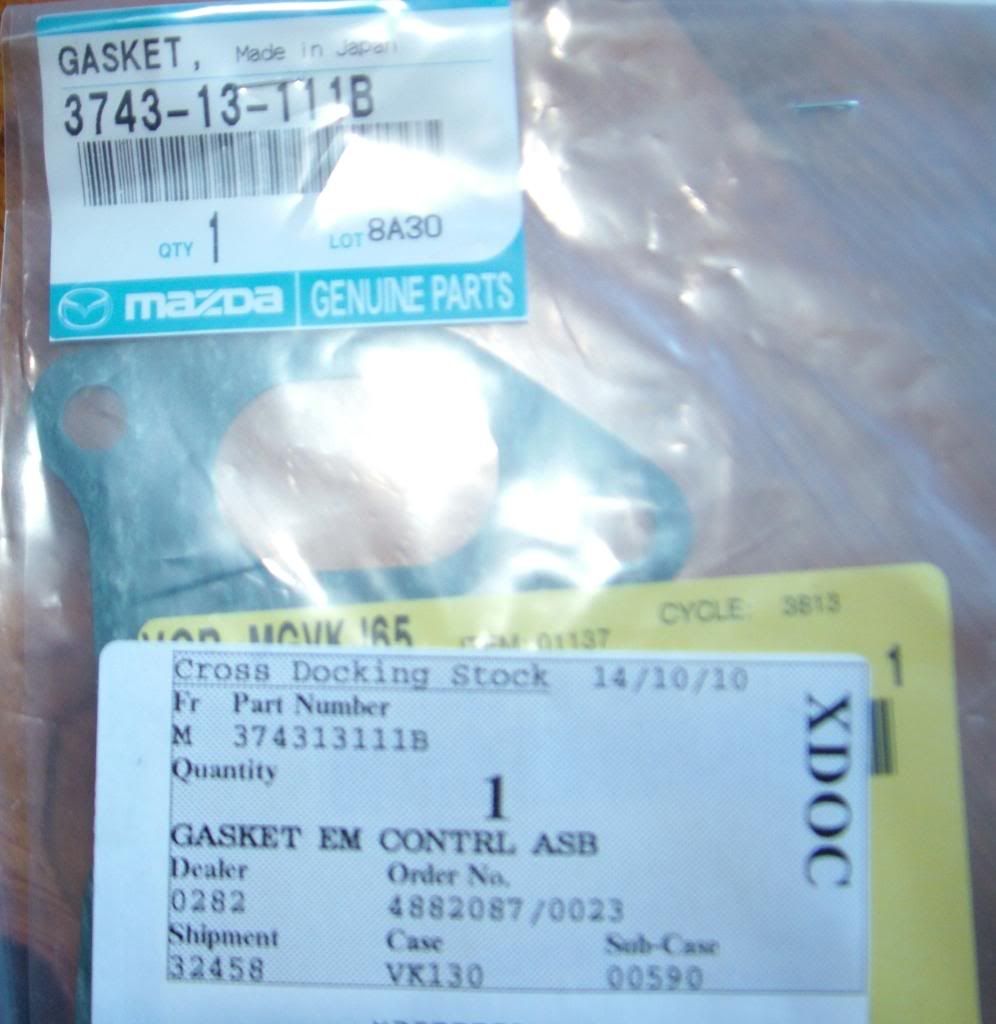
The exhaust manifold gasket...
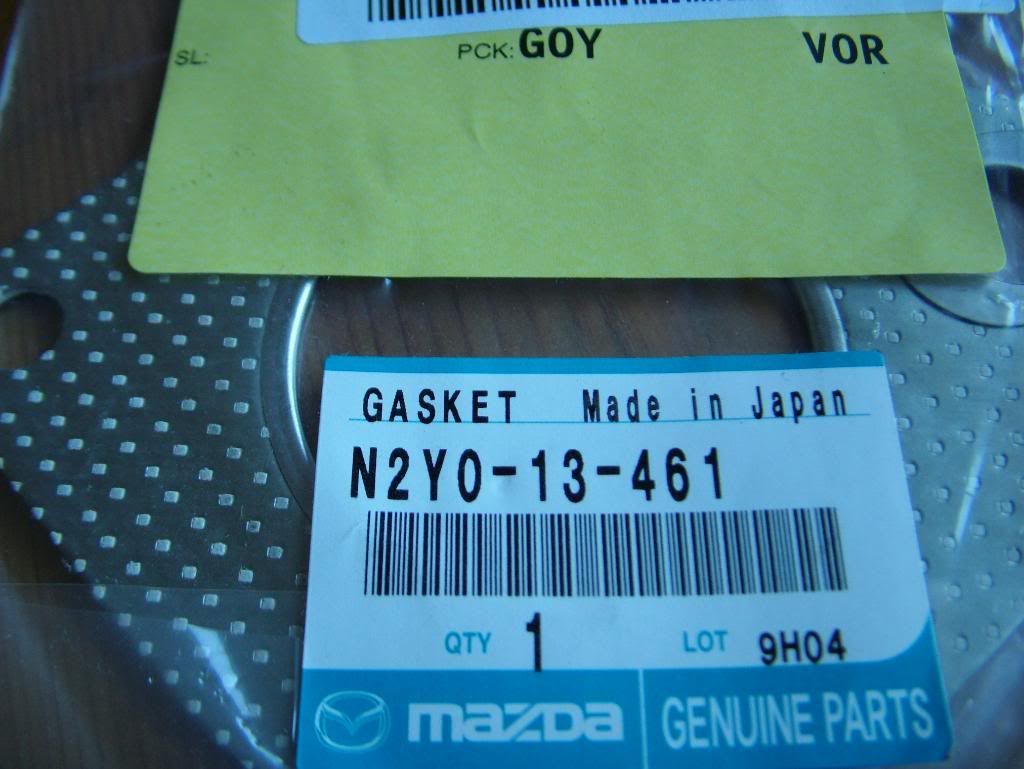
Clutch pilot bearing...
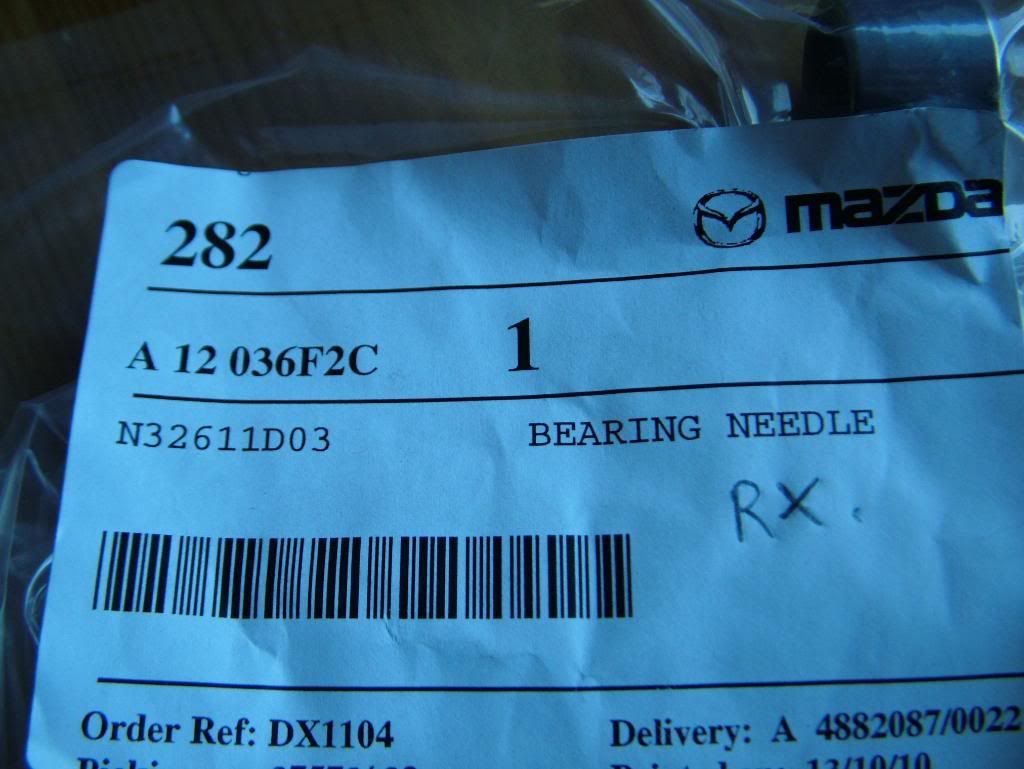
Pilot bearing seal...
After the parts arrived I got the pilot bearing in and the new clutch bolted up...

I then bolted the inlet onto the engine...
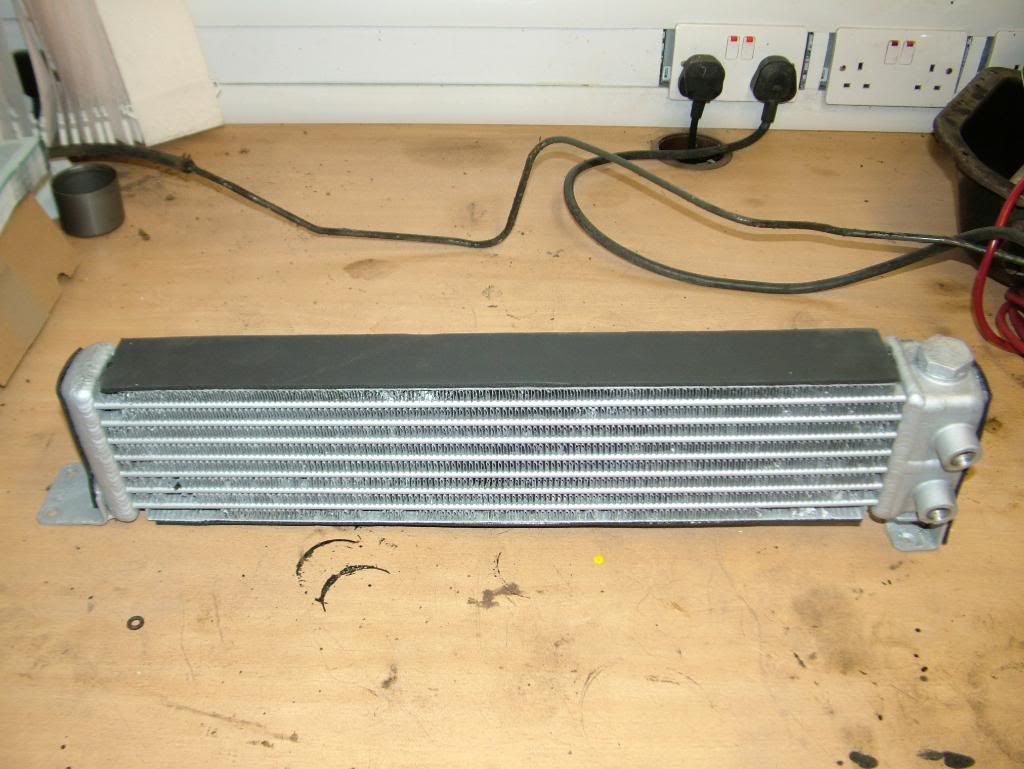
Then painted my bargain £15 series 2 oil cooler and put the insulating foam around it...
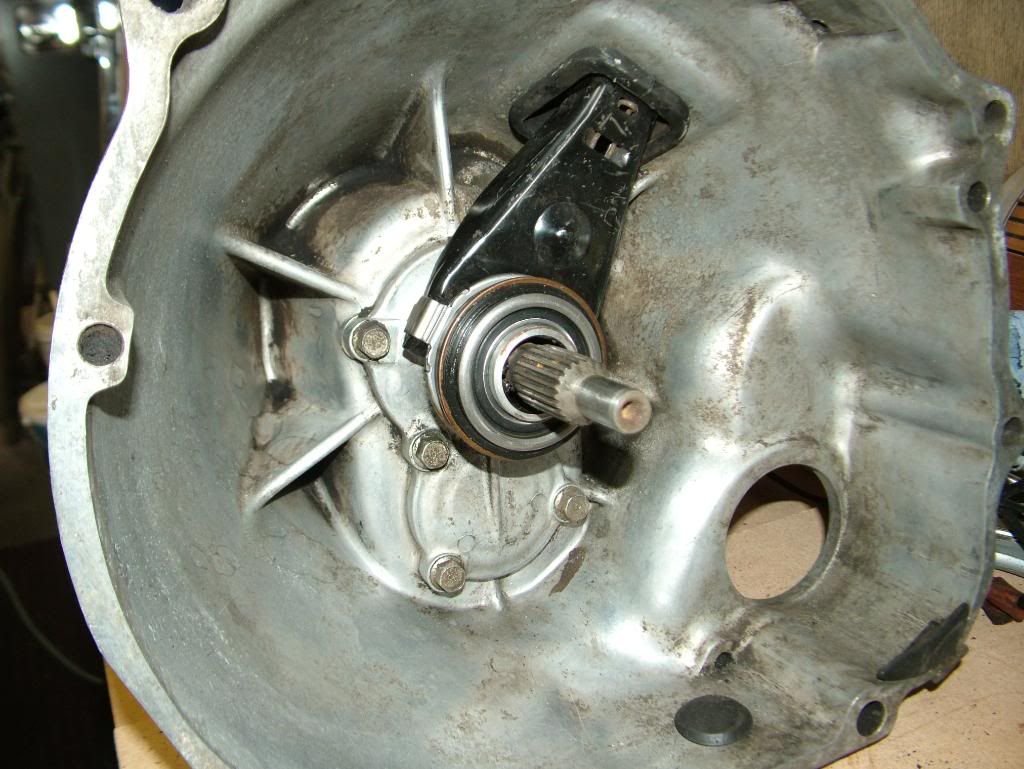
put the clutch fork and new release bearing into the bellhousing...
but then.... put the gear lever in and found that the return spring was damaged which meant that the lever flapped about and didn't centre back to the neutral position. I knew this would drive me mad when driving the car so it had to be fixed.
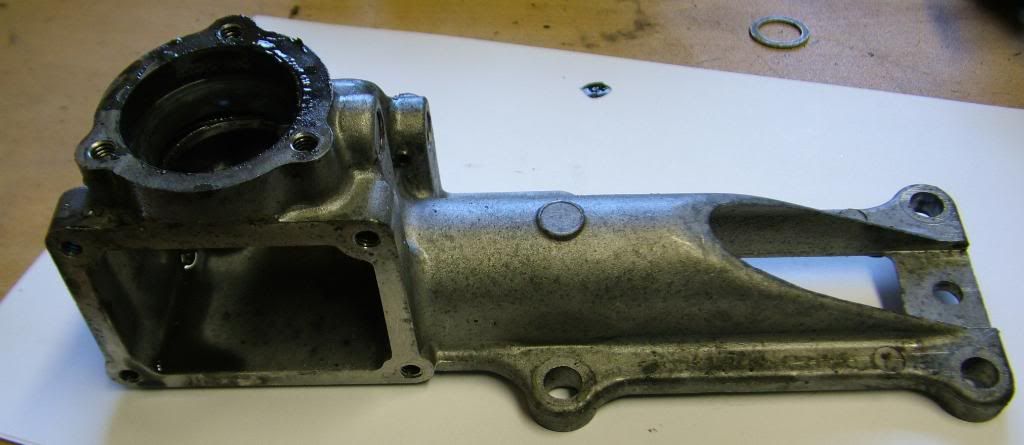
I had to take the selector housing apart and remove the various components...
In the following pic, the selector block on the right has the good spring and the left hand one had the damaged one...
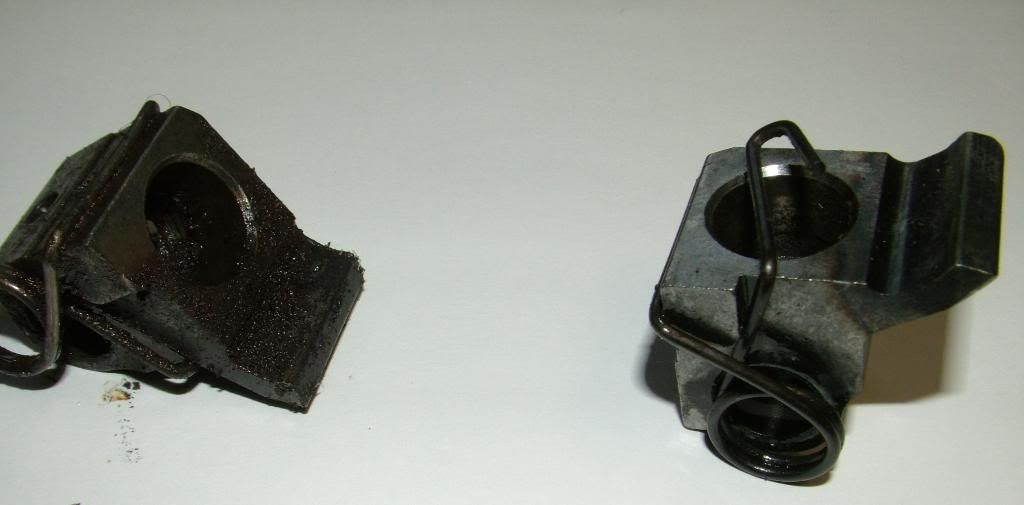
I then cleaned up the housing and all the bits...
and put it all back together with new silicon grease...
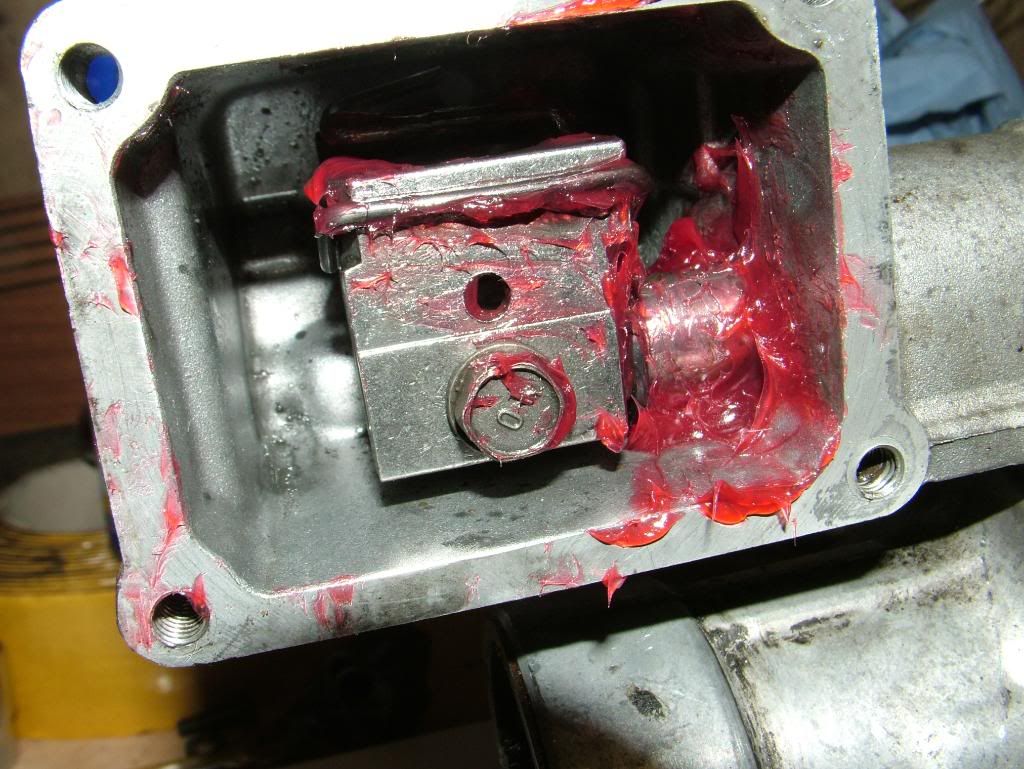
Gear lever feels great now, nice and tight.
It was then time to get the engine and gearbox back into the car....
bolted the gearbox back to the engine and got it ready to lift...
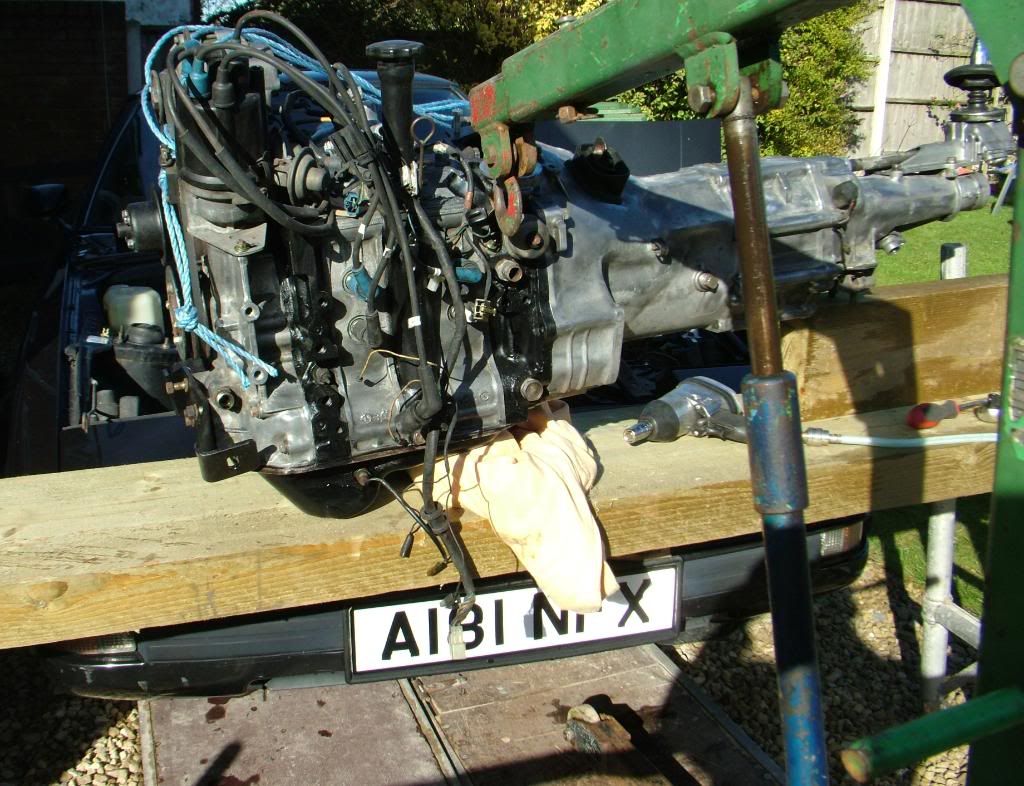
It went in surprisingly easily....
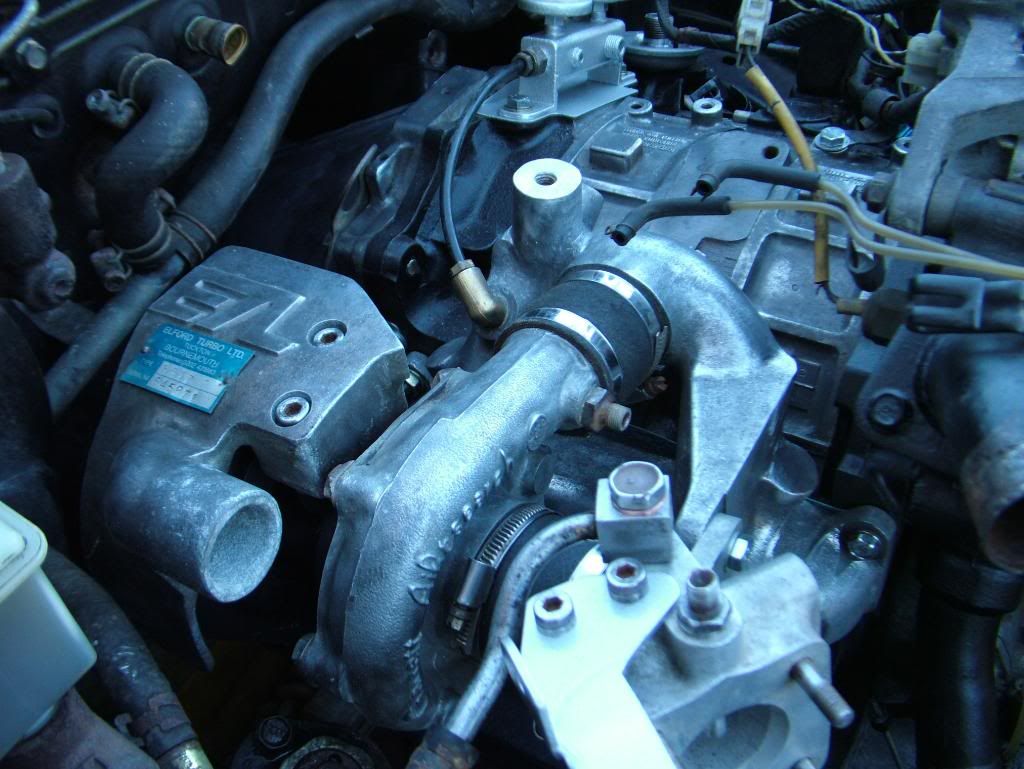
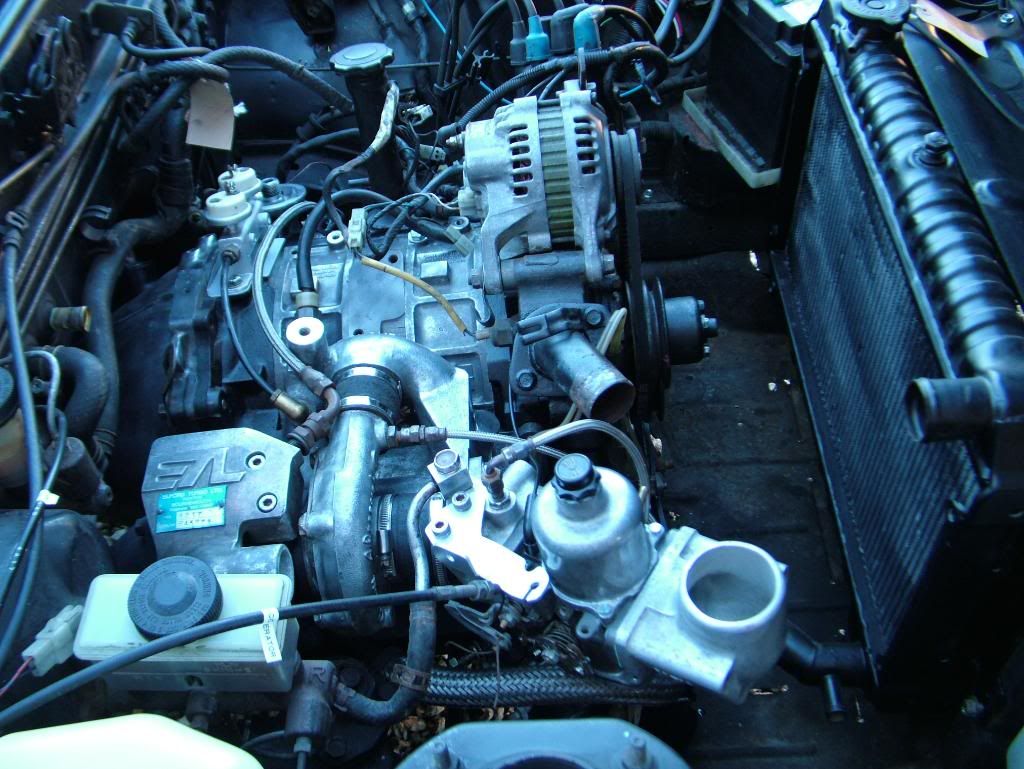
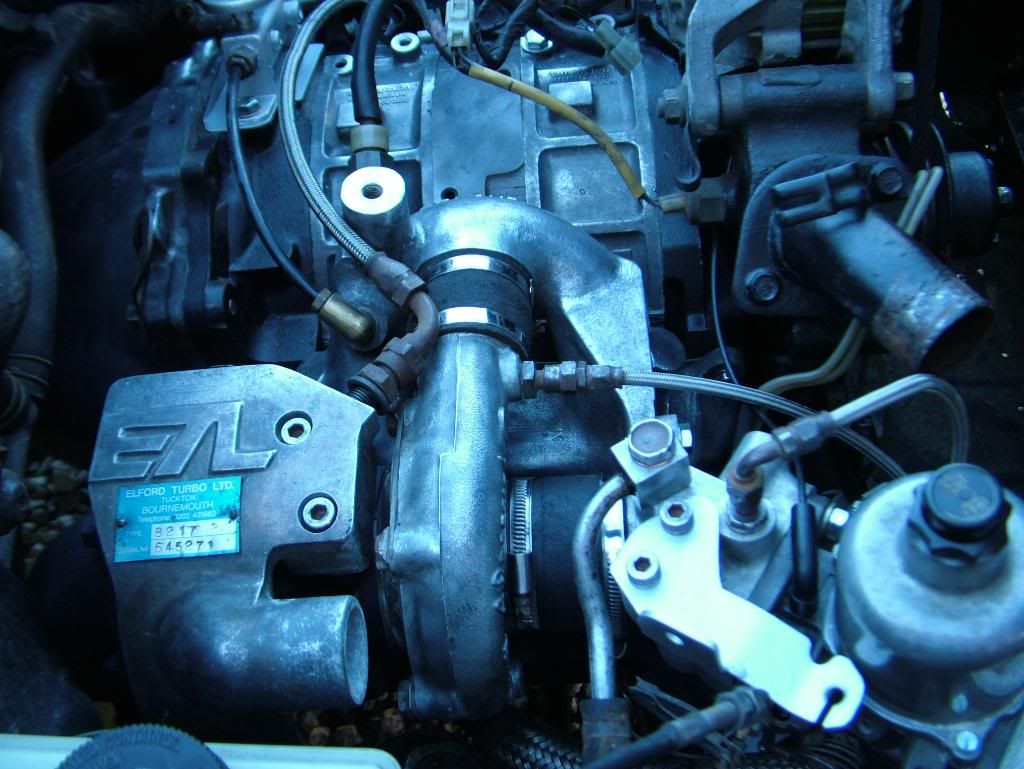
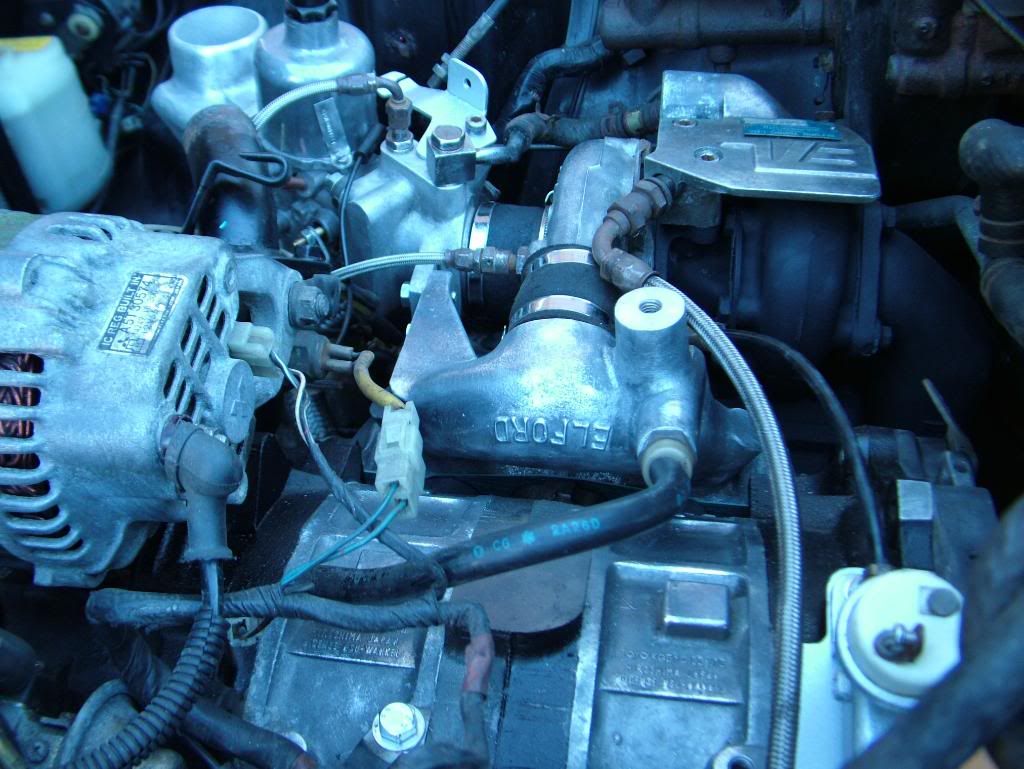
Next.... bolted the manifold and turbo on....
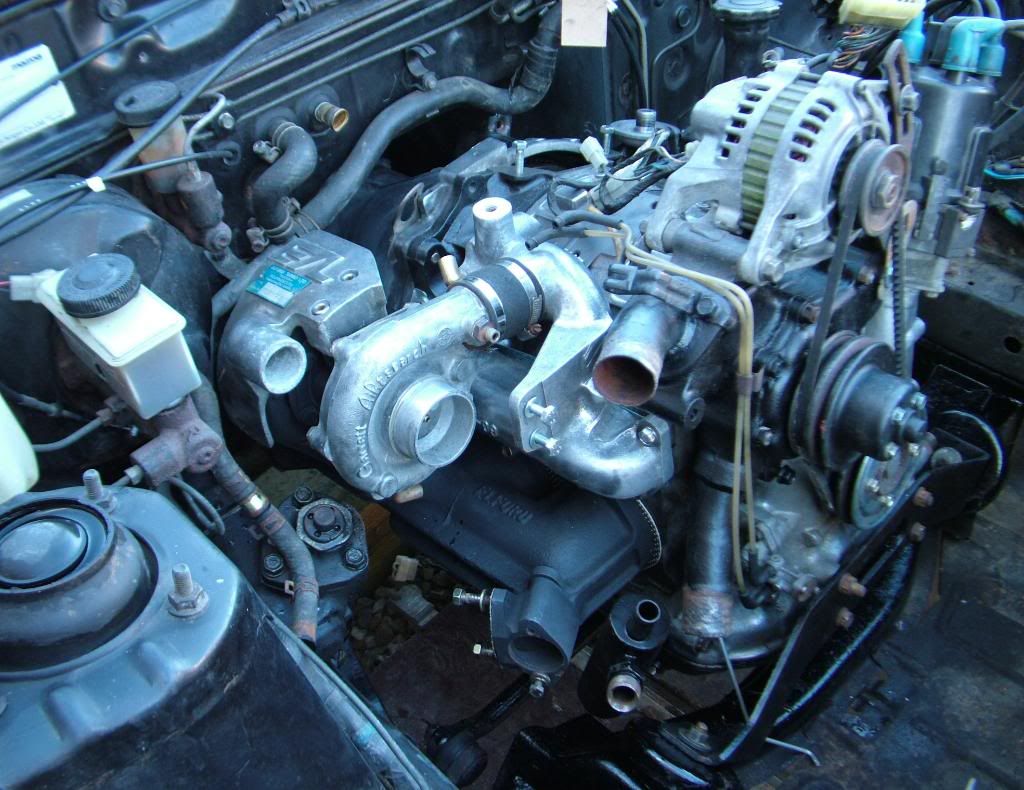
then put on the wastegate, pressure switches and carb mount...
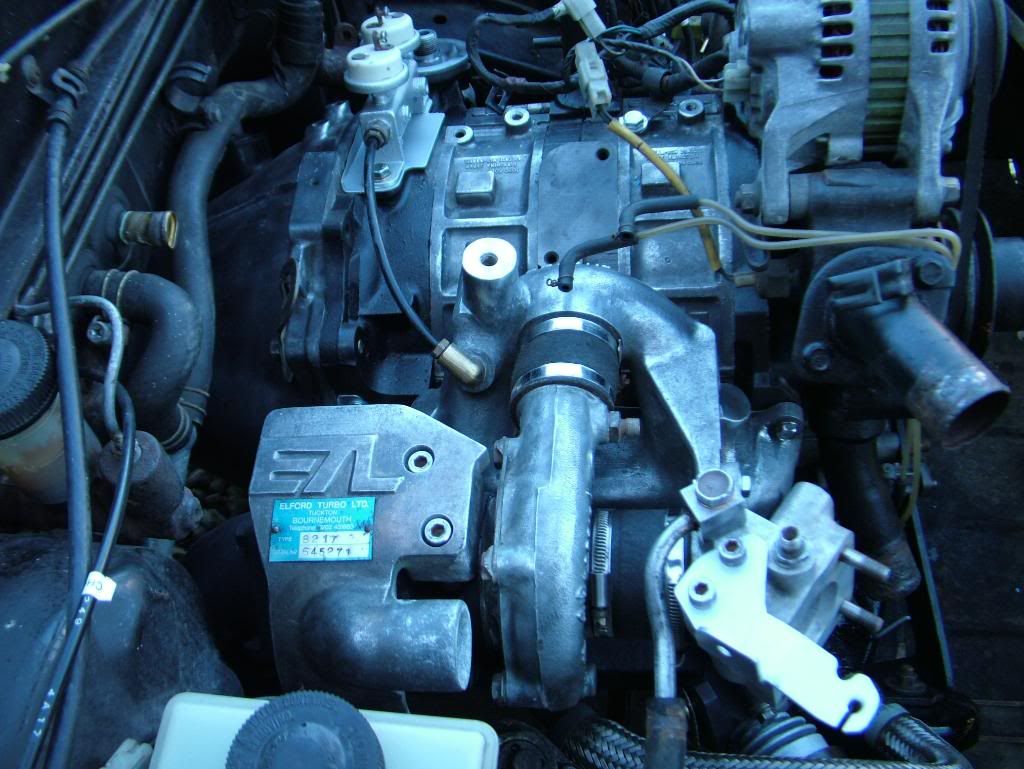
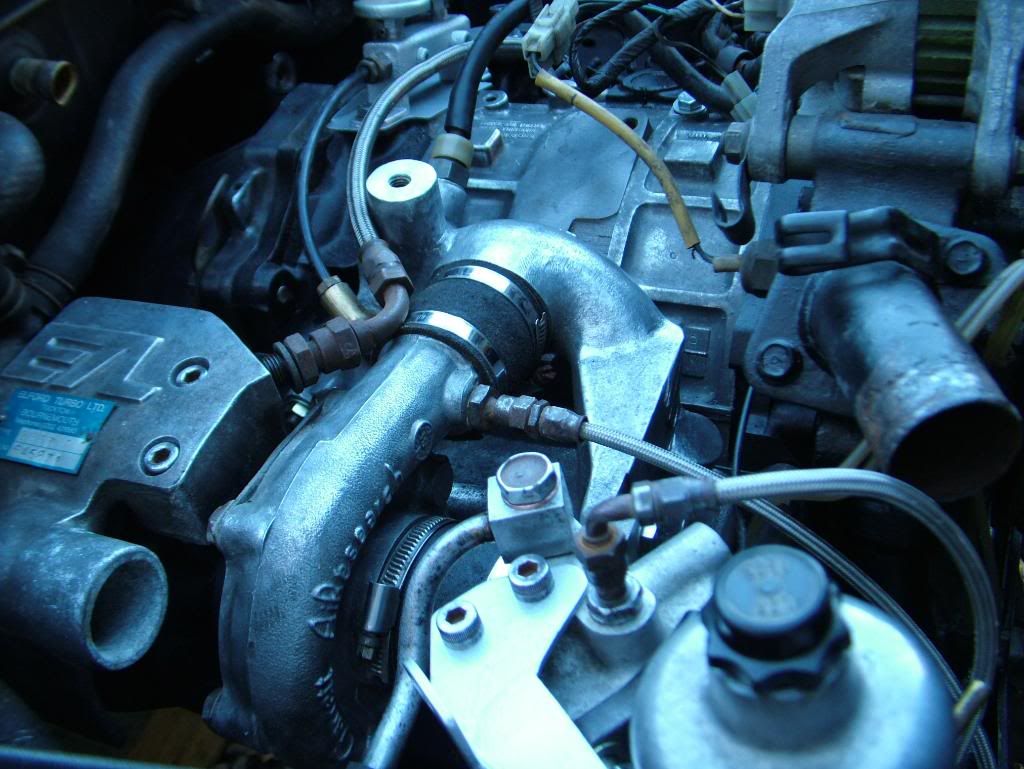
then put on the carb and started putting in the oil lines....
put in my bargain £5 series 2 radiator off ebay....
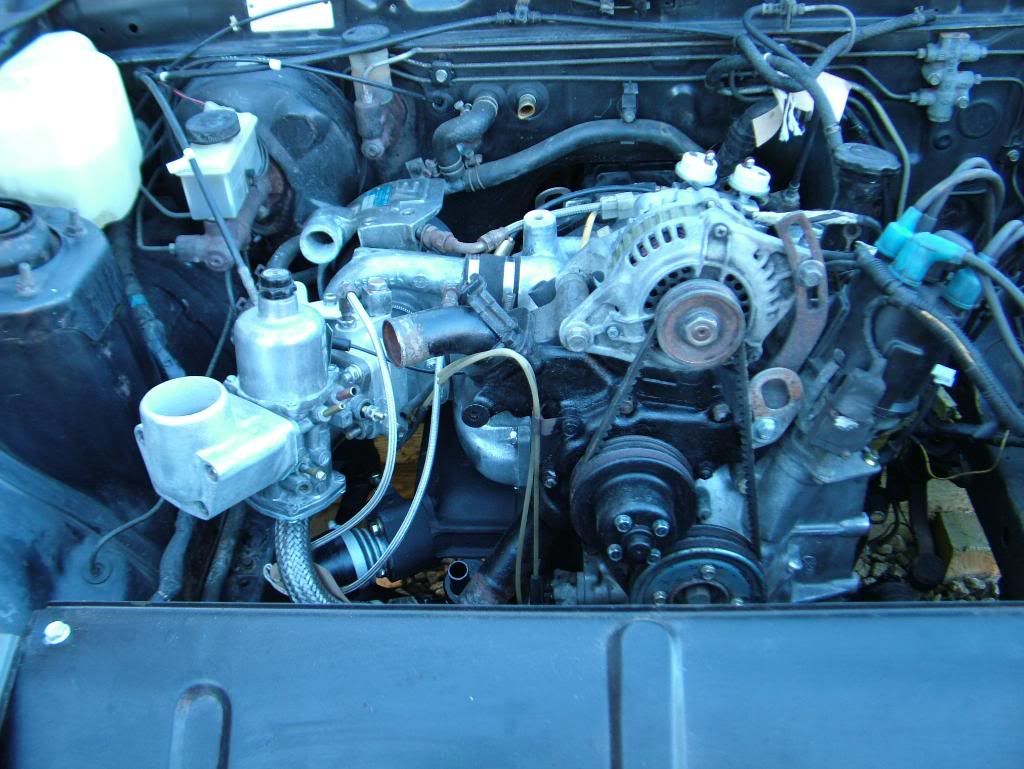
top of the engine looks a lot cleaner without all the solenoids and wiring
next up... the propshaft, exhaust, oil cooler, fans, fuel oil and vac lines and then the wiring puzzle.
Next I removed the rest of the old exhaust and got the Elford one ready to go on.
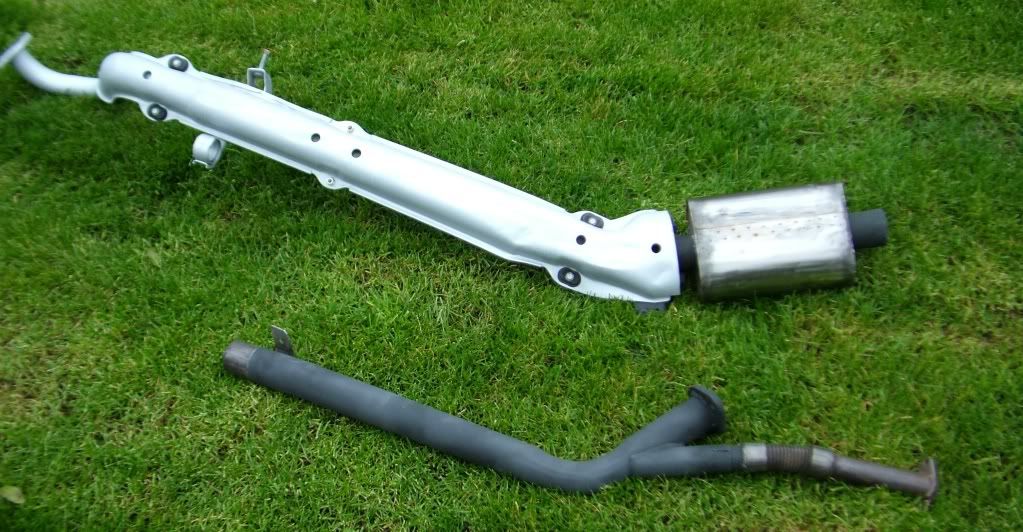
It's stainless from the turbo to the back axle where it mates to the Mazda factory backbox ( which is great as I prefer the stock look)
It only has a very small middle box so it should alter the tone of the exhaust quite a bit.
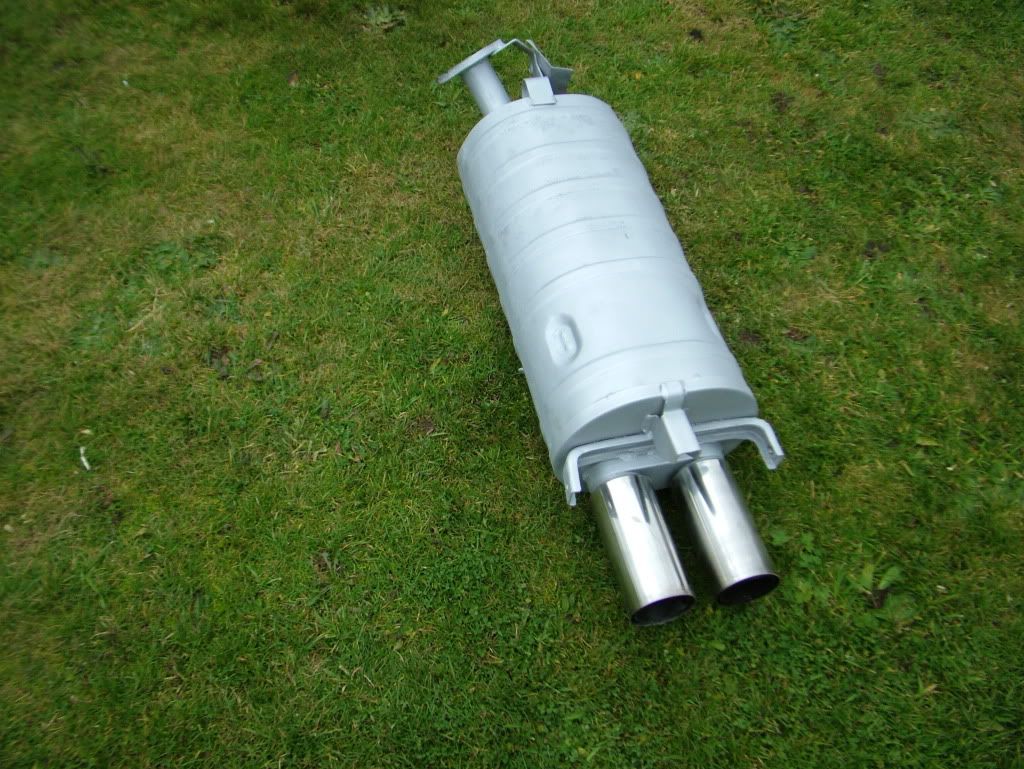
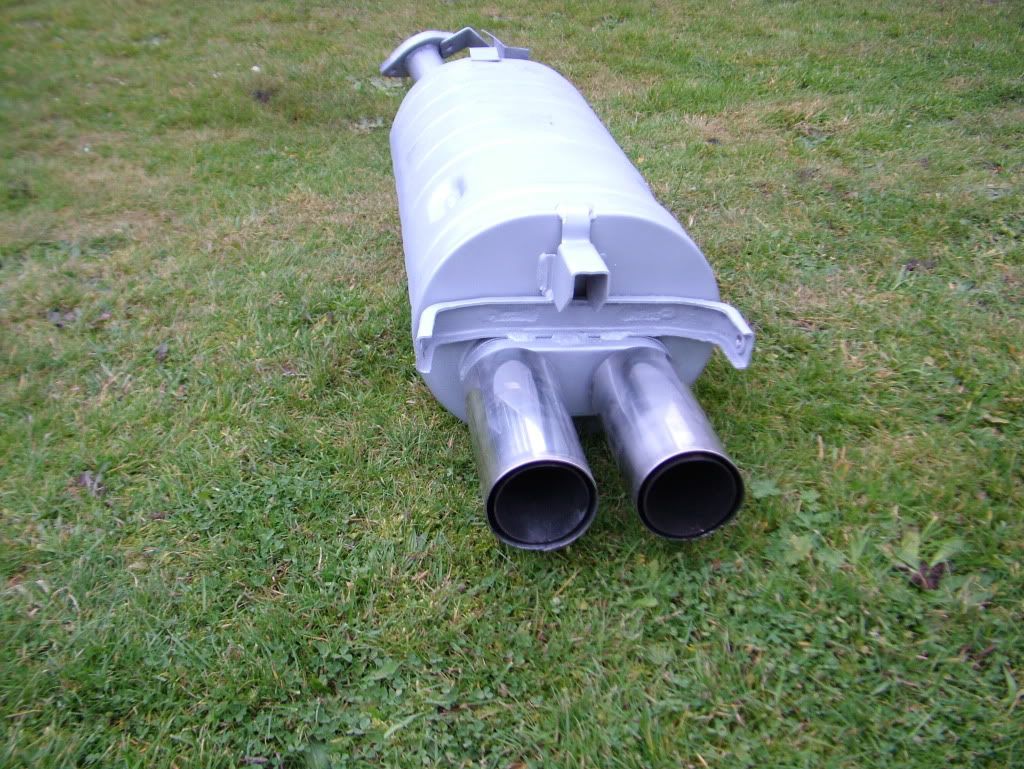
I cleaned up the backbox and put it back on the car with new fixings...
I then put the starter back on, put the oil cooler on and connected up the breathers and vac lines and the coolant hoses then unplugged the fuel pump and spun it over to get the oil pressure up.
Put the old slave cylinder back on and bled the clutch then plugged the fuel pump back in and fired it up.
Here’s the video of it running for the 1st time…
Took a bit of fiddling to get the carb settings roughly right so that it would tick over but sorted now.
Left it on tickover for about 5 mins then my bargain £15 oil cooler leaked!
What a b*******!
On the positive side, the engine sounded as sweet as a nut so I just needed to track down a T2 oil cooler now.
I'd already decided to put the larger S3 rad back in and go for a T2 cooler up front but hoped to run the S2 setup for the time being. Oh well, not to worry!
The 1st RX7 I ever saw back in 1984 was an Elford down in Bournemouth where they made them and I'd wanted one ever since.
I managed to drive to the bottom of my drive and back to test the clutch so after waiting 26 years, my 1st drive in an Elford lasted about 100 yards and wasn't quite how I envisaged it but hey, what the hell, I now officially owned an Elford Turbo!
I managed to get hold of an oil cooler and got everything connected up.
Then, at long, long last, I finally got to test drive this car . It's been off the road since the clutch went in Sept last year and stayed that way whilst I did the turbo conversion.
I'd always drooled over the Elford turbos but I've never got to drive one before today.
And the verdict is...........................
I LOVE IT!!
The turbo transforms the car, the engine seems silky smooth and it pulls like a train.... fantastic!
The mid range power and torque is phenomenal.
There are a couple of niggles..
I need to adjust the carb, it ticks over too high at 1500rpm but the carb has had a full strip and rebuild so it was bound to need some adjustment.
When the old clutch exploded, it allowed the piston seal in the clutch slave to pass over the rust part of the bore at the end of the cylinder. I'd cleaned it up hoping that it would be ok but it's leaking slightly so I need to change the slave.
Not bad though considering the amount of work done to this car.
MARCH 2011
I’ve had my 1st full day of driving this car in the sunshine today and I've been grinning that much I look like I've swallowed a coat hanger!
I've done 71 miles in it today, A road, B road and city centre driving and it's behaved impeccably.
I'm pleased that there are no gremlins that have arisen from the conversion, the engine is water and oil tight with the exception of a slight weep on one of the metering pump lines which was there before but which I'd forgotten about. It's just the rubber bit where it meets the pump so I'll fix that this weekend.
A problem that has come up is the offside front caliper is sticking on after the long lay up so a freshen up of the front brakes beckons but no big deal.
Around town it's no different to any other 1st gen, just ticks along in the traffic but the magic comes when you can get it on some open road and stretch its legs.... once it's on the revs and the turbo comes in, it flies.
It'll accelerate up to 90 in no time but the power isn't on/off instant like some turbo setups, it's smooth and progressive, all the way through the rev band. It's the increased mid range torque that makes the difference.
It's addictive!
If I get plenty of RX7 driving days this year like today, I'll be a happy man!
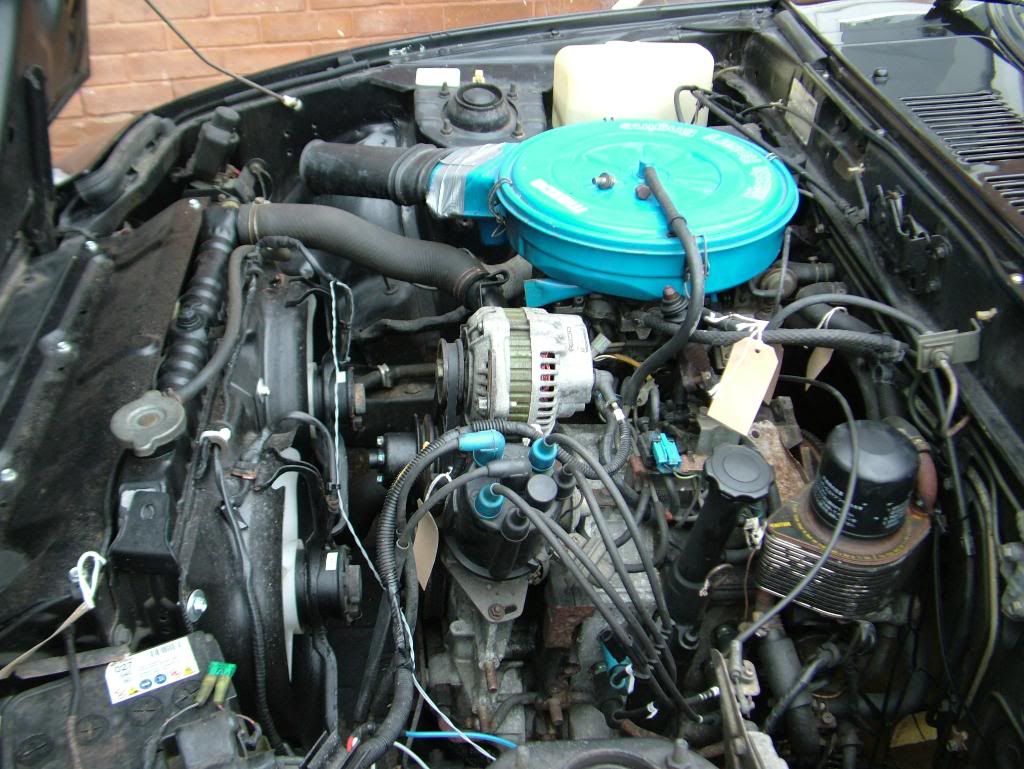
my baby safely back on the drive...
the engine bay as it stands now all put back together...
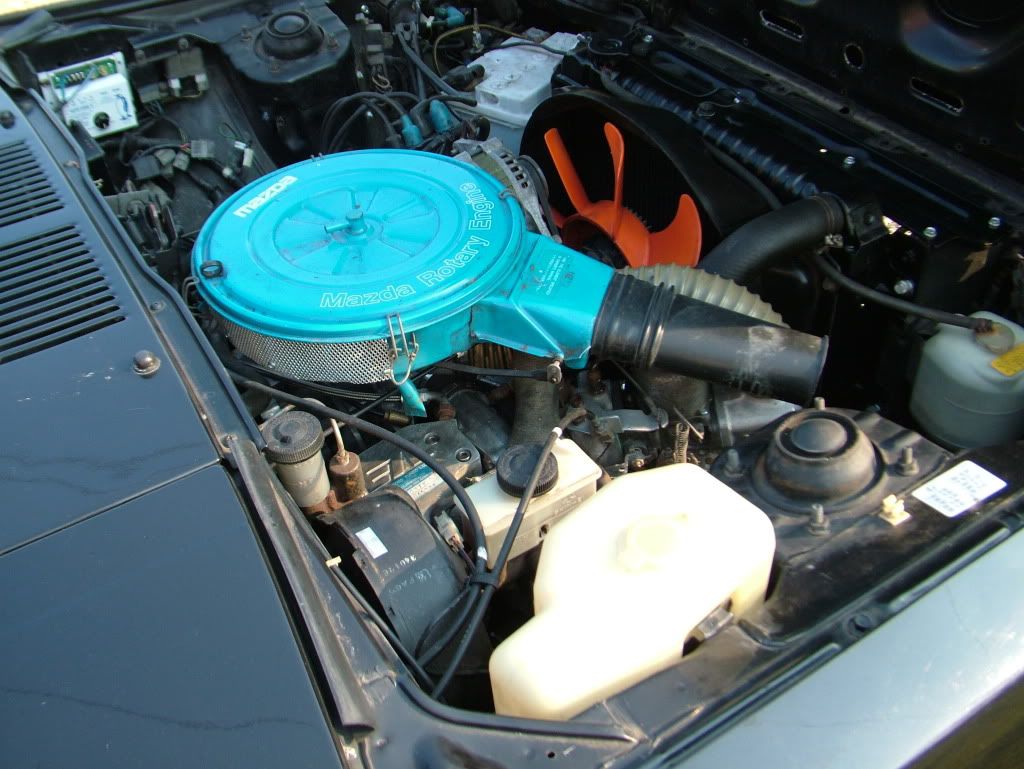
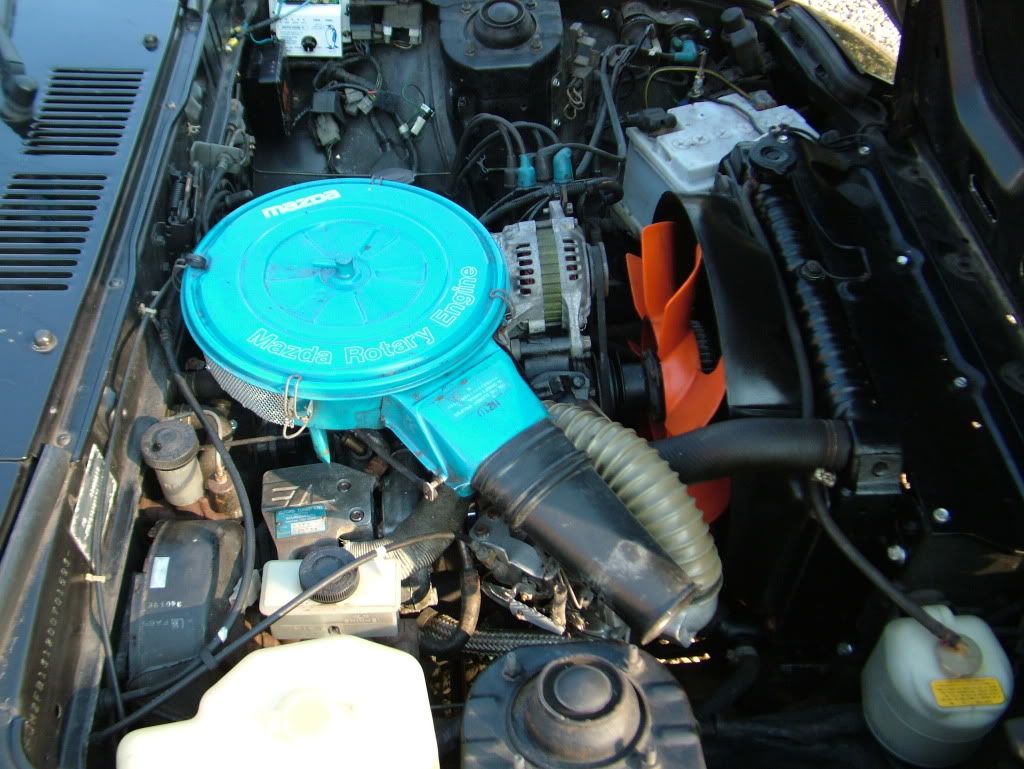
I'm going to put the e-fan back on it but just to get the car back on the road, I took the easier route and put the vicious fan on it temporarily.