Re: Lucky's Series 3
Posted: Sat Oct 26, 2013 7:04 pm
Right, so back in the real world...
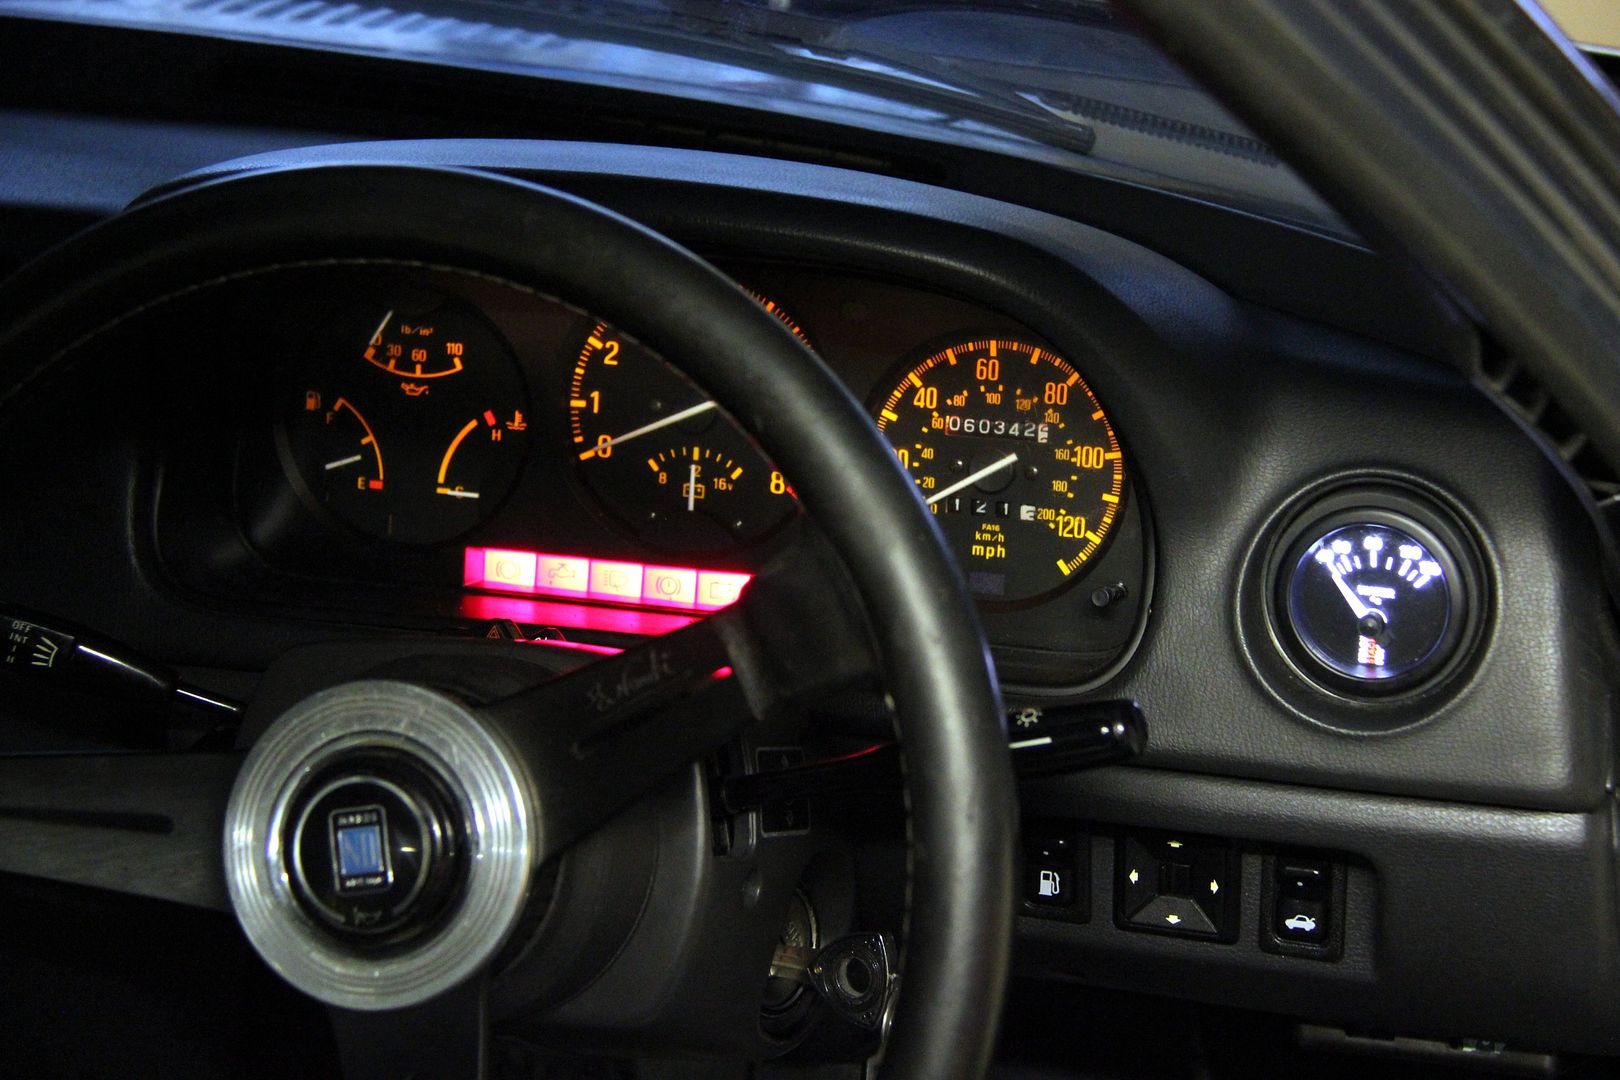
At first I thought this may be annoying but I don't even notice it now. I mean the fact the water gauge is a lot brighter and a different colour to the rest of the dials. I was thinking about spraying some lacquer tinted with colour over it (or there's always the old school technique of a Quality Street wrapper) but to be honest I'll probably leave it well enough alone. Nice to have it working for a while before I screw it up
This is what the engine bay now looks like (now I've finally taken some pics in daylight!). The Gilmer set-up;
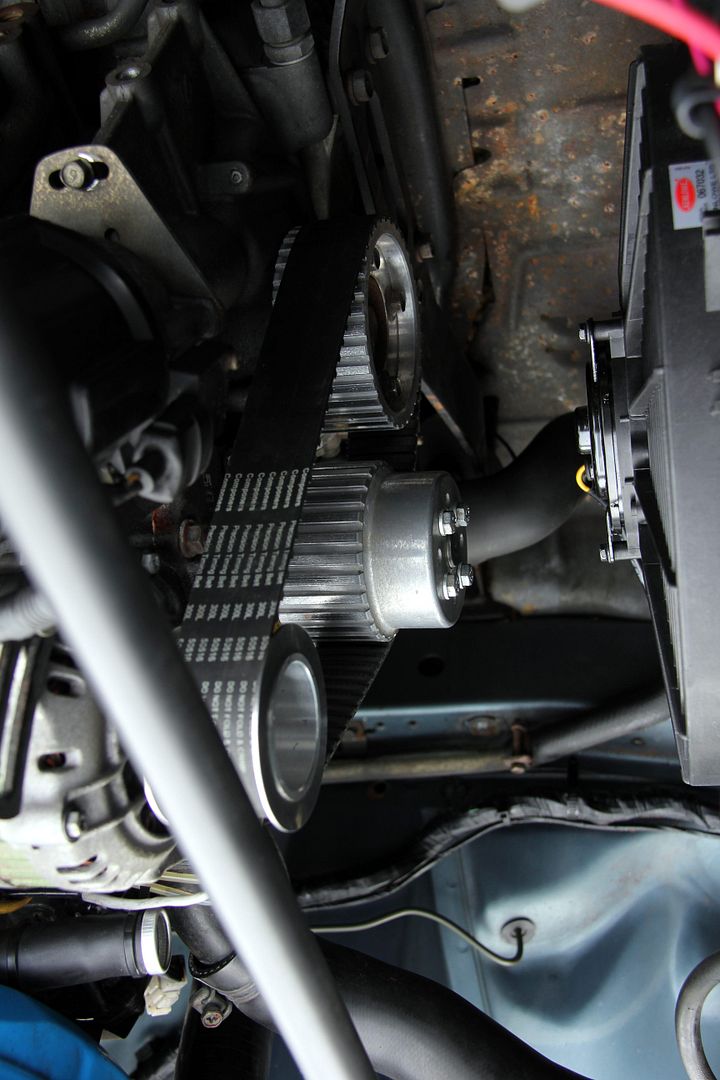
The fan; with hindsight, I probably could have got a 16" rather than 14" one but this seems plenty man enough to bring the temps down quickly enough. I can always upgrade it if need be if it struggles come summer
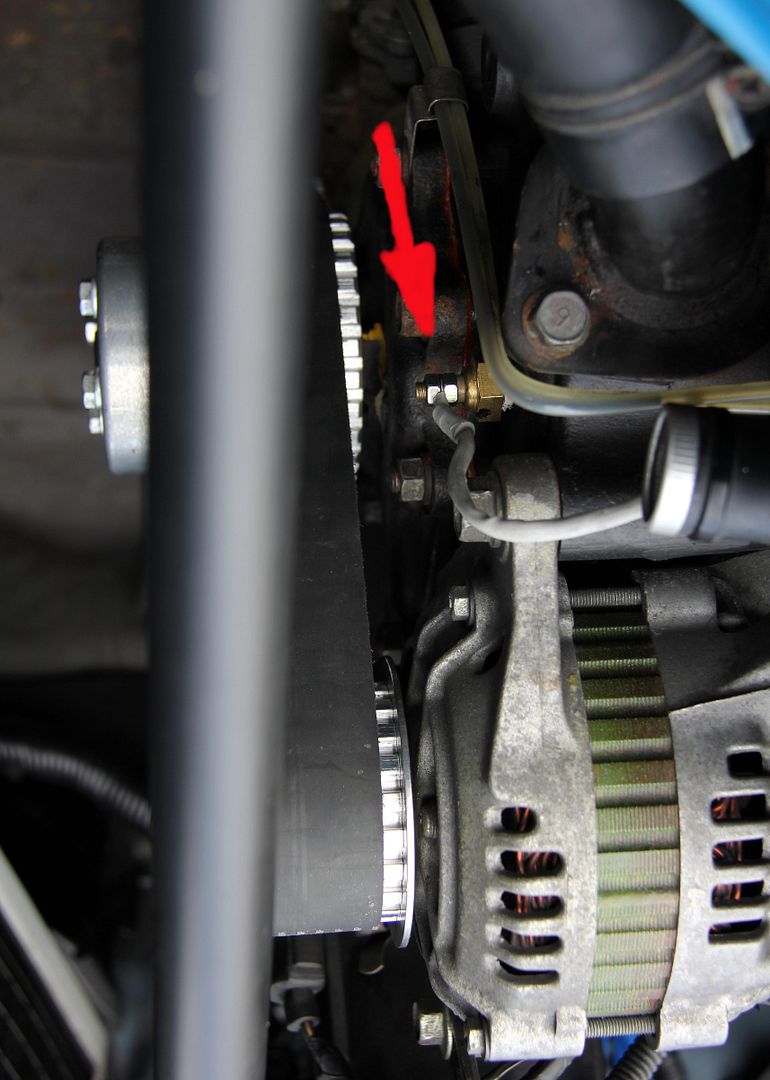
This is the sensor for the water temp gauge (arrowed). Much neater and less cumbersome than putting a hose insert in
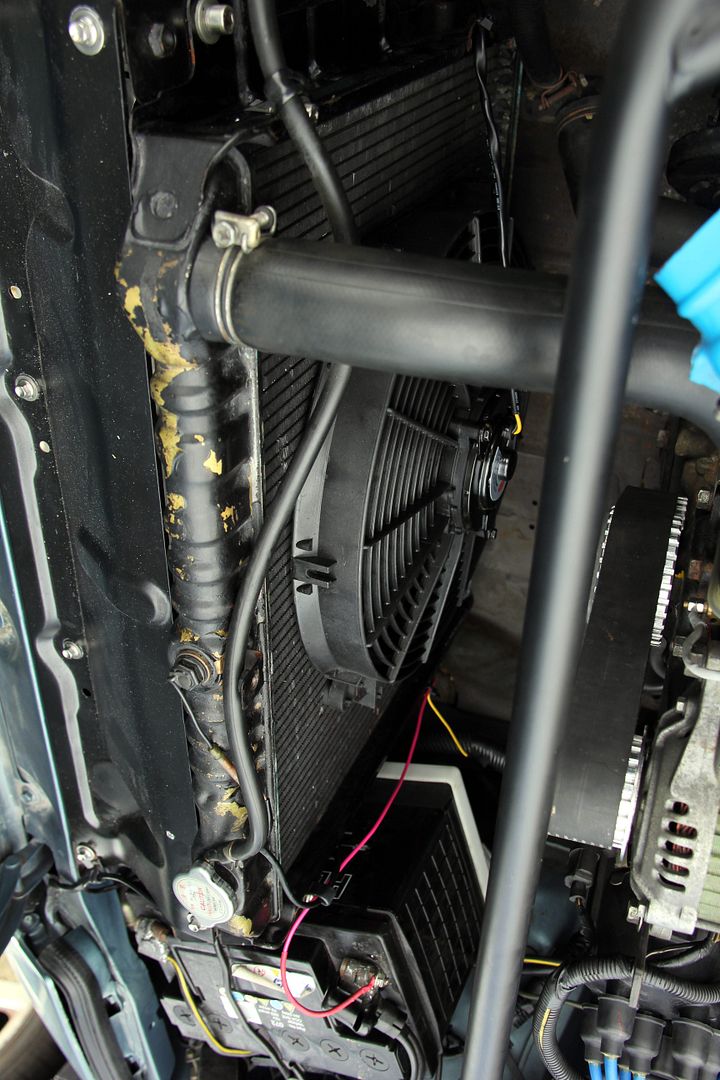
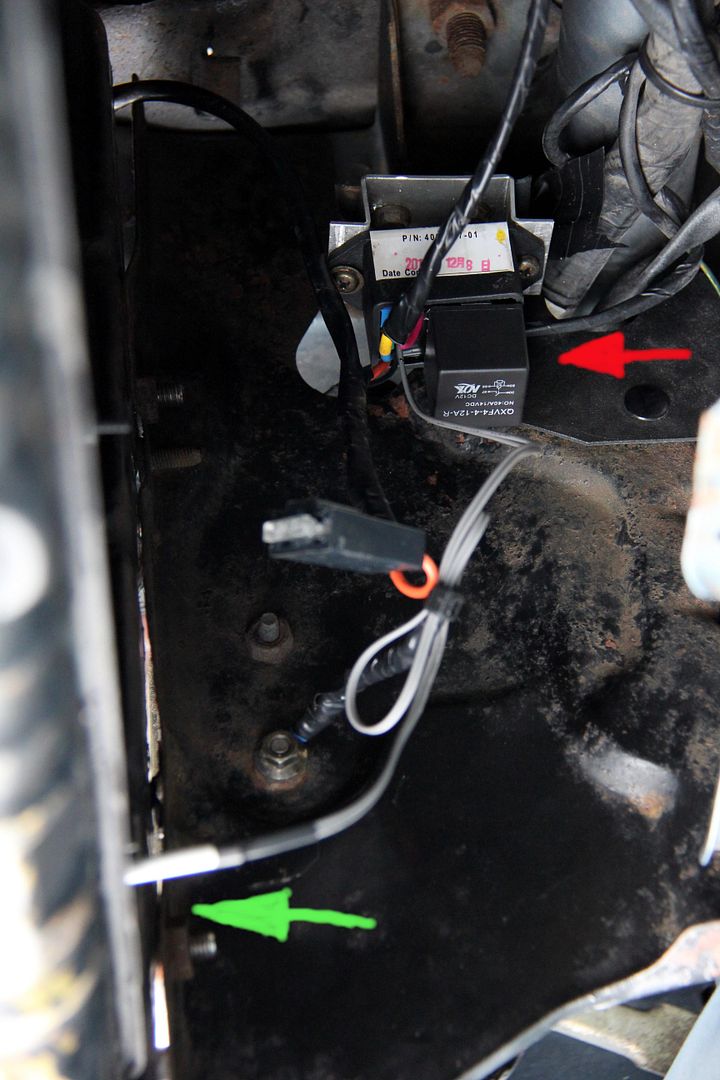
And this is all the wiring gubbins for the fan, mounted on a little bendy ally bracket in front of the rad (so it hopefully won't get cooked). The green arrow is the actual sensor; as I said before you just insert it between the tubes of the radiator core so there's no need to cut hoses, stick probes in under jubilee clips, etc. The red arrow is the module itself; relay on top, fuse currently dangling by its wiring (solution to follow when errr, when I can think of one)
Trouble is, now I have to take out and paint the side panels for the radiator and the engine undertray, now I've realised how gnarly they are. So anyway, took it out of for a good long drive and let it get nice and hot. No repeat of the previous control box fry-up so definitely seems like that was a defective one. Temperature was getting a bit high before the fan cut in, so re-adjusted the controller and now it cuts in round about 90 degrees, goes off five degrees below that. Hurrah! The car now gets the Niah-cat seal of approval;

and to celebrate we strapped it down and did a bit of this

partly out of scientific curiosity, partly because we need a baseline to see what improvements come from the new built engine. If and when it ever happens! Anyway, this is what it made with no adjustments at all;
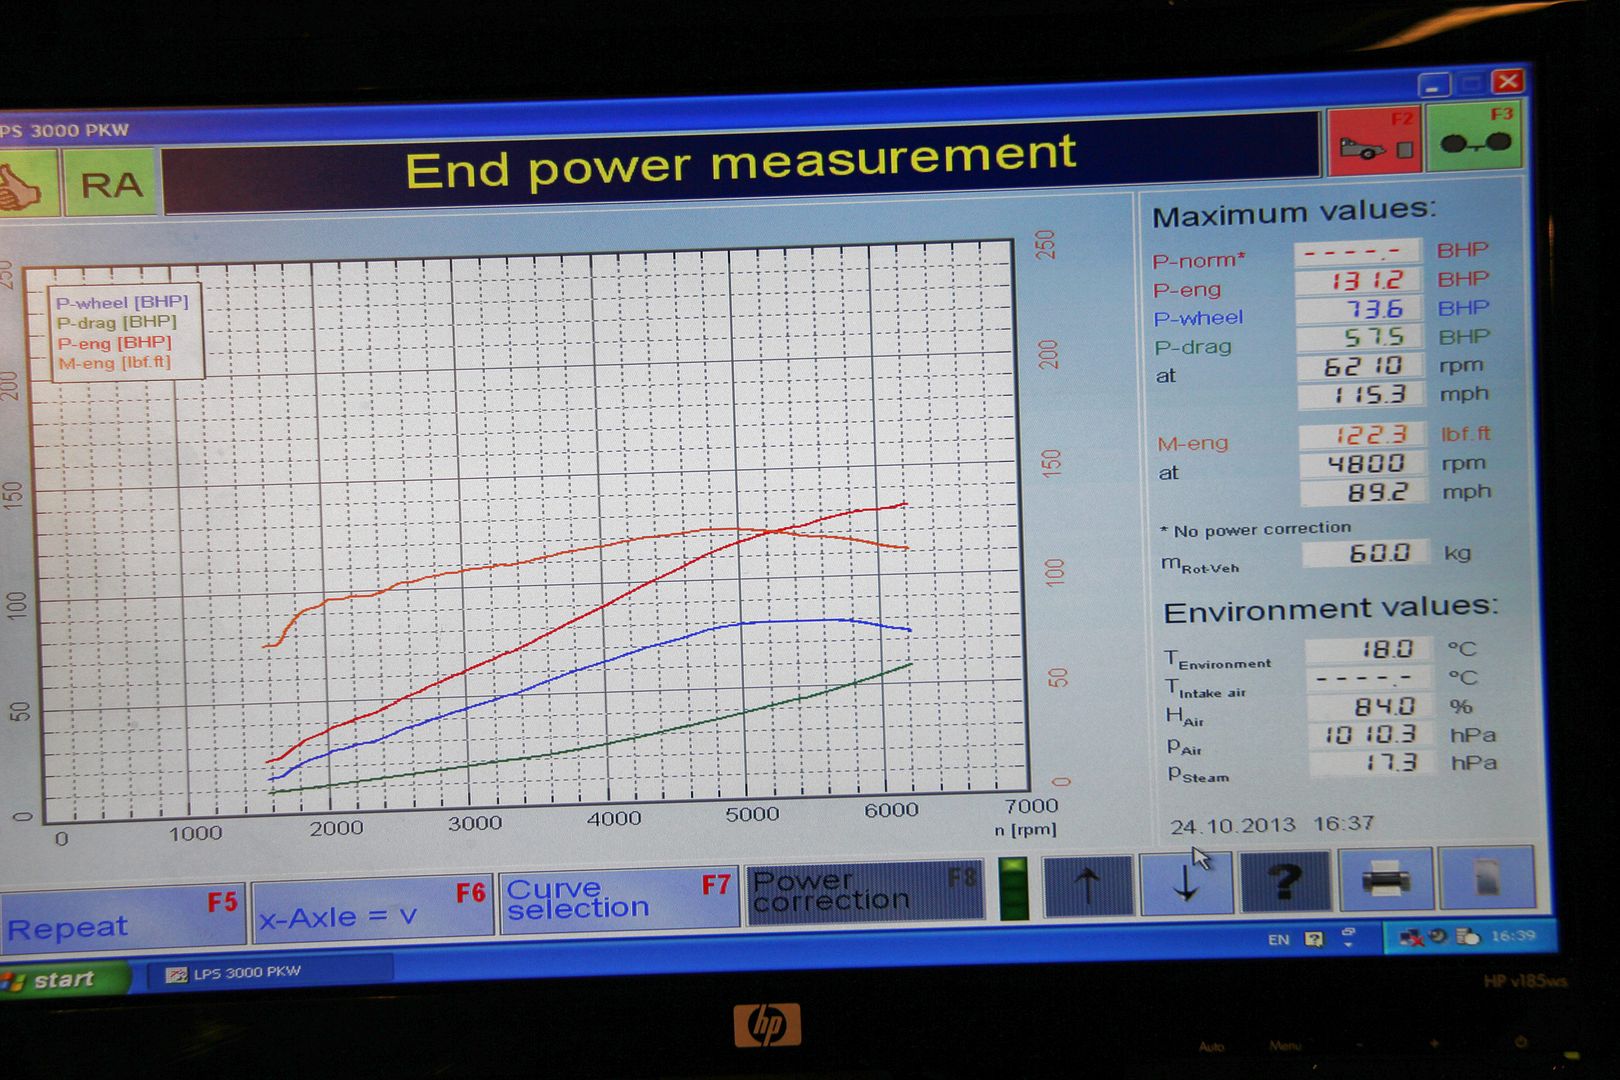
131 horsepower is more than Mazda quoted when it was new, so that was quite pleasing. After a bit of ignition and fueling tweakery it we ran it up again. Here's a video of my car on the dyno and not blowing up, which makes a nice change after the FD
http://www.youtube.com/watch?v=viEOQfy_ ... I42xzwg5mw
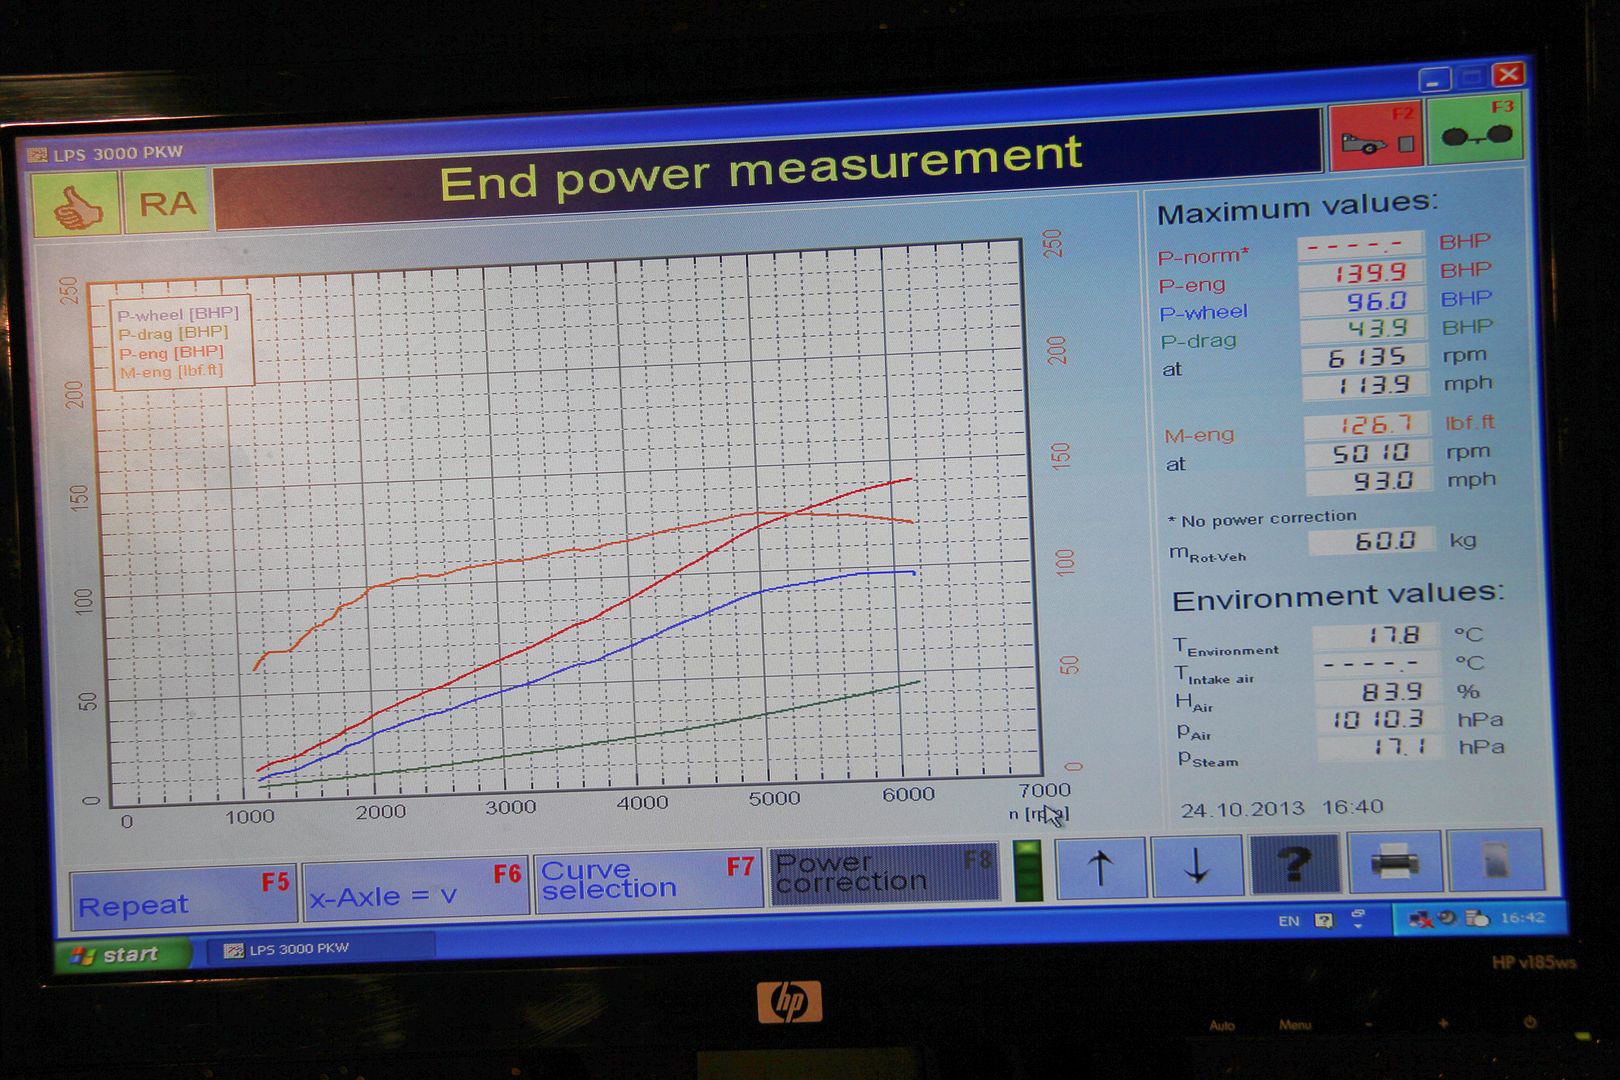
and after that run we made 139.9 horsepowerz! Mind you, the car didn't want to idle and pickup with that level of tune, so we backed things off a bit and tried again with a slight compromise setting
http://www.youtube.com/watch?v=xLxjqf2A ... I42xzwg5mw
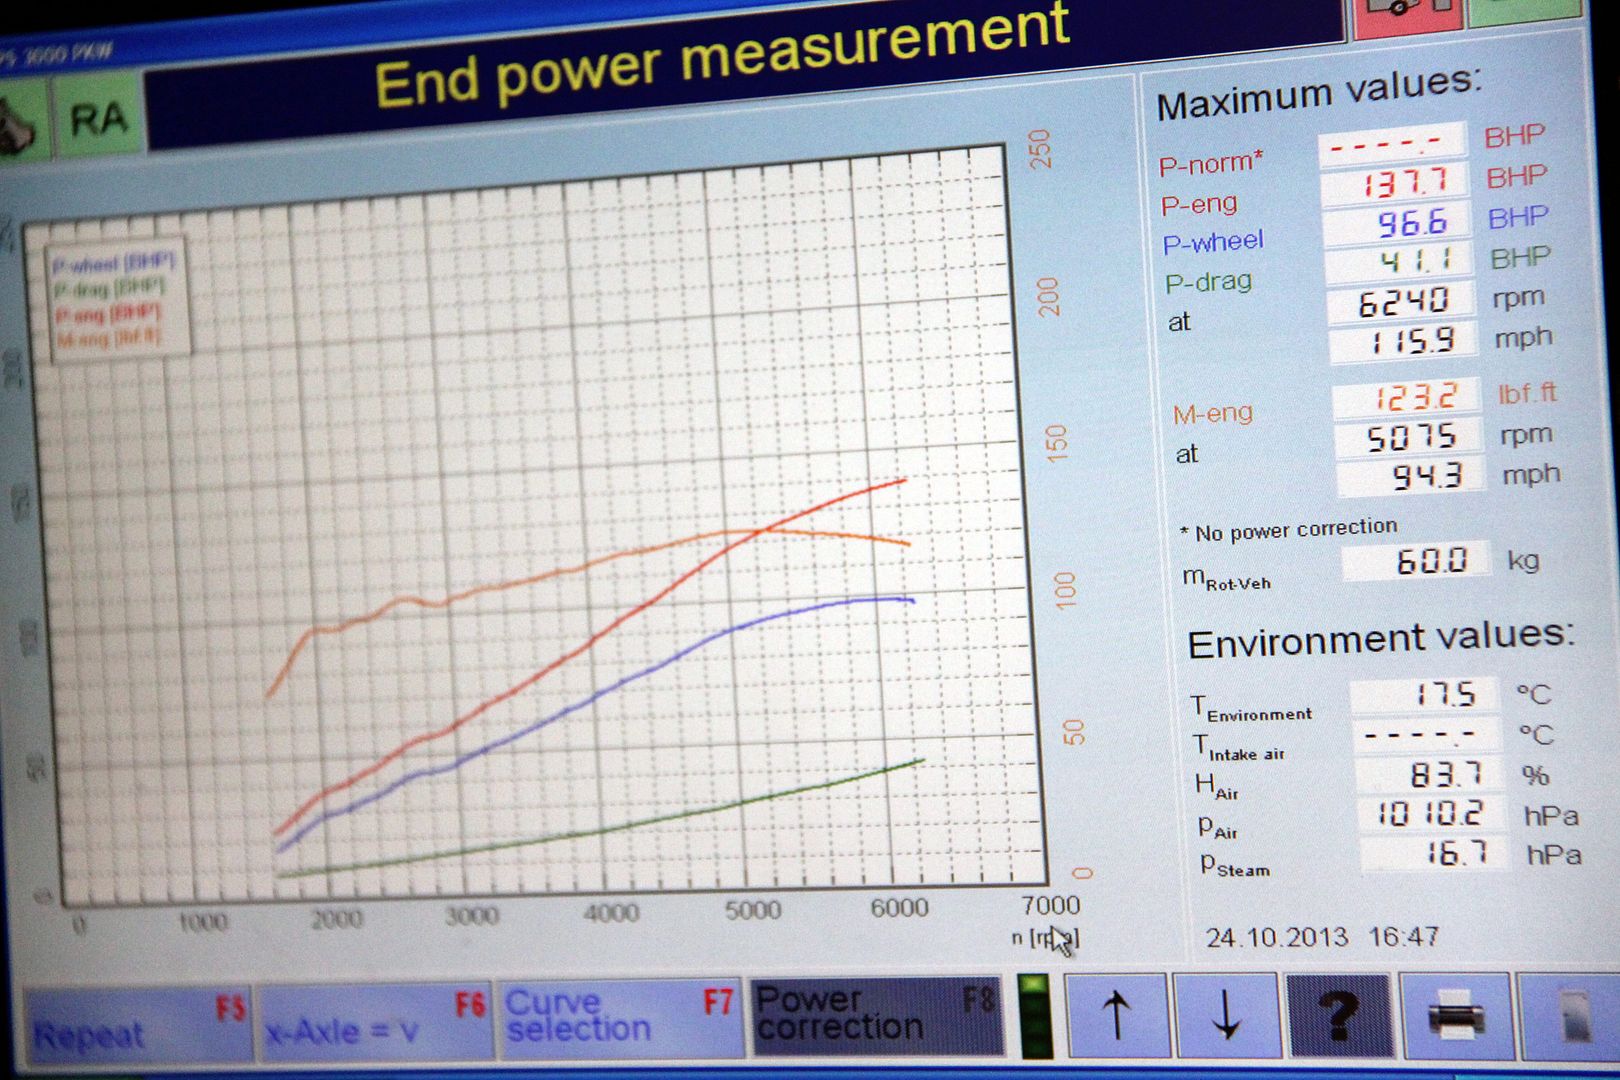
So, ended the day on 137.7 flywheel horsepower. Which I'm happy with. Even though it's nearly three hundred less than the FD it doesn't feel especially slow and tedious. It's still not enough, though. Next step; porting!
At first I thought this may be annoying but I don't even notice it now. I mean the fact the water gauge is a lot brighter and a different colour to the rest of the dials. I was thinking about spraying some lacquer tinted with colour over it (or there's always the old school technique of a Quality Street wrapper) but to be honest I'll probably leave it well enough alone. Nice to have it working for a while before I screw it up

This is what the engine bay now looks like (now I've finally taken some pics in daylight!). The Gilmer set-up;

The fan; with hindsight, I probably could have got a 16" rather than 14" one but this seems plenty man enough to bring the temps down quickly enough. I can always upgrade it if need be if it struggles come summer

This is the sensor for the water temp gauge (arrowed). Much neater and less cumbersome than putting a hose insert in

And this is all the wiring gubbins for the fan, mounted on a little bendy ally bracket in front of the rad (so it hopefully won't get cooked). The green arrow is the actual sensor; as I said before you just insert it between the tubes of the radiator core so there's no need to cut hoses, stick probes in under jubilee clips, etc. The red arrow is the module itself; relay on top, fuse currently dangling by its wiring (solution to follow when errr, when I can think of one)

Trouble is, now I have to take out and paint the side panels for the radiator and the engine undertray, now I've realised how gnarly they are. So anyway, took it out of for a good long drive and let it get nice and hot. No repeat of the previous control box fry-up so definitely seems like that was a defective one. Temperature was getting a bit high before the fan cut in, so re-adjusted the controller and now it cuts in round about 90 degrees, goes off five degrees below that. Hurrah! The car now gets the Niah-cat seal of approval;

and to celebrate we strapped it down and did a bit of this

partly out of scientific curiosity, partly because we need a baseline to see what improvements come from the new built engine. If and when it ever happens! Anyway, this is what it made with no adjustments at all;

131 horsepower is more than Mazda quoted when it was new, so that was quite pleasing. After a bit of ignition and fueling tweakery it we ran it up again. Here's a video of my car on the dyno and not blowing up, which makes a nice change after the FD
http://www.youtube.com/watch?v=viEOQfy_ ... I42xzwg5mw

and after that run we made 139.9 horsepowerz! Mind you, the car didn't want to idle and pickup with that level of tune, so we backed things off a bit and tried again with a slight compromise setting
http://www.youtube.com/watch?v=xLxjqf2A ... I42xzwg5mw

So, ended the day on 137.7 flywheel horsepower. Which I'm happy with. Even though it's nearly three hundred less than the FD it doesn't feel especially slow and tedious. It's still not enough, though. Next step; porting!


