DIY Window Relays
Posted: Mon Jun 19, 2017 10:28 pm
A while ago I made up some window relays as I had read about them taking the stress of our problematic switches which are known to clog up  . It was also said that they would speed up! Thought it made sense and was a great idea!
  . Anyway I'll try and show you guys how I done them in my car. I got the inspiration from these few threads on Ausrotary. My ones are more like Sim_Rx3's (under seat and professional) as he seems to have a pretty good reputation over there aye.
http://www.ausrotary.com/viewtopic.php?t=65894 Sim_Rx3's
http://wright-here.net/cars/rx7/mods/power_windows.html Has before/after times
http://www.ausrotary.com/viewtopic.php?t=123079 FC write up for more reading
http://www.ausrotary.com/viewtopic.php? ... 32&start=0Arran had a different style
Sim also recommends making sure the windows are aligned and lubed up with some dry graphite grease as it won't get dirt and gunk stuck in it http://www.ausrotary.com/viewtopic.php?f=16&t=83038
All connections I used are done properly with interlocking relay bases so the connections don't fall off, heatshrink and OEM plugs. Not using those horrible red/blue/yellow crimp terminals! . I didn't solder anything. I got most of my products from http://www.12voltplanet.co.uk. If you sign up to their newsletter they often send 10% off codes  . Quick shipping, good prices and awesome quality
  . They also have a points system on their website which = $$. So the more you spend, the more points you earn. I learnt quickly not to cheap out on this stuff by buying from ebay as wiring tends to be terrible quality and straight up dangerous. Anyway here are links to the products I used. Lots of terminals as they come in handy for other wiring
I also bought some OEM connectors from the following website. They're awesome. You need to spend a minimum of $20(?) or shipping will be ridiculous. At least when I ordered anyway. If you have some spare connectors, then you won't need these. Scroll down to the Yazaki connectors
http://easternbeaver.com/Main/Elec__Pro ... ctors.html
You can use heatshrink or braided sleeving to protect the wiring and make it look more professional. Can't remember where I got it from or the size I used, but it's easy enough to find. Adhesive heatshrink is used on all the relay base crimps. I'll leave that for you to decide on.
Think those are all the products you need.
-------------------
Here is a diagram I made for the way I wired them up. This is per switch! So you will need to wire up 2 of these. One plug goes into the OEM chassis loom and one plugs into the OEM window switch. Note that I used brown cable whilst the OEM will be black with a blue stripe. This is why I recommended using blue instead of brown.

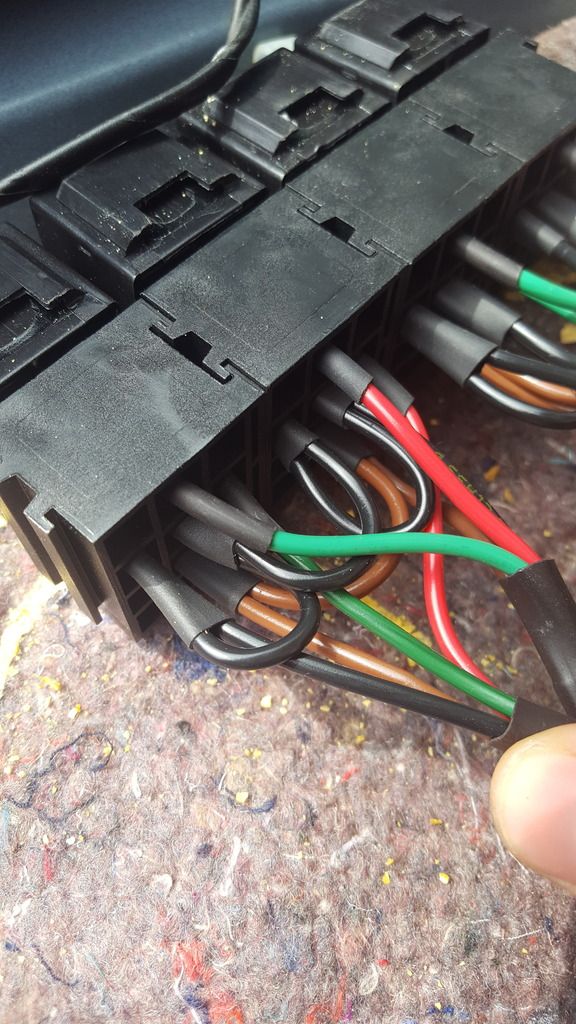
Here they are wired up and heatshrinked. It's hard to find a picture that shows the daisy chain of crimps. Zip ties were to keep everything together tidily. Remember to use the larger female crimp terminals to fit 2 ends of the cable in (for the daisy chain)
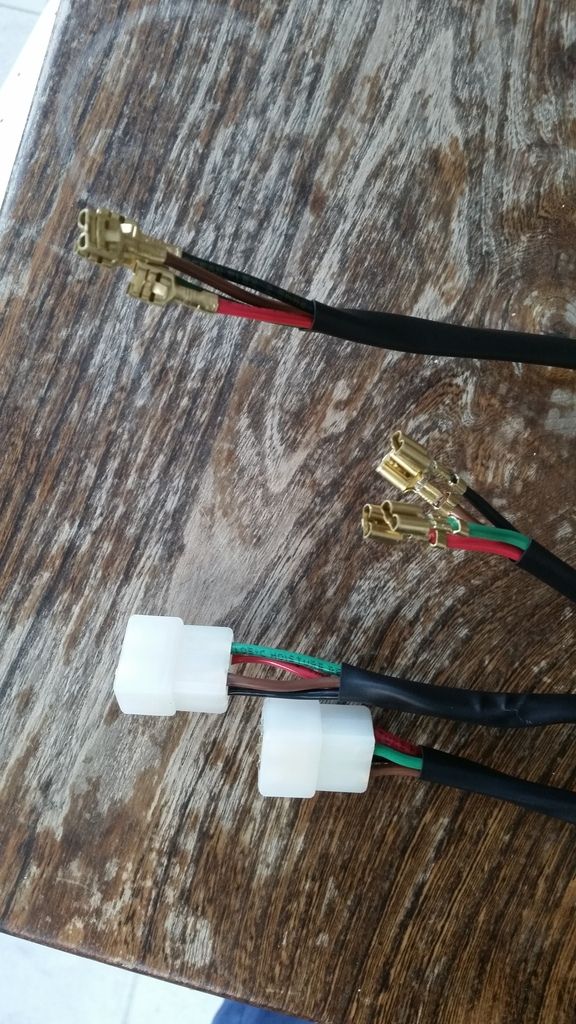
Crimped ends and new OEM plugs. I didn't heatshrink this end as it would be difficult to fit into the plug
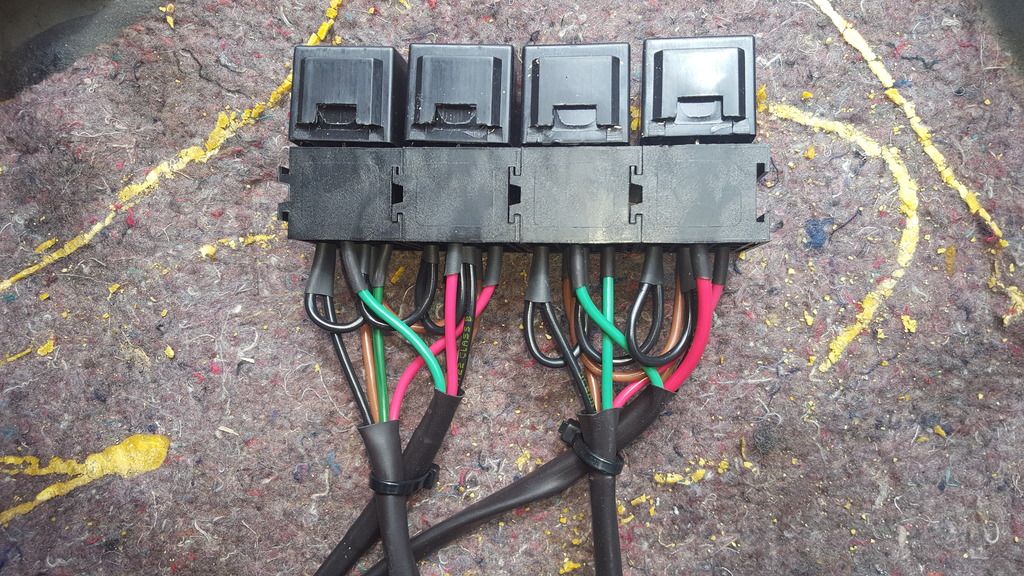
Picture of the whole set up (minus 2 connectors)

I installed mine under my passengers seat and carpet. There is a slight bulge ( ) from under the carpet. But you can't see it as the seat covers it anyway. Poke the OEM switch connectors down towards the seat and plug your new relay harness in!
I timed my passengers window after I installed the relays (needed to adjust the driver side). Each was an average over 3 cycles. There is a noticeable difference. Pretty stoked with the final result and how they're performing. No worries of switches clogging up either!
Before:
Down - 4.50
Up - 4.34
After:
Down - 3.62
Up - 3.87
It's probably worth giving the switches a good clean out when doing this mod. Just so everything is fresh and stays that way, thanks to your new window relays! Here is the link how to clean 'em out
http://www.rx7fb.com/viewtopic.php?f=22&t=1783
I think that's about it aye. Thanks for reading and I hope this is useful for a few of you! If I have missed anything out you guys have any questions then let me know! Haha
http://www.ausrotary.com/viewtopic.php?t=65894 Sim_Rx3's
http://wright-here.net/cars/rx7/mods/power_windows.html Has before/after times
http://www.ausrotary.com/viewtopic.php?t=123079 FC write up for more reading
http://www.ausrotary.com/viewtopic.php? ... 32&start=0Arran had a different style
Sim also recommends making sure the windows are aligned and lubed up with some dry graphite grease as it won't get dirt and gunk stuck in it
All connections I used are done properly with interlocking relay bases so the connections don't fall off, heatshrink and OEM plugs. Not using those horrible red/blue/yellow crimp terminals!
. They also have a points system on their website which = $$. So the more you spend, the more points you earn. I learnt quickly not to cheap out on this stuff by buying from ebay as wiring tends to be terrible quality and straight up dangerous. Anyway here are links to the products I used. Lots of terminals as they come in handy for other wiring - Crimpers
- 50 Pack male terminals with locking tab (6.3mm width, 1.5-2.5mm2)
- 50 Pack female terminals with locking tab (6.3mm width, 1.5-2.5mm2)
- 10 Pack female terminals with locking tab - for daisy chain (6.3mm width, 2.5-6.0mm2)
- Interlinking relay bases
- 4 x Change over relays
- 3 meters - 2.5mm2 - Black
- 2 meters - 2.5mm2 - Red
- 2 meters - 2.5mm2 - Green
- 2 meters - 2.5mm2 - Brown (blue would be more appropriate, but they didn't have any when I ordered)
I also bought some OEM connectors from the following website. They're awesome. You need to spend a minimum of $20(?) or shipping will be ridiculous. At least when I ordered anyway. If you have some spare connectors, then you won't need these. Scroll down to the Yazaki connectors
http://easternbeaver.com/Main/Elec__Pro ... ctors.html
You can use heatshrink or braided sleeving to protect the wiring and make it look more professional. Can't remember where I got it from or the size I used, but it's easy enough to find. Adhesive heatshrink is used on all the relay base crimps. I'll leave that for you to decide on.
Think those are all the products you need.
-------------------
Here is a diagram I made for the way I wired them up. This is per switch! So you will need to wire up 2 of these. One plug goes into the OEM chassis loom and one plugs into the OEM window switch. Note that I used brown cable whilst the OEM will be black with a blue stripe. This is why I recommended using blue instead of brown.

Here they are wired up and heatshrinked. It's hard to find a picture that shows the daisy chain of crimps. Zip ties were to keep everything together tidily. Remember to use the larger female crimp terminals to fit 2 ends of the cable in (for the daisy chain)


Crimped ends and new OEM plugs. I didn't heatshrink this end as it would be difficult to fit into the plug

Picture of the whole set up (minus 2 connectors)
I installed mine under my passengers seat and carpet. There is a slight bulge (
I timed my passengers window after I installed the relays (needed to adjust the driver side). Each was an average over 3 cycles. There is a noticeable difference
Before:
Down - 4.50
Up - 4.34
After:
Down - 3.62
Up - 3.87
It's probably worth giving the switches a good clean out when doing this mod. Just so everything is fresh and stays that way, thanks to your new window relays! Here is the link how to clean 'em out
http://www.rx7fb.com/viewtopic.php?f=22&t=1783
I think that's about it aye. Thanks for reading and I hope this is useful for a few of you! If I have missed anything out you guys have any questions then let me know!