
don't let that deter you..... it was the adrenaline and shock blocking out the pain...... now that has subsided, the damage to your neck, back, shoulders is becoming more and more apparent and uncomfortable..... not to mention the mental anguish and nightmares....... it's a terrible thing you're suffering Nik.... and all through no fault of your own.... get it recorded.Lucky wrote:^^lol, good response
Unfortunately, I slightly took credibility from any attempt at claiming injury by being out of my car, with the kiddies' drivers door open with a view to beating him into a small greasy smear almost before it had come to a stop
Lucky's Series 3
-
ian65

- Admin

- Posts: 6402
- Joined: Wed Mar 30, 2011 12:11 am
- Has thanked: 315 times
- Been thanked: 376 times
Re: Lucky's Series 3
1999 Jaguar XJR V8 Supercharged
1992 Peugeot 205 1.9 GTI
2003 Mercedes SLK 200 Kompressor
-
TOOL
- VIP User

- Posts: 2598
- Joined: Thu Sep 01, 2011 10:30 am
- Location: Switzerland
- Been thanked: 24 times
Re: Lucky's Series 3
Trying to be the voice of optimism, that's not nearly as bad as I expected.
A bent control arm will give you a wheel out of place, easy. Pull the wing off and get a good look.
What dude did Tim's car get hit on again? Maybe it was the other side and he has spares.
In short, that'll buff out (tbh, I can't believe no-ones said it yet)
A bent control arm will give you a wheel out of place, easy. Pull the wing off and get a good look.
What dude did Tim's car get hit on again? Maybe it was the other side and he has spares.
In short, that'll buff out (tbh, I can't believe no-ones said it yet)
Back in the UK for the summer, maybe longer......
-
Chud
- VIP User
- Posts: 933
- Joined: Fri Apr 01, 2011 7:35 am
- Location: North Dorset, UK
- Has thanked: 3 times
- Been thanked: 111 times
Re: Lucky's Series 3
Which Tim? Mine got hit on the same side - Uncle Timmy has a candidate though.
instagram: tymboooo
1980 series 1 RX7 x2
1983 series 2 RX7
1975 RX3 Coupe
1956 VW split screen kombi
1966 Porsche 912
1980 series 1 RX7 x2
1983 series 2 RX7
1975 RX3 Coupe
1956 VW split screen kombi
1966 Porsche 912
-
Chud
- VIP User
- Posts: 933
- Joined: Fri Apr 01, 2011 7:35 am
- Location: North Dorset, UK
- Has thanked: 3 times
- Been thanked: 111 times
Re: Lucky's Series 3
Yeah that's the side mine got hit - took hell of a wallop on the offside wheel and bent a lot but luckily all removable.
instagram: tymboooo
1980 series 1 RX7 x2
1983 series 2 RX7
1975 RX3 Coupe
1956 VW split screen kombi
1966 Porsche 912
1980 series 1 RX7 x2
1983 series 2 RX7
1975 RX3 Coupe
1956 VW split screen kombi
1966 Porsche 912
Re: Lucky's Series 3
I don't know what to say mate, apart from wishing I had the parts you need.
Really feel for you, and I hope you get it all sorted.
Really feel for you, and I hope you get it all sorted.

-
spirit r
- VIP User
- Posts: 1895
- Joined: Sat Feb 09, 2013 4:15 pm
- Location: Germany Black Forest
- Has thanked: 476 times
- Been thanked: 253 times
- Contact:
Re: Lucky's Series 3
Holy shit. know how feelings shake the body after accident with your "Love" hope load bodyparts of your car are ok.
I would therefore like to extend my deepest sympathy about your misery. Im so far away but if need help please give a ask.
Thomas
I would therefore like to extend my deepest sympathy about your misery. Im so far away but if need help please give a ask.
Thomas

-
Lucky
- VIP User
- Posts: 2685
- Joined: Mon Nov 07, 2011 8:30 pm
- Location: Worthing, UK
- Been thanked: 5 times
Re: Lucky's Series 3
Right, well just because I'm lazy doesn't mean I'm idle, lol. Prior to the accident I'd spent the past few weeks getting stuff ready for what should have been the great hand-over. I wanted to get everything I could sorted before giving the car to Super 7 to build/fit the new ported engine. Bear with me, this may take a while!
First thing was a jaunt up to darkest Northamptonshire. Mark (K) was clearing out all his remaining FB stuff cos now he's seen the light of FD glory it was in the way and it had got to the point he was going to just tip it. I didn't really need most of it, but like all good hoarders I can't bear to see what are essentially now irreplaceable out of production parts chucked away. Because one day someone will post saying "my windscreen wiper linkage has snapped" and I'll think "ooooh, now where did I put those three I blagged off Mark!". I'm a custodian for obscurity, lol. No, please, no need to thank me
Anyway, it was weird driving actually past Santa Pod and not going in, but at least in a rare moment of perception I'd stolen the waff's F*rd rather than try to fit it all in an RX-7. Just as well. It ended up full. And I mean full!
Big thanks to Mark for insisting I took it all, anyway. I felt a bit cheeky just bunging him some beer money and scarpering. There were certainly a couple of bits that made it worth the trip for me, things I'd been after for a while. Firstly was a decent seat. The one that came with the 2nd hand leather interior I scored had a couple of problems. One was that the foam padding was completely knackered, absolutely squashed flat. Either the car it came from was owned by an elephantine fatty or it had done interstellar mileage, but after a while it got pretty uncomfortable sitting directly on non-upholstered springs and there was no lateral support at all so I tended to slide about in corners. The second problem was that the quadrant gear for the reclining mechanism had stripped all its teeth so the seat back was either all the way upright or all the way gangster lean but wouldn't stay anywhere in between.
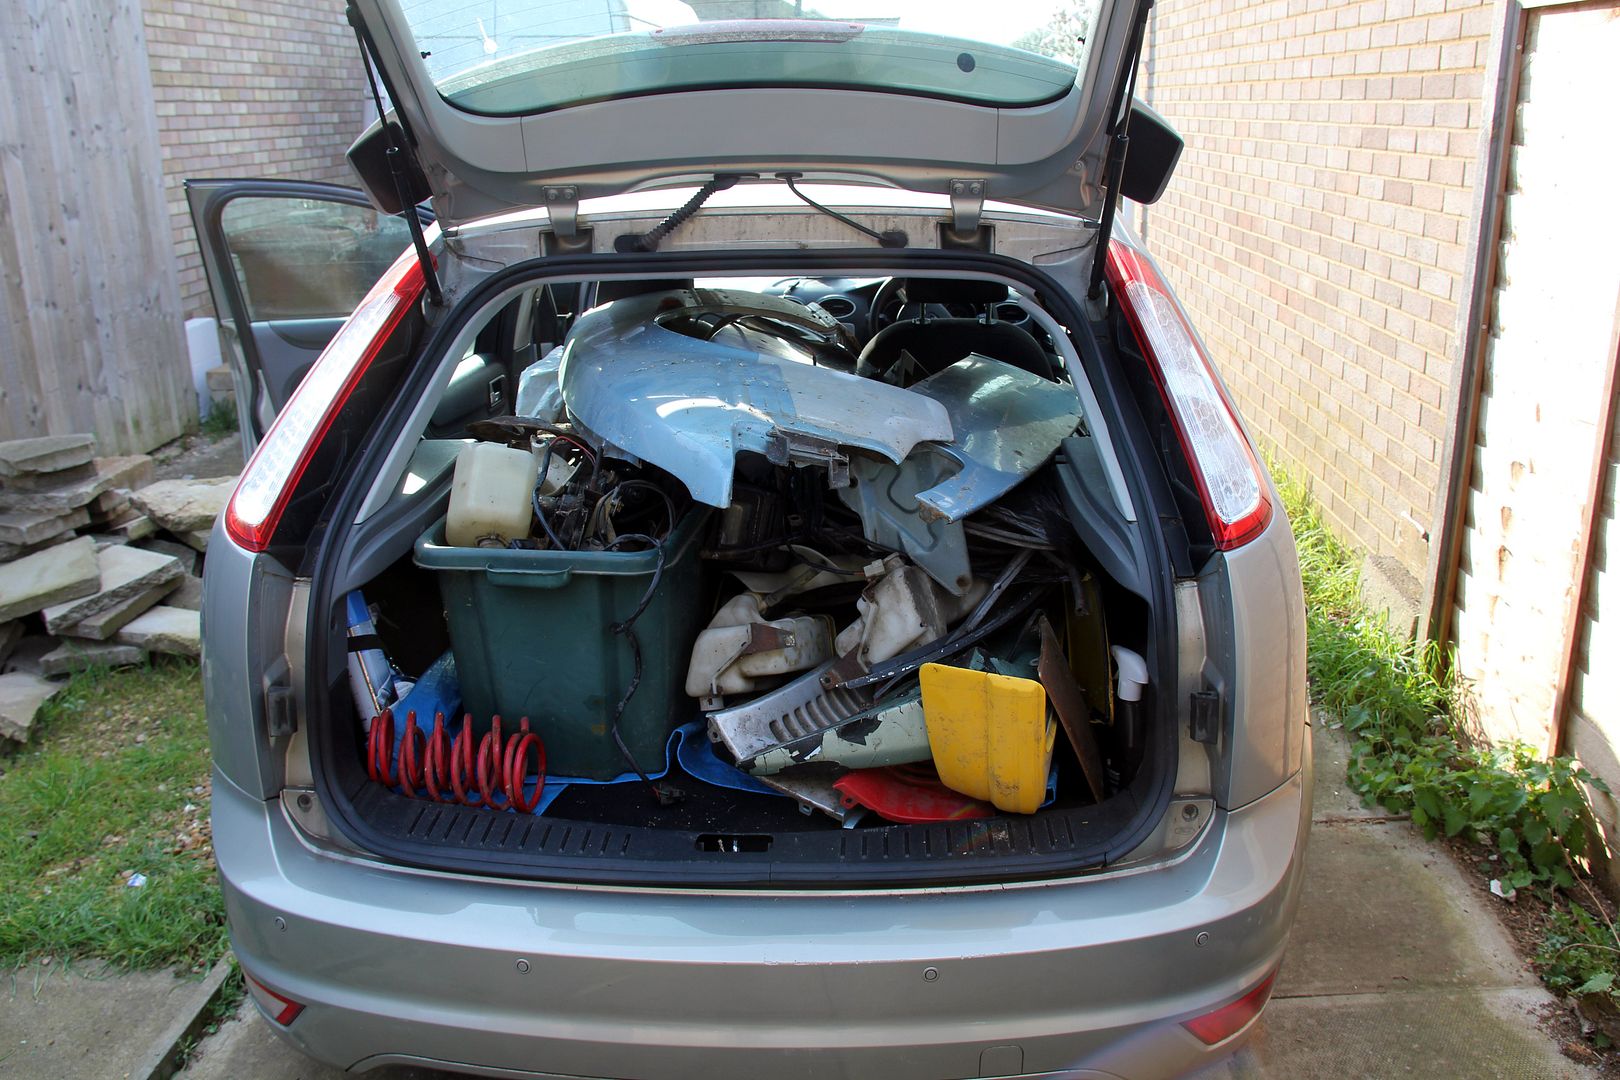
So, the first thing I did was inexplicably manage to shatter my 12mm socket getting the runner mounting bolt undone. Yeah, that real PITA one under the rear trans-tunnel side of the seat
Hopefully this wasn't going to be an omen for how the job was going to progress. Armed with a socket that had the advantage of having all six sides still attached, I got the bugger out

Then I pressed on with disassembling the "new" seat from Mark. It's easy enough to split the seat into its halves; just a couple of socket head bolts on one side, one screw in the lumbar support crank and that's about it. I didn't touch the actual spring-loaded mechanism for the recliner; the spring in this is designed to lift fatties against gravity. If it cuts loose you're going to lose an arm!
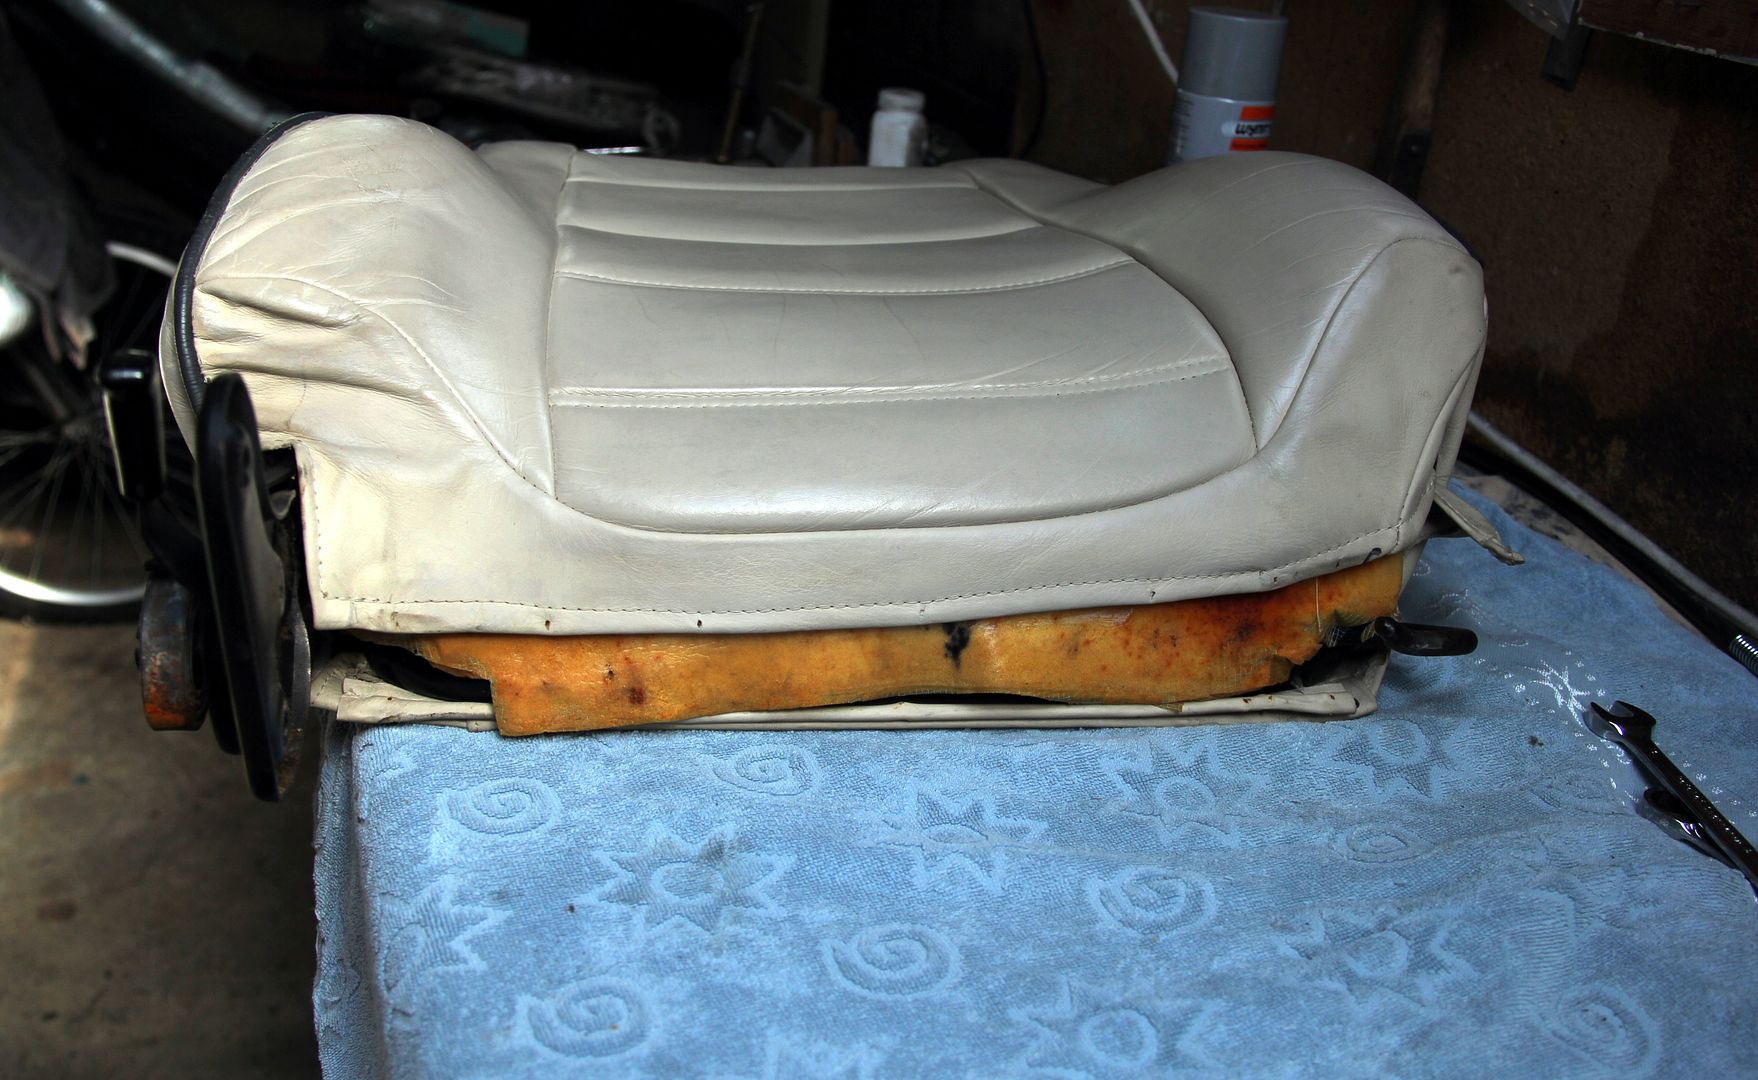
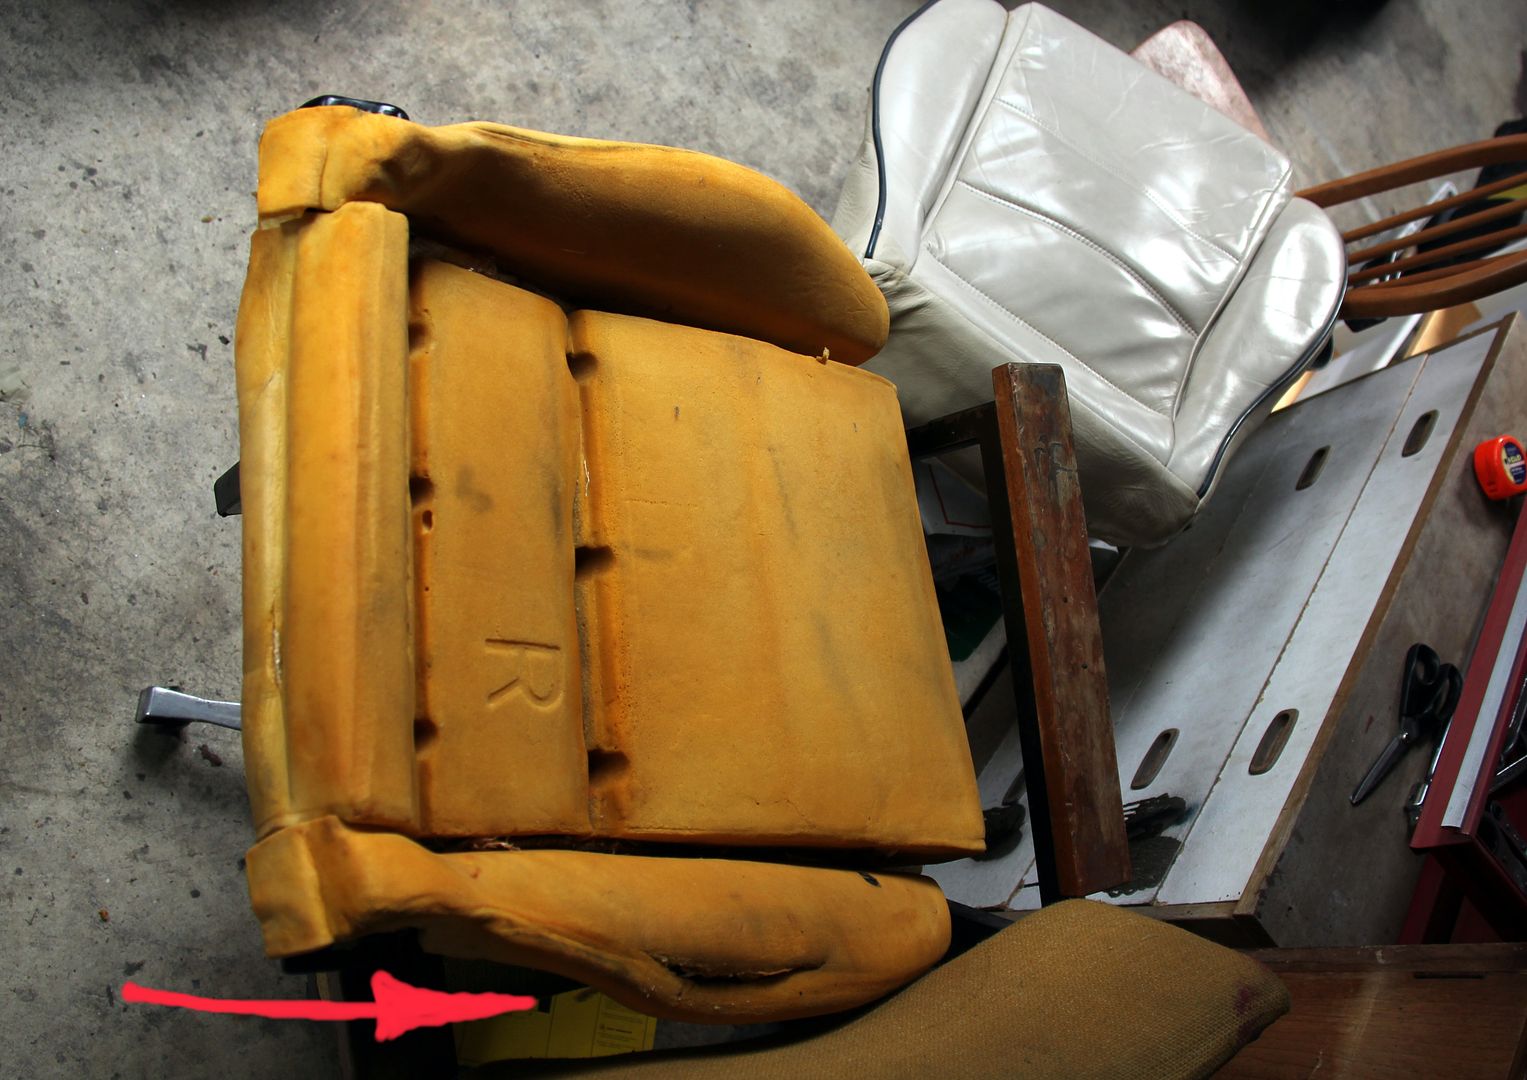
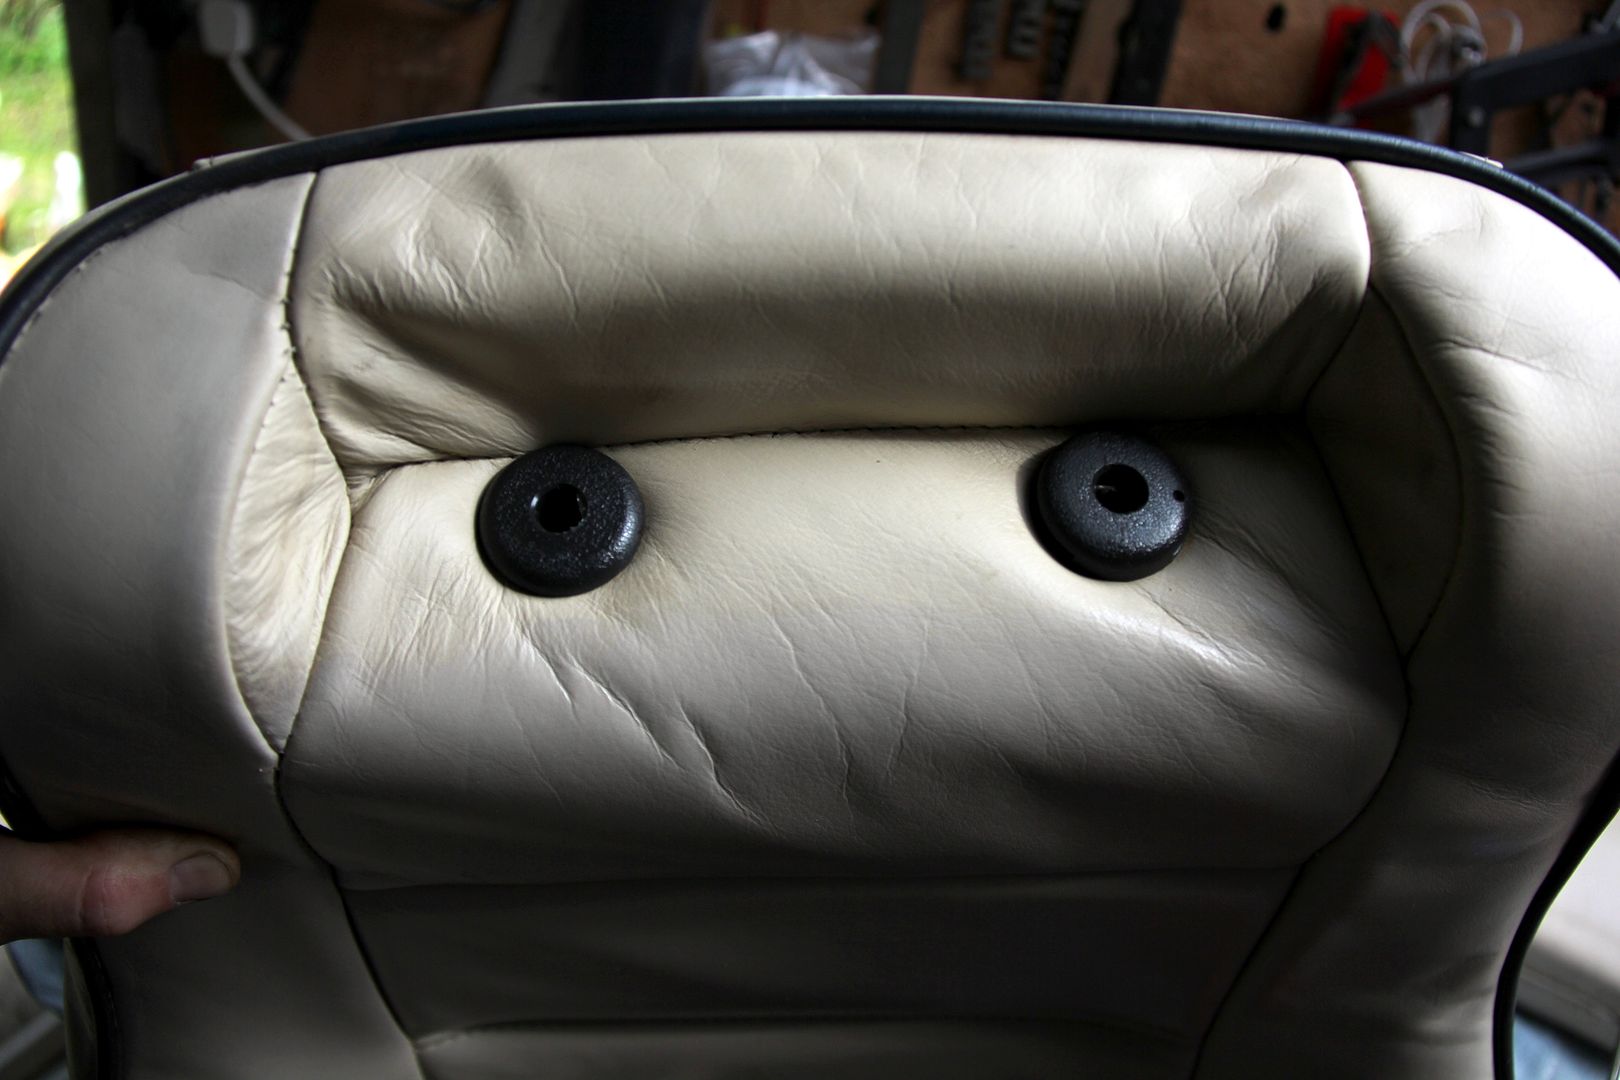
As you can see in these comparison pics the seat backs were very different in how pert and supportive the lumbar side cushions were. Mark's seat they stand nice and proud;
on mine they're all floppy and baggy. There's probably a joke in there somewhere. Not only that, but presumably because this was a one-off trimming job, the dimensions of the leather are clearly slightly wrong to the point the trimmer couldn't even get it fastened underneath where the back mounts to the base, and all the foam was just hanging out of its gaping gusset. Euwww. Definitely a joke in there
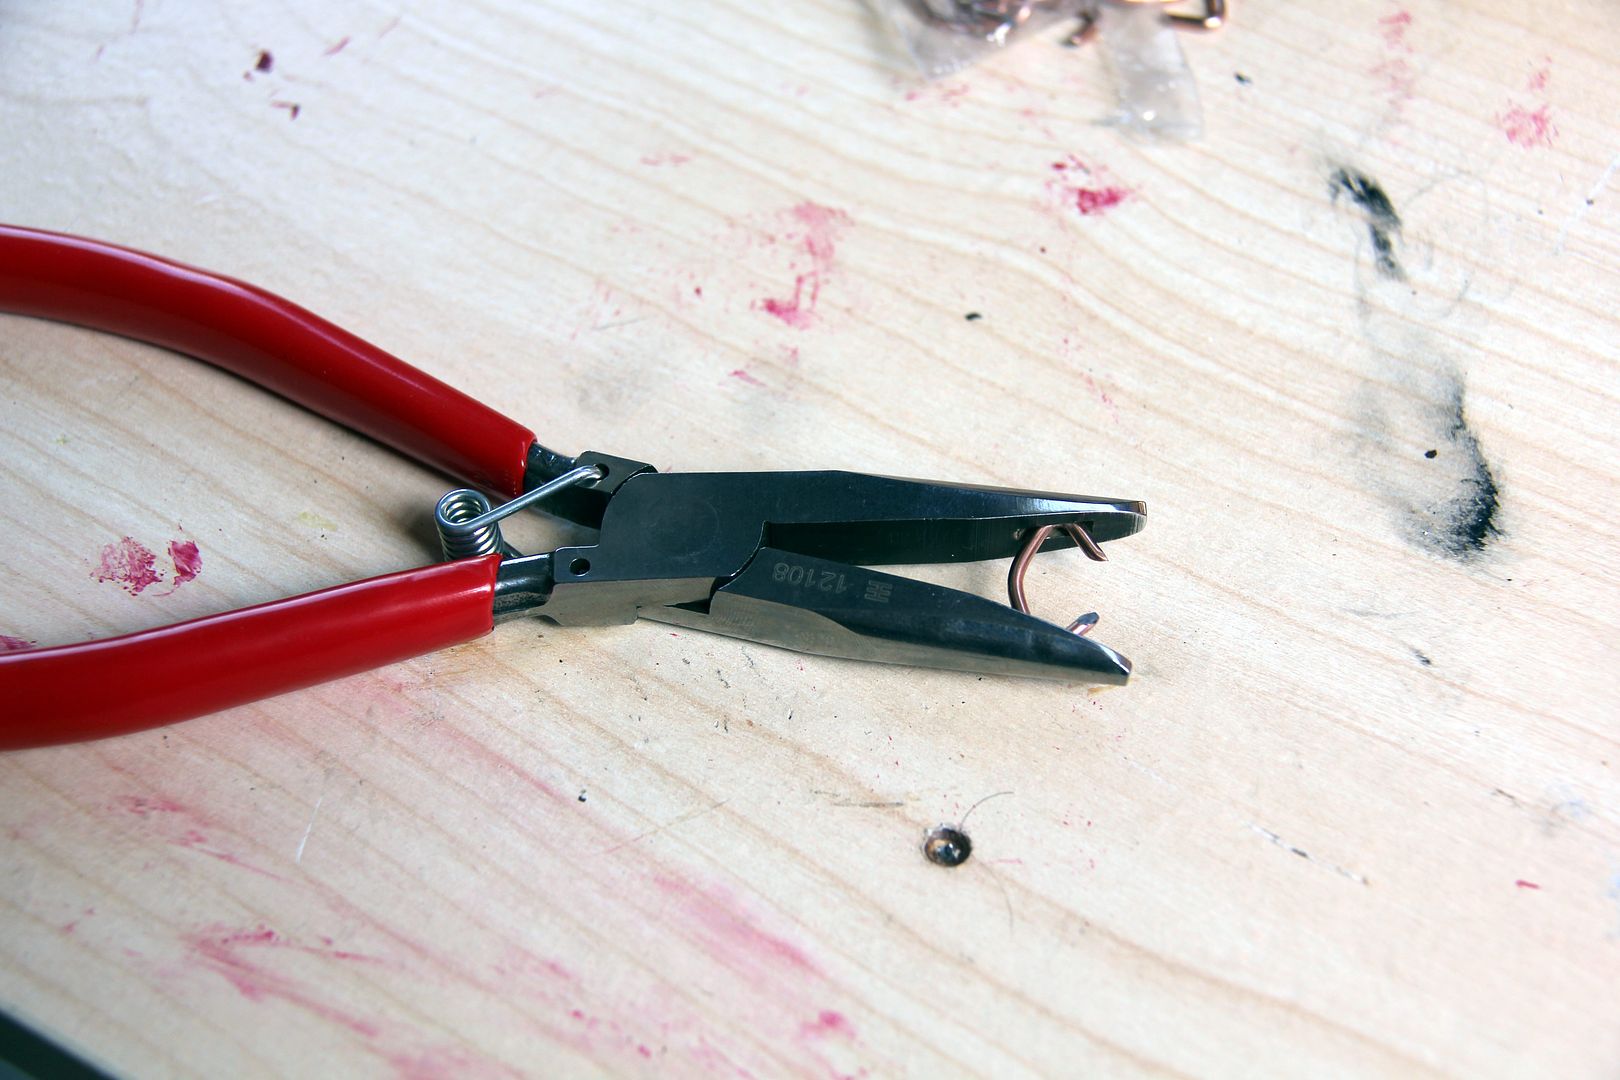
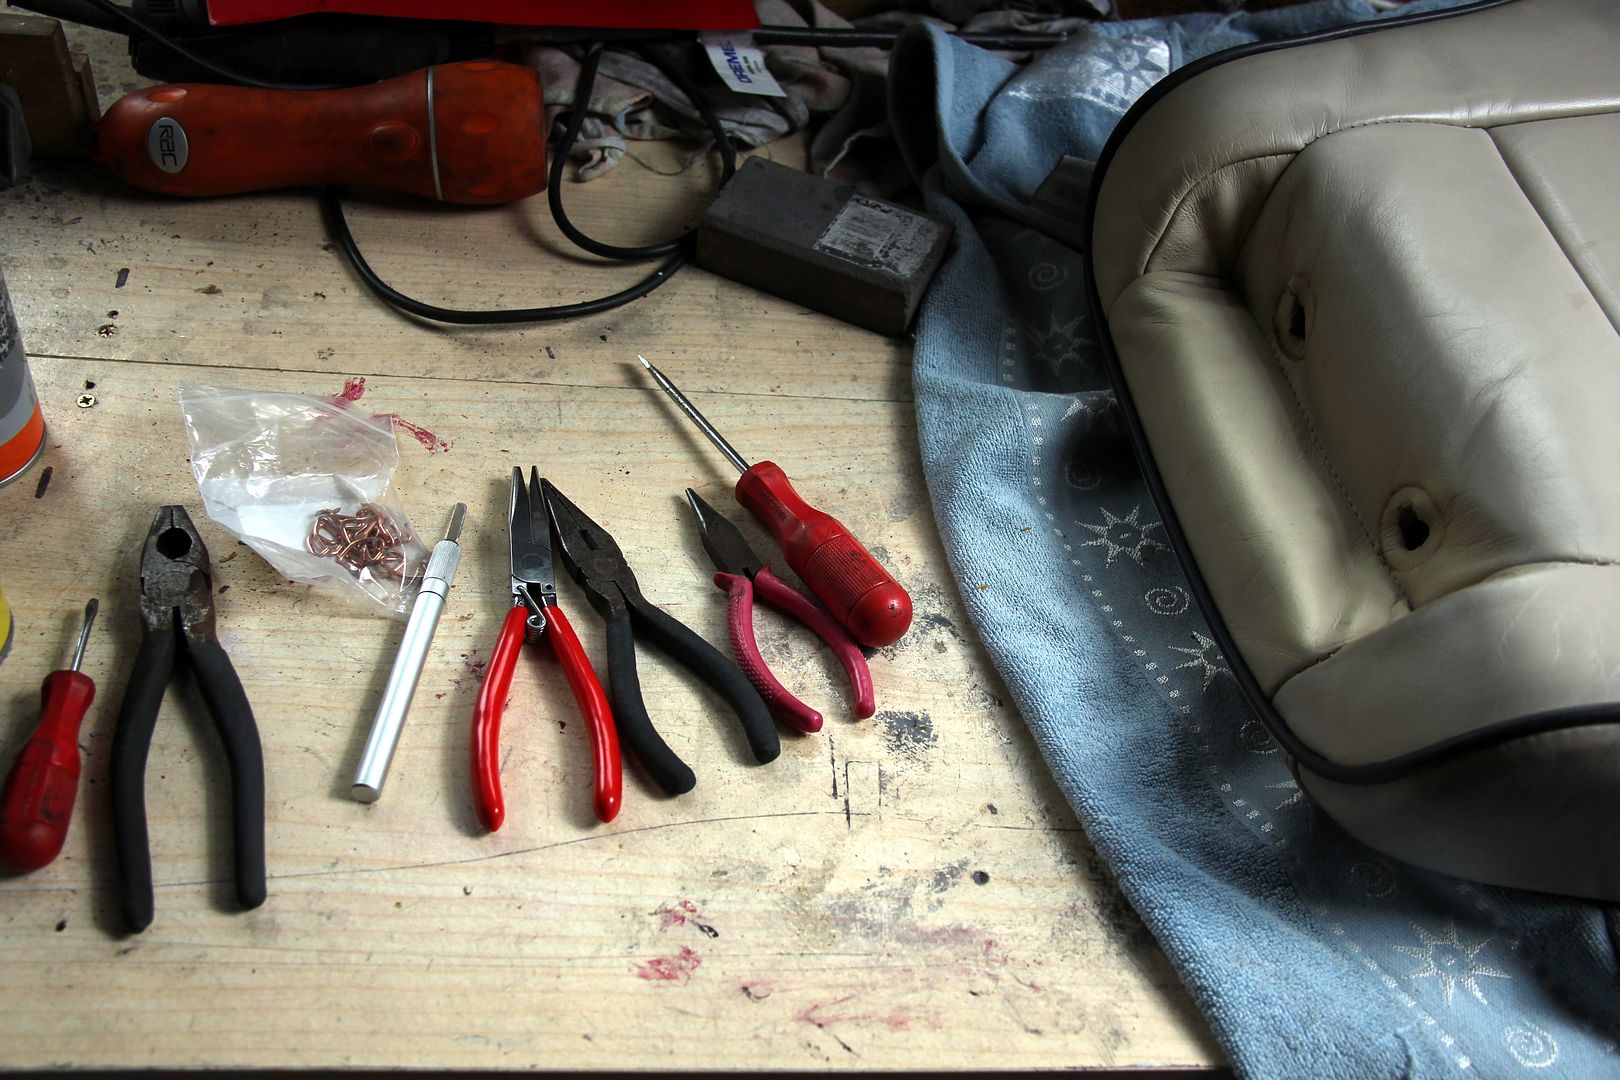
So essentially what holds the seatcover to the frame are hogrings. These are little c-shaped clips that when you squeeze them in the jaws of special pliers (called hogring pliers, imaginatively) make a spiral shape and clamp the fabric or leather to wires inserted through the foam or to the seat springs. Fortunately, having stripped and repaired the leather seat on my FD, I had some pliers and hogrings leftover. The pliers are devilishly simple yet clever, like all the best inventions. They're essentially sprung snipe-nose pliers with a dentent machined into each jaw that grips the hogring and forces it round on itself when you squeeze the handle. The spring keeps the jaws gripping the hogring so they are one-handed to use while you manouvre the material into the right place with the other
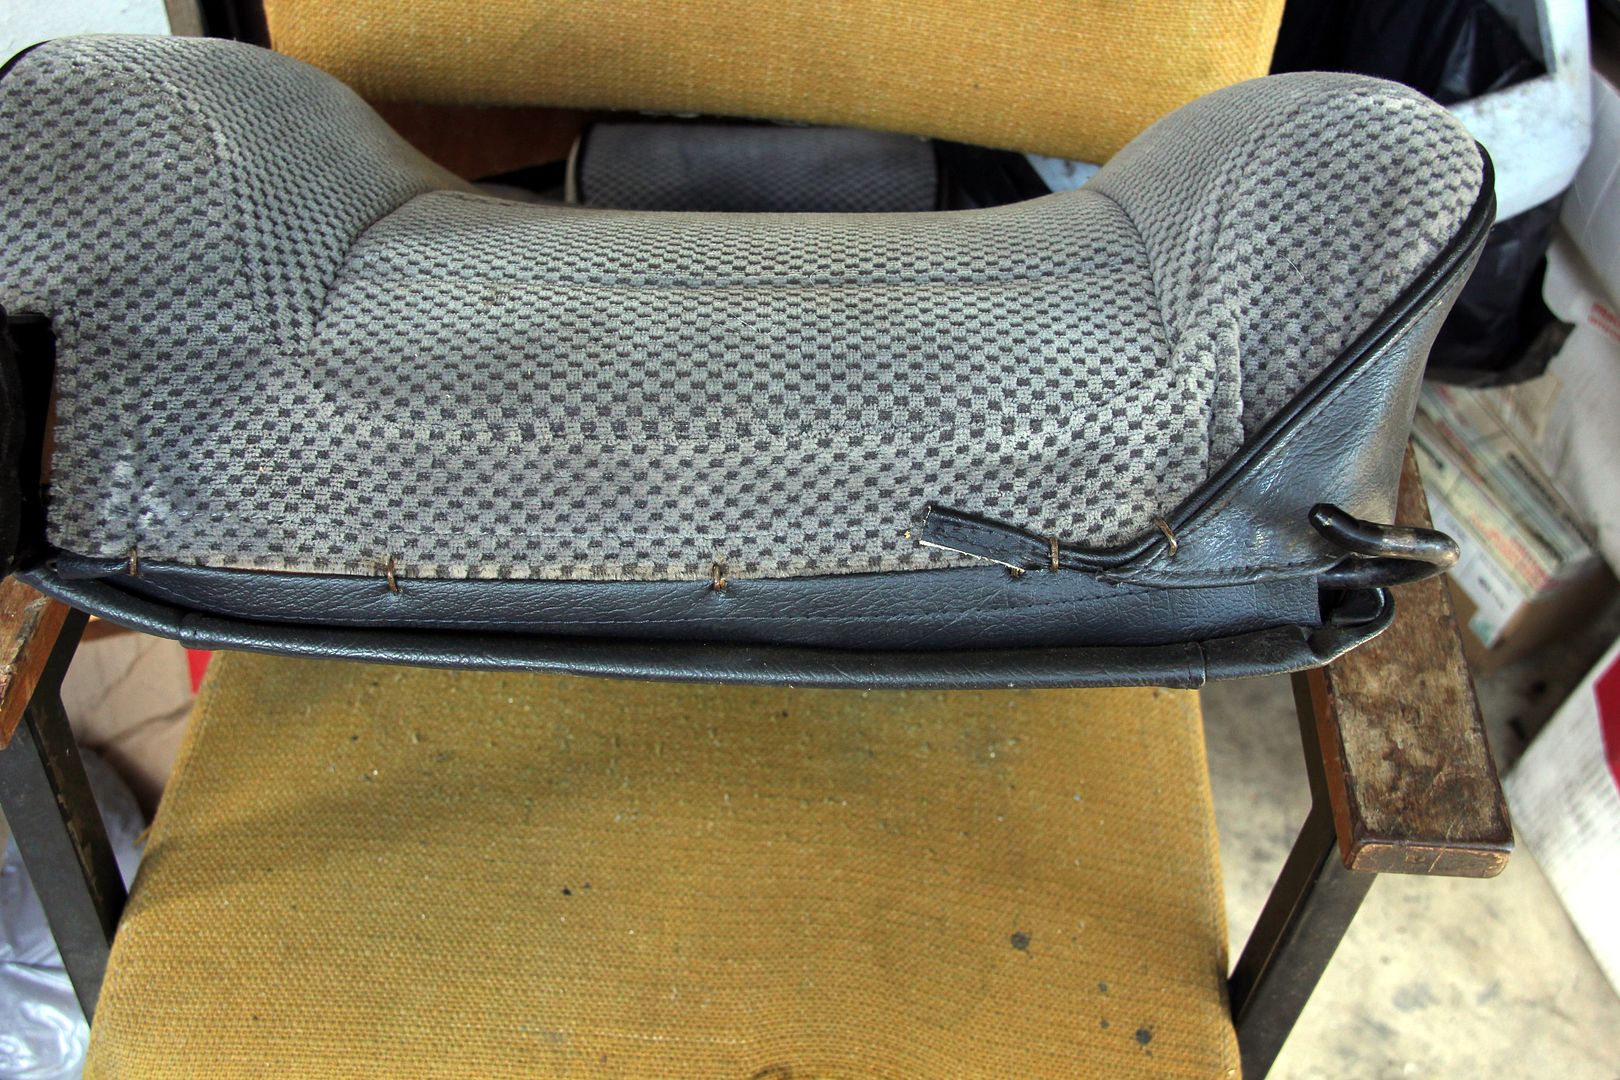
However, nothing is as easy in practice as in theory, and before I could even think of using clever pliers I had to strip both seats.. which meant uncurling a load of hogrings. And there are a LOT! Some are obvious, some more hidden. For example, every arrow on this pic of the base is a hogring. The easiest way to to lever a slight gap in the ring with a screwdriver, then un-curl it with longnosed pliers. However, restricted access sometimes makes this a properly irritating test of patience

by way of example, there is one here, in the corner-web of the seat base structure, clipped around the frame of the springs. This space is about two inches by three, surrounded by sharp metal edges. Yeah, these ones had me inventing some new swear words just for the occasion!
However, it's a therapeutically simple procedure and basically I like the fact that an entire seat can be stripped and re-assembled using these few tools;
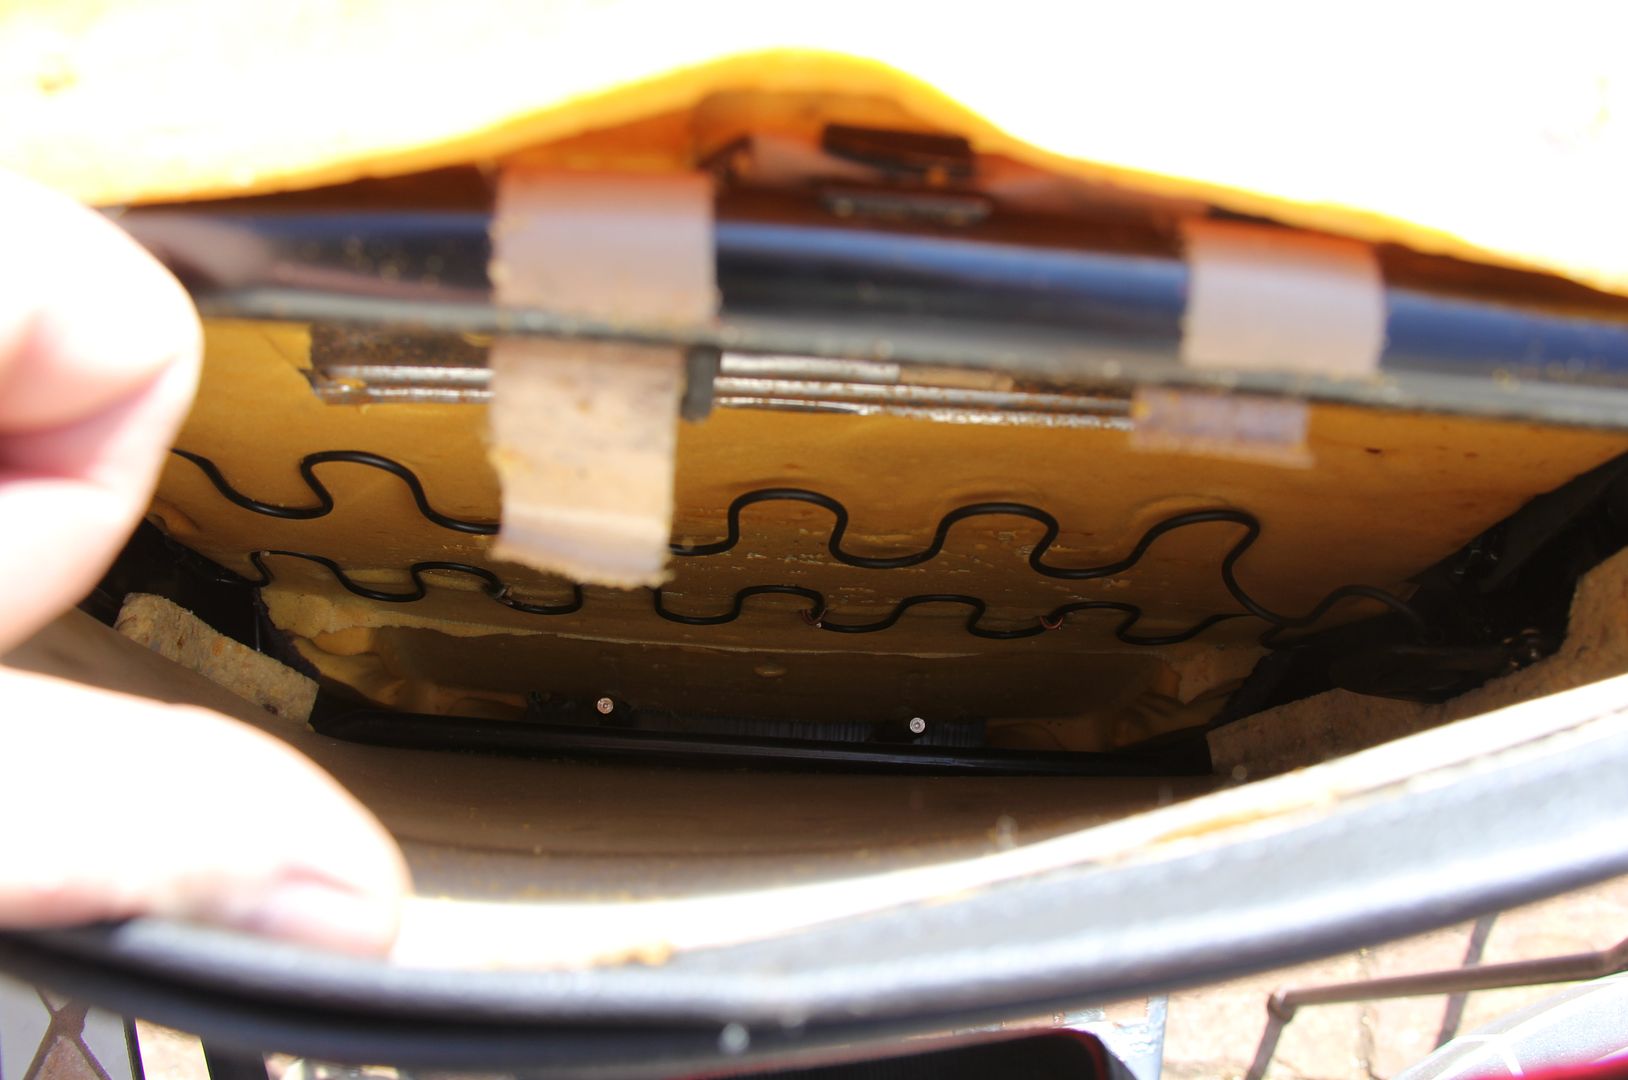
The back is a bit more complex than the base. It has this weird plastic tray in it, presumably to give the back of it some rigidity. It's held on by freaky rubbery surgical tape where the glue has gone weird with age and heat and basically turned into some kind of permanently gooey un-set tar type stuff that sticks to bloody everything.
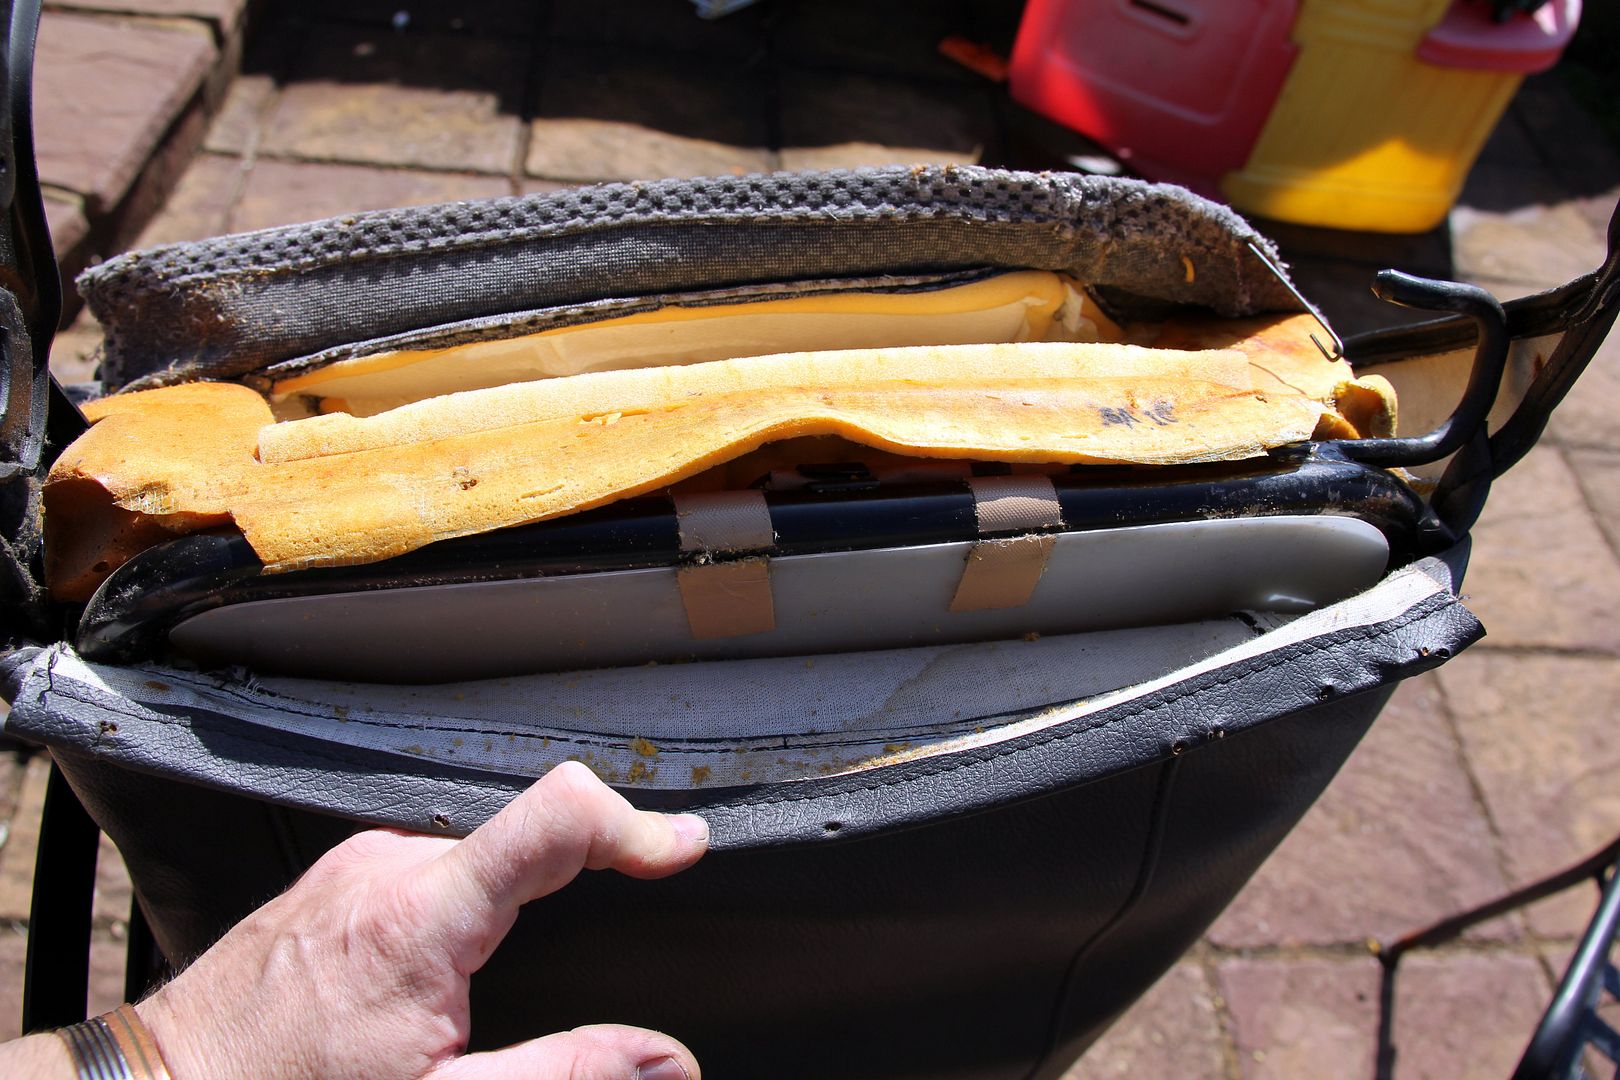
The seat cover has pockets that basically stick backwards from the inside of the front face and these are hogring-ed through the foam to the spring structure at the back of the frame. Which means you have to get right down in here with your two pliers/screwdriver routine, all the while needing at least two extra hands to hold the damned thing apart for access. Nadgery doesn't even come close to describing it, and I gained a whole new respect for people who do this for a living!
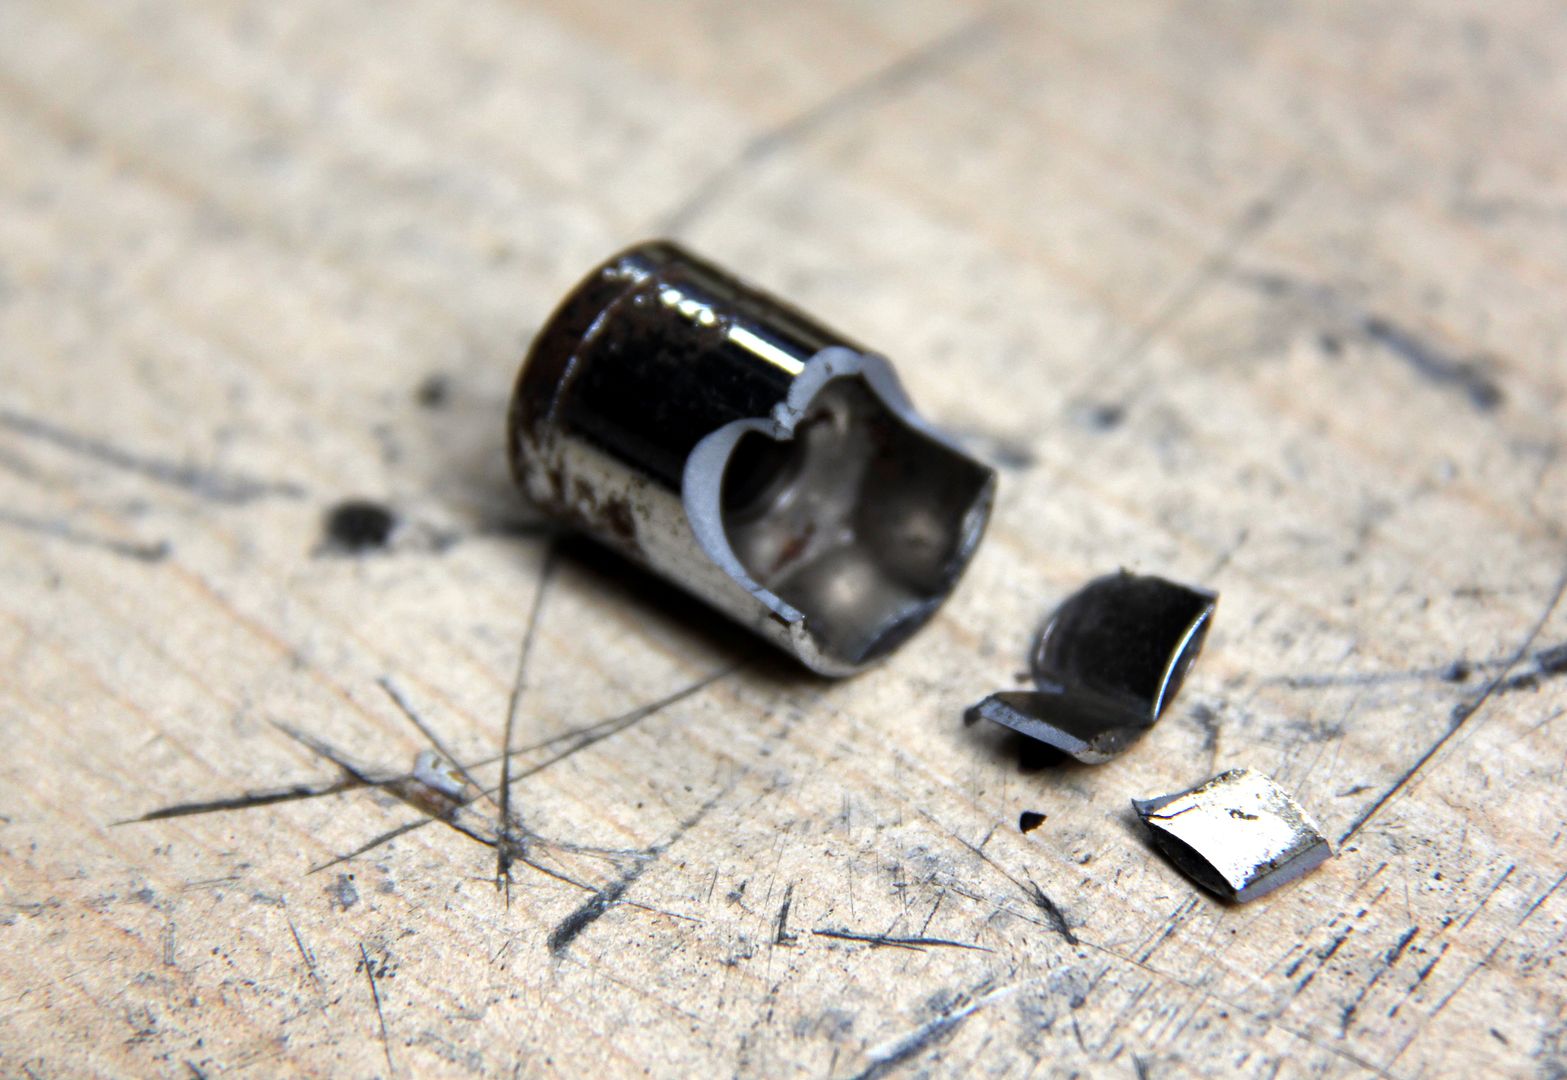
At first I was stymied as to how to remove the headrest, until I discoverd that a) some squirty grease freed up the seized runners nicely and b) one of the plastic guides that hold the runners in the seat has a little spring clip built into it that you can release through a tiny groove using a small screwdriver. Then I could remove the plastic guides from the top of the seat, the last thing holding the cover on

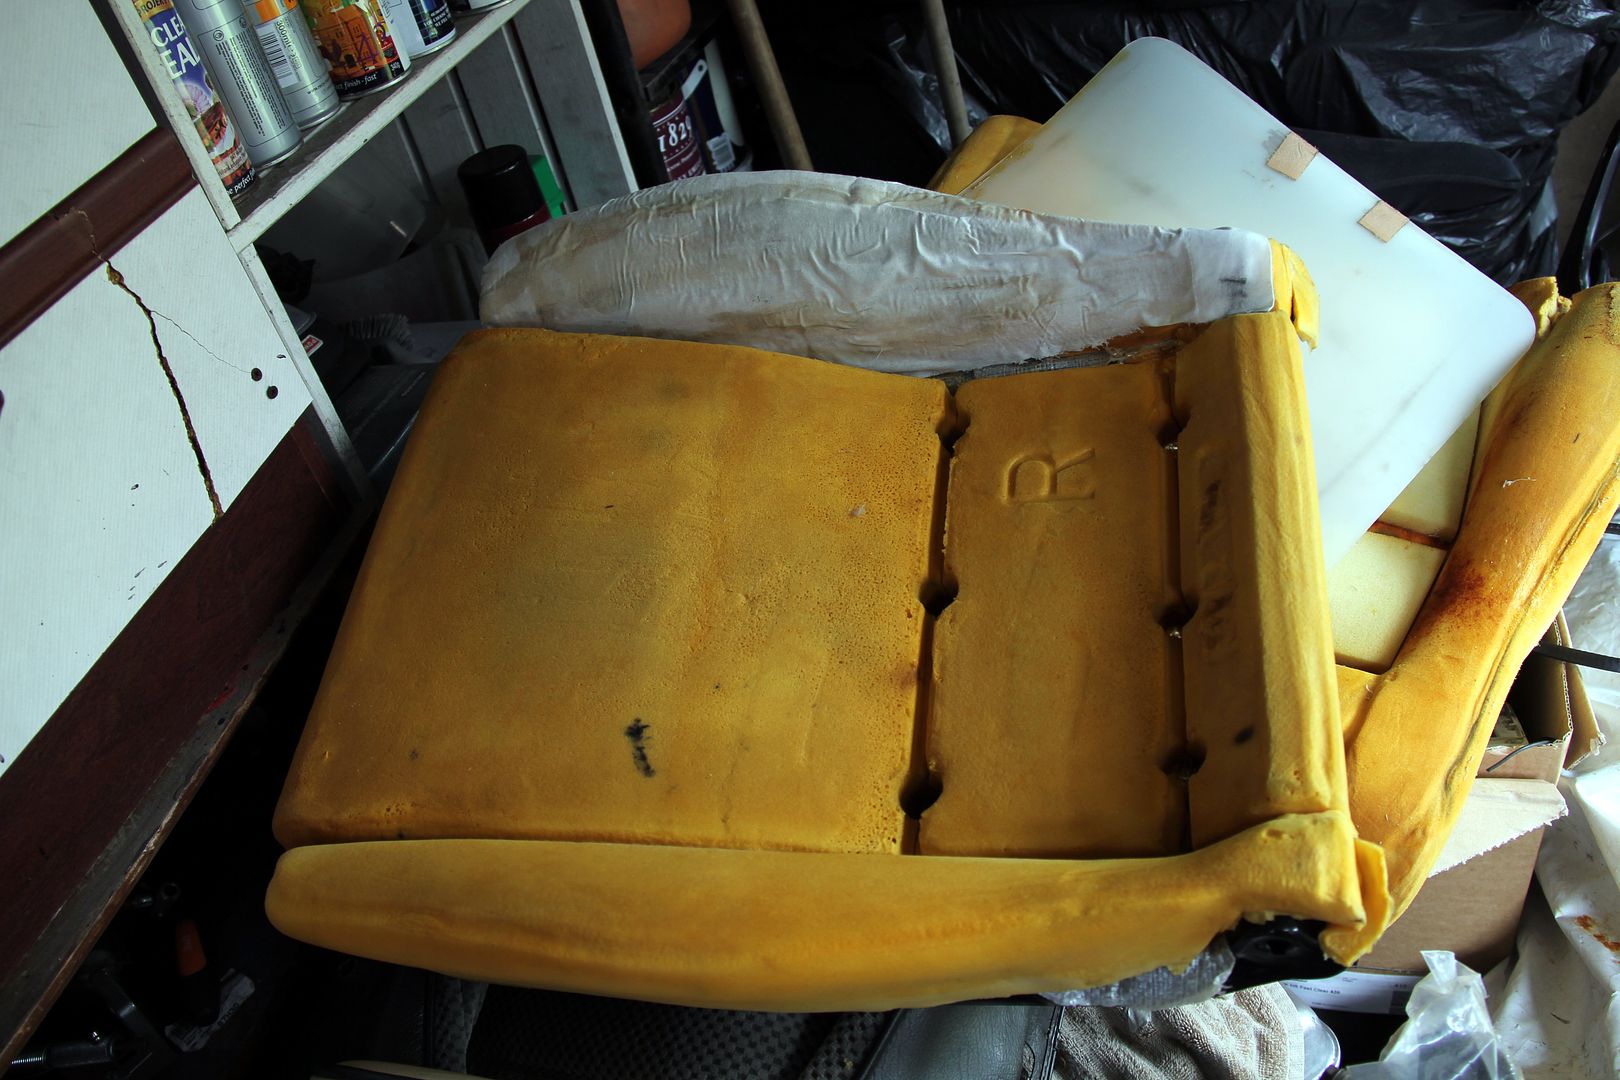
One of these was broken on my old seat, so it was good to get a decent pair fitted and stop the slight lateral movement in the headrest. So, all disassembled, the poor state of the foam can clearly be seen now. Here the arrow shows where the metal frame of the base has actually worked its way through the foam and the foam itself is all distorted and useless. This is caused by decades of lazy people flopping out of the side of the seat without bothering to use their legs to exit the car, lol
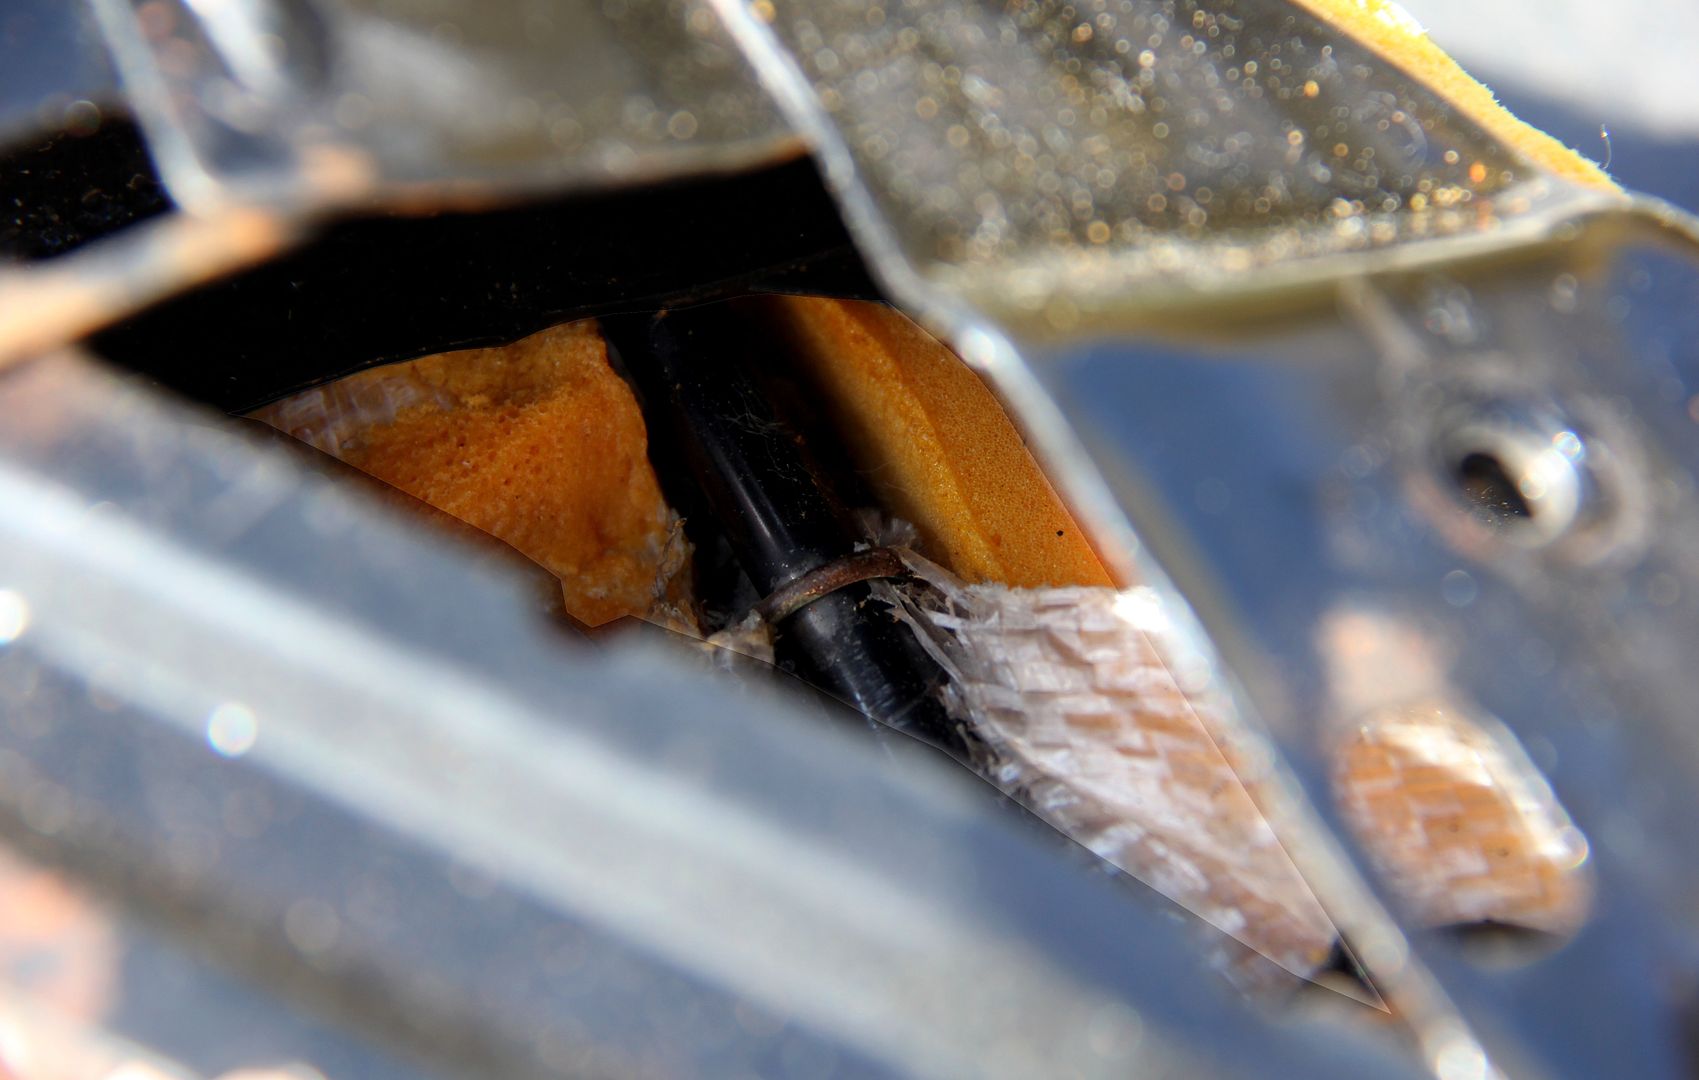
The one out of Mark's seat was a lot better, though I took the precaution of spray-fixing some linen onto the side bolster as a bit of a preventative against similar wear starting. The lines in the foam with the little circles every so often are the places where the wires in the covers go, and the little circles are where the hogrings have to be clipped through from the underside and go around the base springs (or whatever) and the cover wires.
The worst part of re-assembly was this bit at the top of the seat. Imagine the inside of this, where the right-angle of the indent for the headrest is. There are two wires in here that need to be hogringed to the frame, and they're arm-deep within the structure, holding pliers, blind, against the tension of the leather and trying to line up the rings past two ninety-degree bends in the metal. It was one of those jobs where I actually gave up in outright fury the evening of the first day because something was going to get smashed. Went back and started again in the morning, got them done first time. Bliss. The rings on the top rear wire I ended up doing by wiggling the pliers in through the holes for the plastic headrest guides. Took a few goes, but a lot easier than going in from the bottom. Oooer...
Not entirely sure why I took this photo. Maybe to illustrate that even with a choice of two completely different fasteners in the two seats I still managed to use a third one. The lumbar clicky support thing (it's basically a plate on a spring inside the back) had been my only means of adjustment on the old knackered seat so I felt it deserved the best in its new home. Interestingly, despite the fact that the cover was now fitted a lot better than it had been on the original seat, I had to enlarge the hole to let the mechanism here protrude through, which was a bit odd. I guess not all seats are exactly the same size

I know the cover fitted better because I actually managed to get it closed at the bottom. It was tight, but I used the method of putting a hogring in each side, then drawing them together with a cable tie through both, a bit like an industrial-strength zip. The I could get just a single ring through both sides and remove the extra ones and cable ties

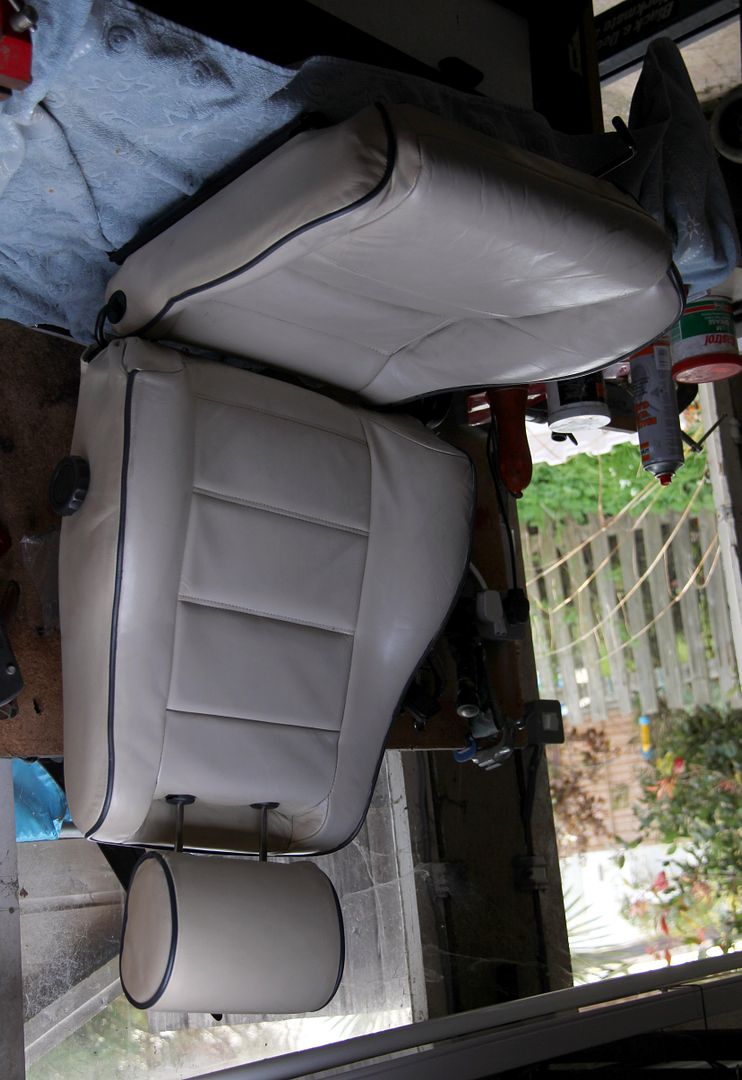
And there she is; finished. Looks slightly weird in this photo cos I gave it a going-over with the leather cleaner and hide food, so it's a bit greasy as the stuff soaks in.
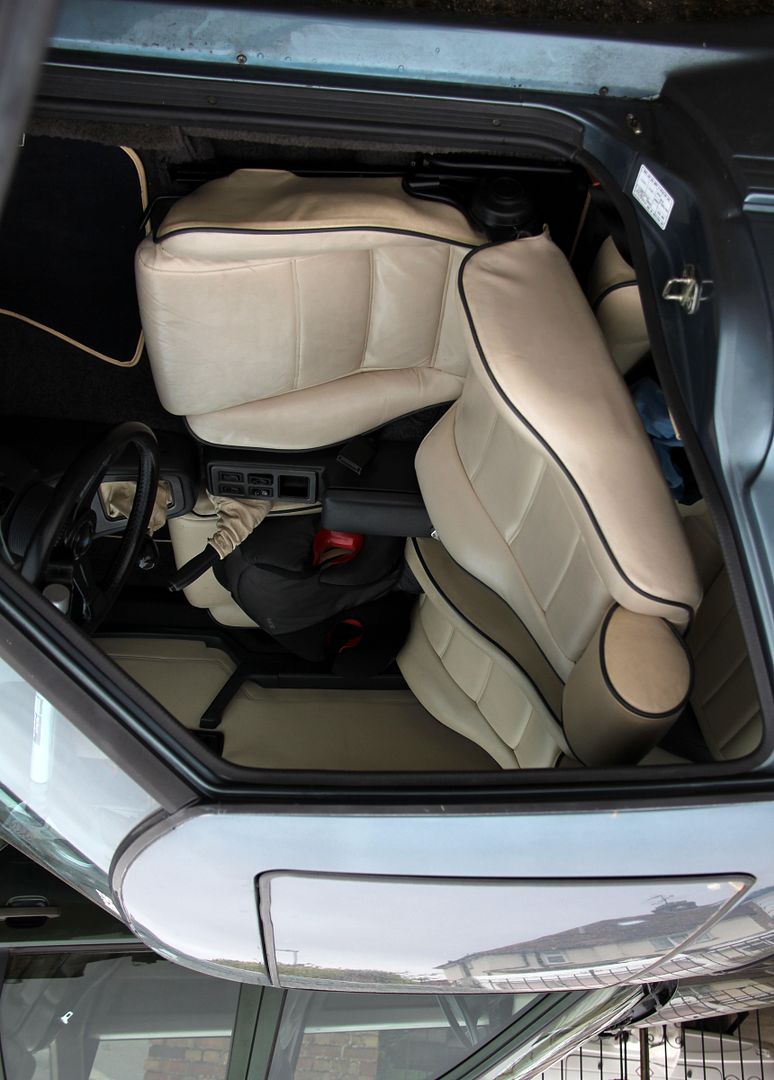
And then back in the car. Yeah, it doesn't look madly different from where I started but in terms of comfort it's a whole new car all over again. Plus I have the satisfaction of knowing it's better than new, the foam is more resilient than factory and hopefully I'll never have to see another hogring. Ever
First thing was a jaunt up to darkest Northamptonshire. Mark (K) was clearing out all his remaining FB stuff cos now he's seen the light of FD glory it was in the way and it had got to the point he was going to just tip it. I didn't really need most of it, but like all good hoarders I can't bear to see what are essentially now irreplaceable out of production parts chucked away. Because one day someone will post saying "my windscreen wiper linkage has snapped" and I'll think "ooooh, now where did I put those three I blagged off Mark!". I'm a custodian for obscurity, lol. No, please, no need to thank me
Anyway, it was weird driving actually past Santa Pod and not going in, but at least in a rare moment of perception I'd stolen the waff's F*rd rather than try to fit it all in an RX-7. Just as well. It ended up full. And I mean full!

Big thanks to Mark for insisting I took it all, anyway. I felt a bit cheeky just bunging him some beer money and scarpering. There were certainly a couple of bits that made it worth the trip for me, things I'd been after for a while. Firstly was a decent seat. The one that came with the 2nd hand leather interior I scored had a couple of problems. One was that the foam padding was completely knackered, absolutely squashed flat. Either the car it came from was owned by an elephantine fatty or it had done interstellar mileage, but after a while it got pretty uncomfortable sitting directly on non-upholstered springs and there was no lateral support at all so I tended to slide about in corners. The second problem was that the quadrant gear for the reclining mechanism had stripped all its teeth so the seat back was either all the way upright or all the way gangster lean but wouldn't stay anywhere in between.
So, the first thing I did was inexplicably manage to shatter my 12mm socket getting the runner mounting bolt undone. Yeah, that real PITA one under the rear trans-tunnel side of the seat

Hopefully this wasn't going to be an omen for how the job was going to progress. Armed with a socket that had the advantage of having all six sides still attached, I got the bugger out

Then I pressed on with disassembling the "new" seat from Mark. It's easy enough to split the seat into its halves; just a couple of socket head bolts on one side, one screw in the lumbar support crank and that's about it. I didn't touch the actual spring-loaded mechanism for the recliner; the spring in this is designed to lift fatties against gravity. If it cuts loose you're going to lose an arm!

As you can see in these comparison pics the seat backs were very different in how pert and supportive the lumbar side cushions were. Mark's seat they stand nice and proud;

on mine they're all floppy and baggy. There's probably a joke in there somewhere. Not only that, but presumably because this was a one-off trimming job, the dimensions of the leather are clearly slightly wrong to the point the trimmer couldn't even get it fastened underneath where the back mounts to the base, and all the foam was just hanging out of its gaping gusset. Euwww. Definitely a joke in there

So essentially what holds the seatcover to the frame are hogrings. These are little c-shaped clips that when you squeeze them in the jaws of special pliers (called hogring pliers, imaginatively) make a spiral shape and clamp the fabric or leather to wires inserted through the foam or to the seat springs. Fortunately, having stripped and repaired the leather seat on my FD, I had some pliers and hogrings leftover. The pliers are devilishly simple yet clever, like all the best inventions. They're essentially sprung snipe-nose pliers with a dentent machined into each jaw that grips the hogring and forces it round on itself when you squeeze the handle. The spring keeps the jaws gripping the hogring so they are one-handed to use while you manouvre the material into the right place with the other
However, nothing is as easy in practice as in theory, and before I could even think of using clever pliers I had to strip both seats.. which meant uncurling a load of hogrings. And there are a LOT! Some are obvious, some more hidden. For example, every arrow on this pic of the base is a hogring. The easiest way to to lever a slight gap in the ring with a screwdriver, then un-curl it with longnosed pliers. However, restricted access sometimes makes this a properly irritating test of patience

by way of example, there is one here, in the corner-web of the seat base structure, clipped around the frame of the springs. This space is about two inches by three, surrounded by sharp metal edges. Yeah, these ones had me inventing some new swear words just for the occasion!

However, it's a therapeutically simple procedure and basically I like the fact that an entire seat can be stripped and re-assembled using these few tools;

The back is a bit more complex than the base. It has this weird plastic tray in it, presumably to give the back of it some rigidity. It's held on by freaky rubbery surgical tape where the glue has gone weird with age and heat and basically turned into some kind of permanently gooey un-set tar type stuff that sticks to bloody everything.

The seat cover has pockets that basically stick backwards from the inside of the front face and these are hogring-ed through the foam to the spring structure at the back of the frame. Which means you have to get right down in here with your two pliers/screwdriver routine, all the while needing at least two extra hands to hold the damned thing apart for access. Nadgery doesn't even come close to describing it, and I gained a whole new respect for people who do this for a living!

At first I was stymied as to how to remove the headrest, until I discoverd that a) some squirty grease freed up the seized runners nicely and b) one of the plastic guides that hold the runners in the seat has a little spring clip built into it that you can release through a tiny groove using a small screwdriver. Then I could remove the plastic guides from the top of the seat, the last thing holding the cover on

One of these was broken on my old seat, so it was good to get a decent pair fitted and stop the slight lateral movement in the headrest. So, all disassembled, the poor state of the foam can clearly be seen now. Here the arrow shows where the metal frame of the base has actually worked its way through the foam and the foam itself is all distorted and useless. This is caused by decades of lazy people flopping out of the side of the seat without bothering to use their legs to exit the car, lol

The one out of Mark's seat was a lot better, though I took the precaution of spray-fixing some linen onto the side bolster as a bit of a preventative against similar wear starting. The lines in the foam with the little circles every so often are the places where the wires in the covers go, and the little circles are where the hogrings have to be clipped through from the underside and go around the base springs (or whatever) and the cover wires.

The worst part of re-assembly was this bit at the top of the seat. Imagine the inside of this, where the right-angle of the indent for the headrest is. There are two wires in here that need to be hogringed to the frame, and they're arm-deep within the structure, holding pliers, blind, against the tension of the leather and trying to line up the rings past two ninety-degree bends in the metal. It was one of those jobs where I actually gave up in outright fury the evening of the first day because something was going to get smashed. Went back and started again in the morning, got them done first time. Bliss. The rings on the top rear wire I ended up doing by wiggling the pliers in through the holes for the plastic headrest guides. Took a few goes, but a lot easier than going in from the bottom. Oooer...

Not entirely sure why I took this photo. Maybe to illustrate that even with a choice of two completely different fasteners in the two seats I still managed to use a third one. The lumbar clicky support thing (it's basically a plate on a spring inside the back) had been my only means of adjustment on the old knackered seat so I felt it deserved the best in its new home. Interestingly, despite the fact that the cover was now fitted a lot better than it had been on the original seat, I had to enlarge the hole to let the mechanism here protrude through, which was a bit odd. I guess not all seats are exactly the same size

I know the cover fitted better because I actually managed to get it closed at the bottom. It was tight, but I used the method of putting a hogring in each side, then drawing them together with a cable tie through both, a bit like an industrial-strength zip. The I could get just a single ring through both sides and remove the extra ones and cable ties

And there she is; finished. Looks slightly weird in this photo cos I gave it a going-over with the leather cleaner and hide food, so it's a bit greasy as the stuff soaks in.

And then back in the car. Yeah, it doesn't look madly different from where I started but in terms of comfort it's a whole new car all over again. Plus I have the satisfaction of knowing it's better than new, the foam is more resilient than factory and hopefully I'll never have to see another hogring. Ever

-
Lucky
- VIP User
- Posts: 2685
- Joined: Mon Nov 07, 2011 8:30 pm
- Location: Worthing, UK
- Been thanked: 5 times
Re: Lucky's Series 3
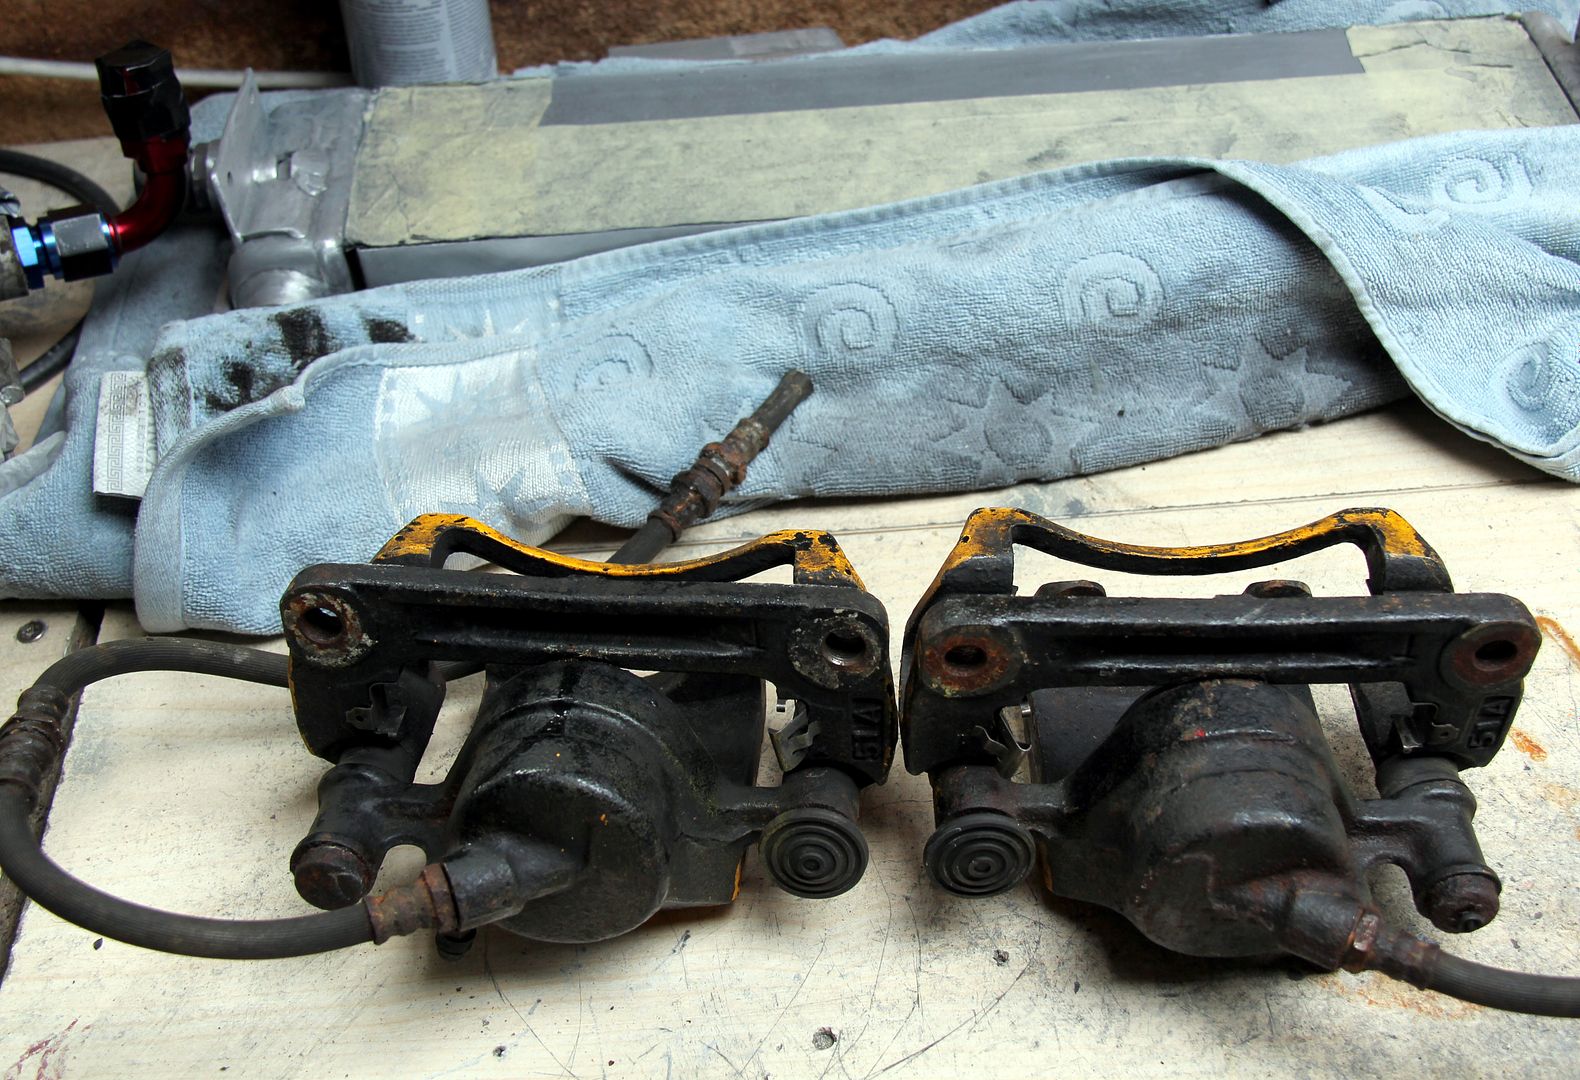
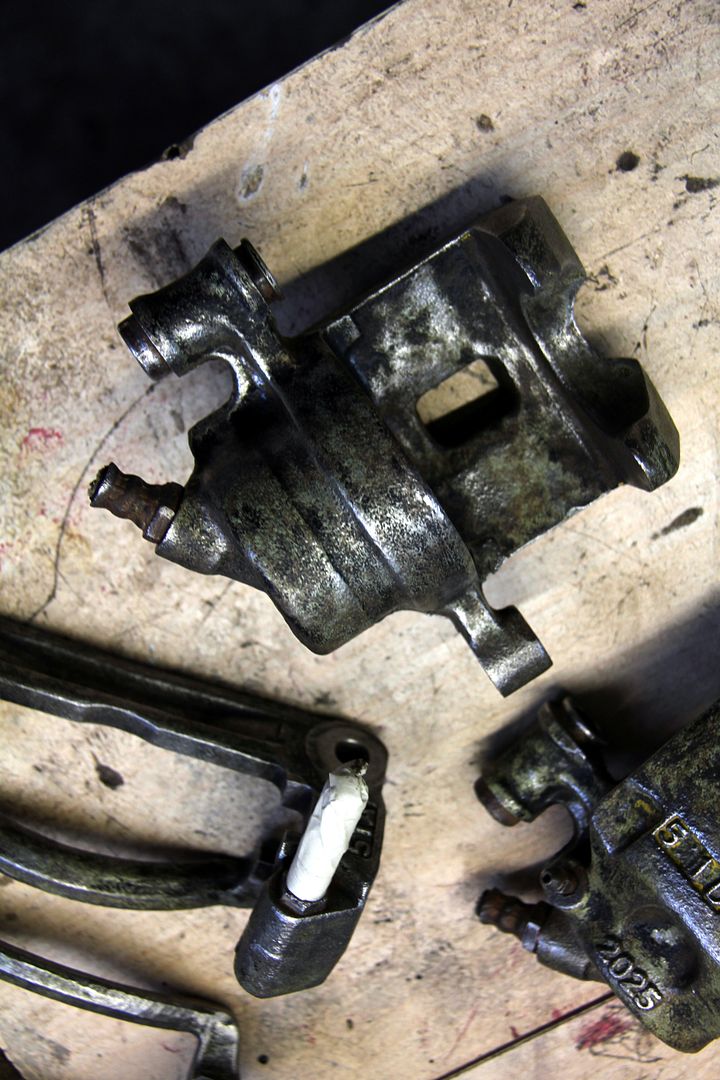
Right, with the seat laid to rest I could move on to the next main item that made it worthwhile taking the trek up to remove Mark's FB mountain. Brakes. The calipers on my car have an unpleasant habit of sticking on, or at least the offside one does. First time it happened it almost ended with me in a hedge, and it had the brake disc red-hot with smoke pouring off it. A strip and clean of the sliders helped a bit but it's clear the piston is sticking in the bore and frequent use pumps it further and further out as it can't return quickly enough. Eventually the pads are permanently engaged on the disc and it overheats and gets ugly. I didn't want to overhaul the calipers that were on the car because then it would be incapacitated for as long as it took, so I was after a spare set to work on in my own time off the car. Fortunately, in mark's haul was a pair of Series 3 calipers ripe for a refurb

errrr, yeah, they were a bit grimy. OK, a lot grimy. And they'd fallen prey to Mark's fetish for painting everything yellow, lol. But it was a start
Actually, I owe a debt of thanks and respect to Mark because as I started stripping them down it became clear they'd been in the hands of someone with sense and foresight; plenty of copperslip meant that they came apart a lot easier than I was dreading, and the important slider bearing surfaces were in good nick. The only thing I had to get a bit medieval with were the brakeline fittings, which were pretty well stuck. A bit of heat and cutting them short enough to get a long socket over and thus use a breaker bar got them out eventually. I had some stainless lines to go on, so wouldn't need these and could afford to sacrifice them
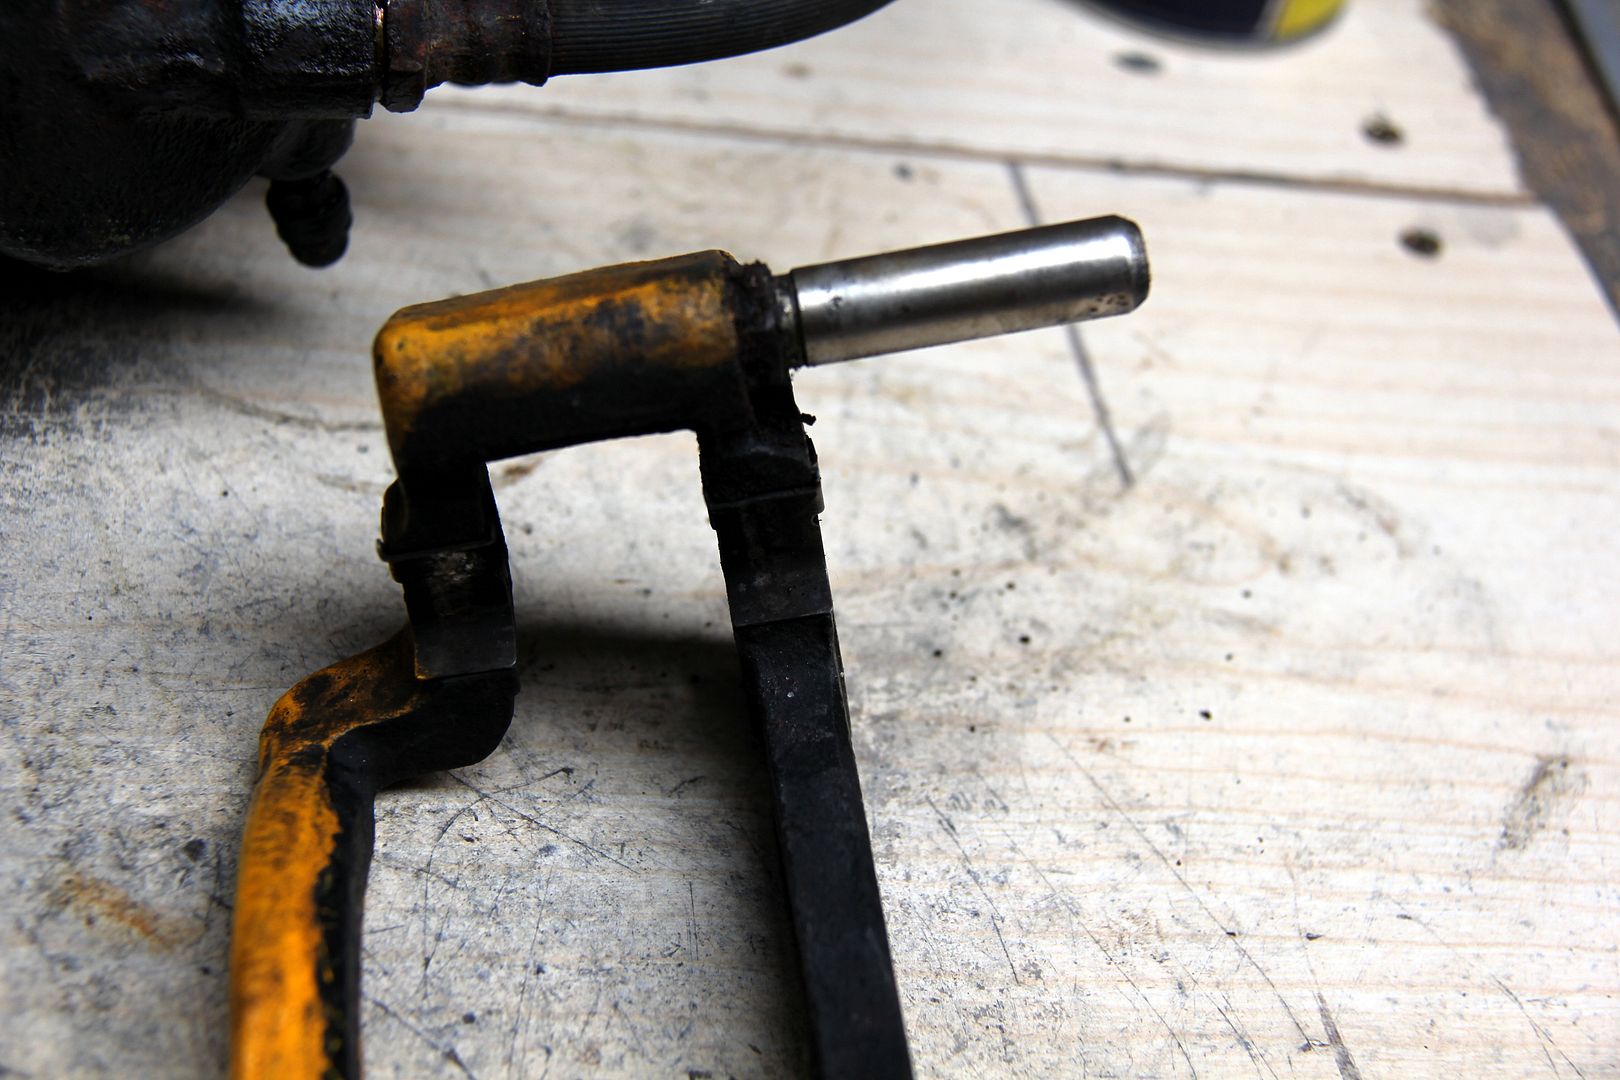
Even the bleed nipples came undone, despite being rusty enough that they might have come off the Lusitania. But then I hit a brick wall. The pistons were absolutely bloody welded to the bores
Every time I've previously worked on brakes they've been off a bike where the multipiston calipers make it a bit less of a brute force exercise. On this occasion, the old trick of putting an airline in the brake hose hole and blowing the piston out had no effect whatsoever. They didn't budge one mil. Neither could they be levered out with a pry bar, nor a massive set of Stilsons. Soaking in diesel or WD40 seemingly made no difference. One of the mechanics at Super 7 made a suggestion when I went to blag the use of their airline, and though made half-jokingly, it made sense, having seen what it does to 2p pieces and stuff. He said he used to use it on old Triumph Stags where the head bolts had cold-welded themselves to the rocker boxes and the only way to dissolve the bond was to soak in this particular solvent. The one in question?

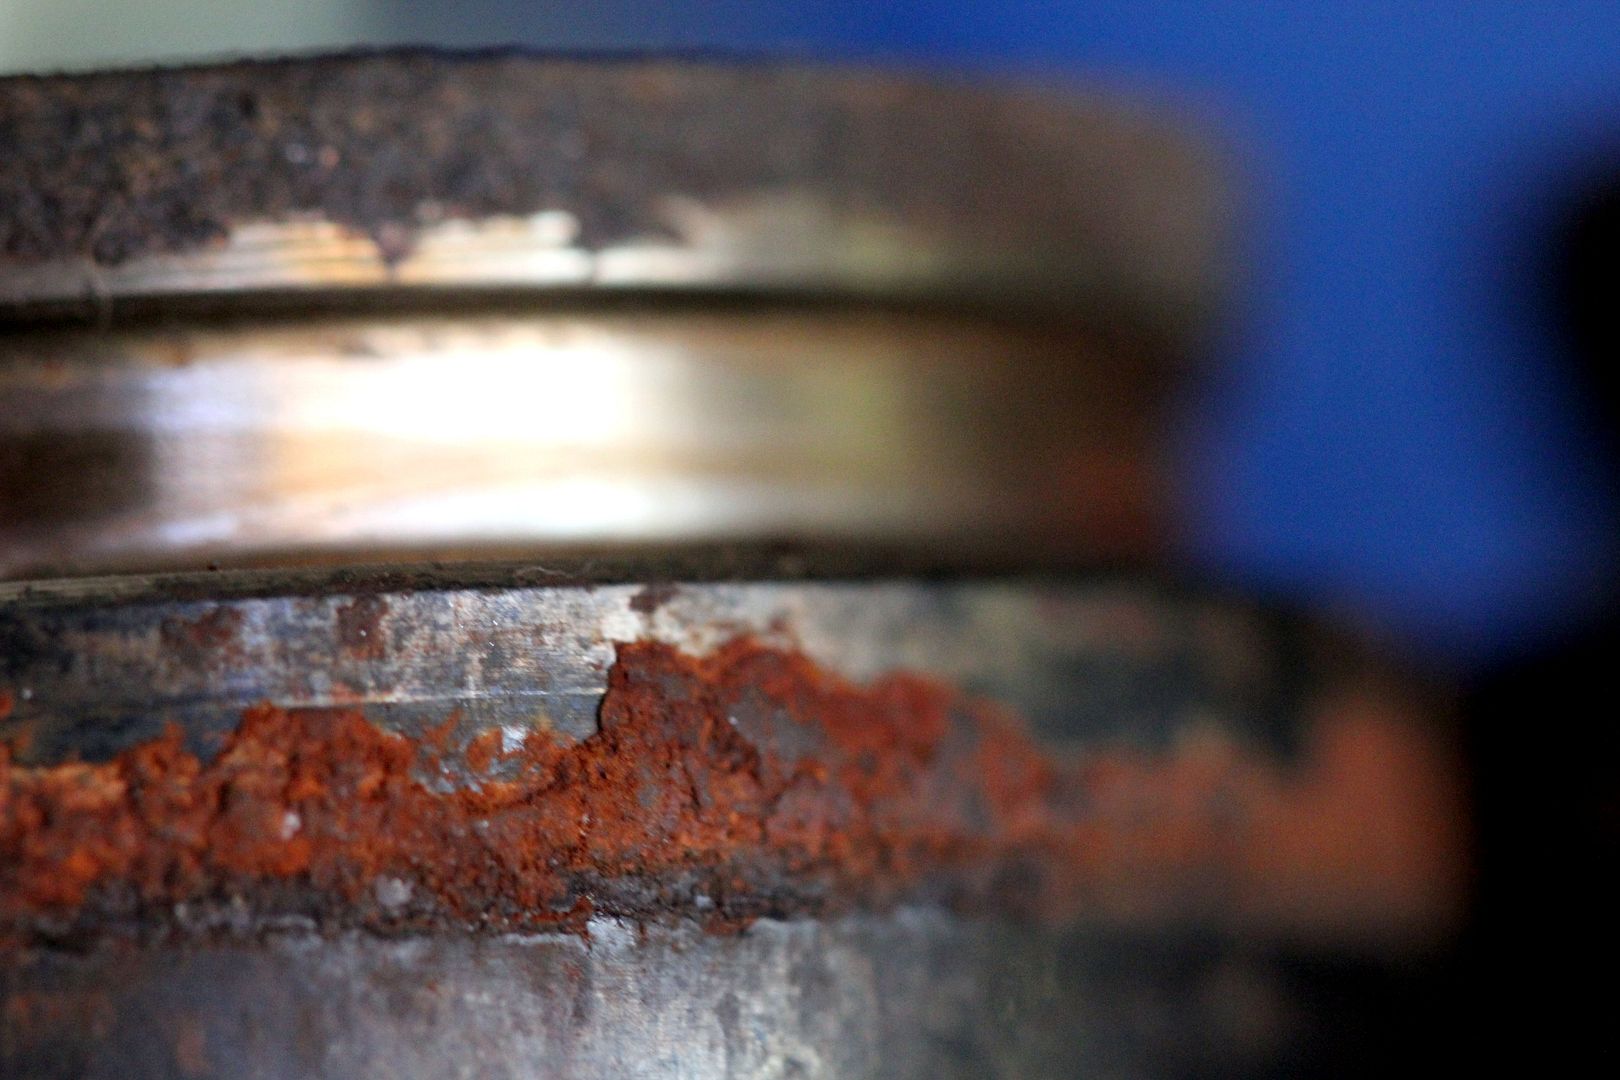
Coke. I figured, what the hell? Coke is cheaper per litre than diesel or WD40, and I'd rather use it to clean brake components than drink it. I had a tub that just fitted two litres of coke and one caliper, so I left it soaking for a few days just out of scientific curiosity as anything else. And guess what? Yep, it didn't work. In the end, I had to resort to the extremely long-winded method of enlisting a brake-pedal monkey, then unbolting one caliper from the car, connecting one of the seized ones, bleeding it up to pressure, using the hydraulics to blow out the piston, connecting the second one, bleeding it, blowing out the piston, re-connecting the original, bleeding it, and finally mopping up the gallons of spilled brake fluid that had gone everywhere. Still, a morning well spent and at the end it seemed I owed Chris the mechanic an apology. It appears the Coke had actually worked, and if I'd been more patient and left it a while longer it may have broken the corrosion bond completely. See if you can spot which one was soaking in the Coke;

Remarkable, really! just imagine what it's doing to your insides... It might have been possible to clean these pistons up but I figured why go to all this trouble and do half a job, so I ordered new ones along with the seal kits. Why trust my brakes to corrosion like this? I know already how easy it is to end up with seizing brakes, I might as well do it properly
So this was what I ended up ordering in from the excellent Brakeparts.co.uk as directed to by MR TOOL. The guy there was really helpful on the phone, and they gave very quick professional service on stuff. At one point I was actually going to order in new calipers as well... until I found out you can't get them any more!

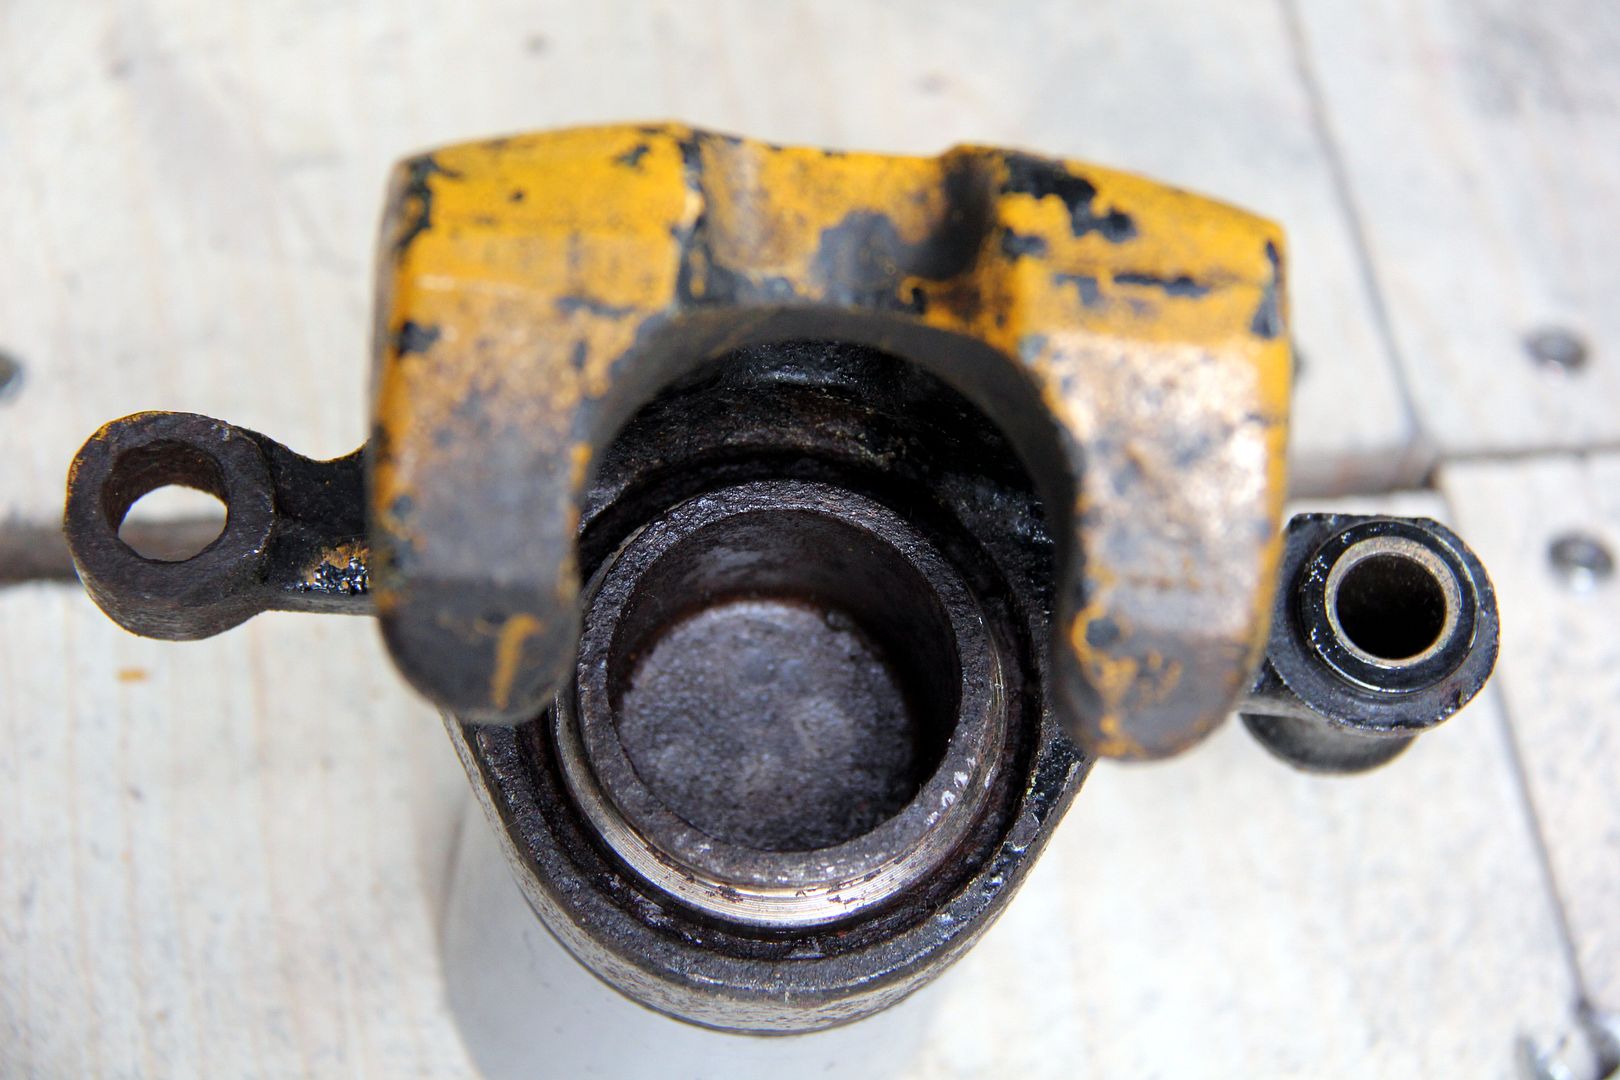
The scunge left behind the pistons' eviction was pretty gnarly; a delightfully heady cocktail of rust, Coke and brakefluid. So quite a lot like Dr Pepper, really.
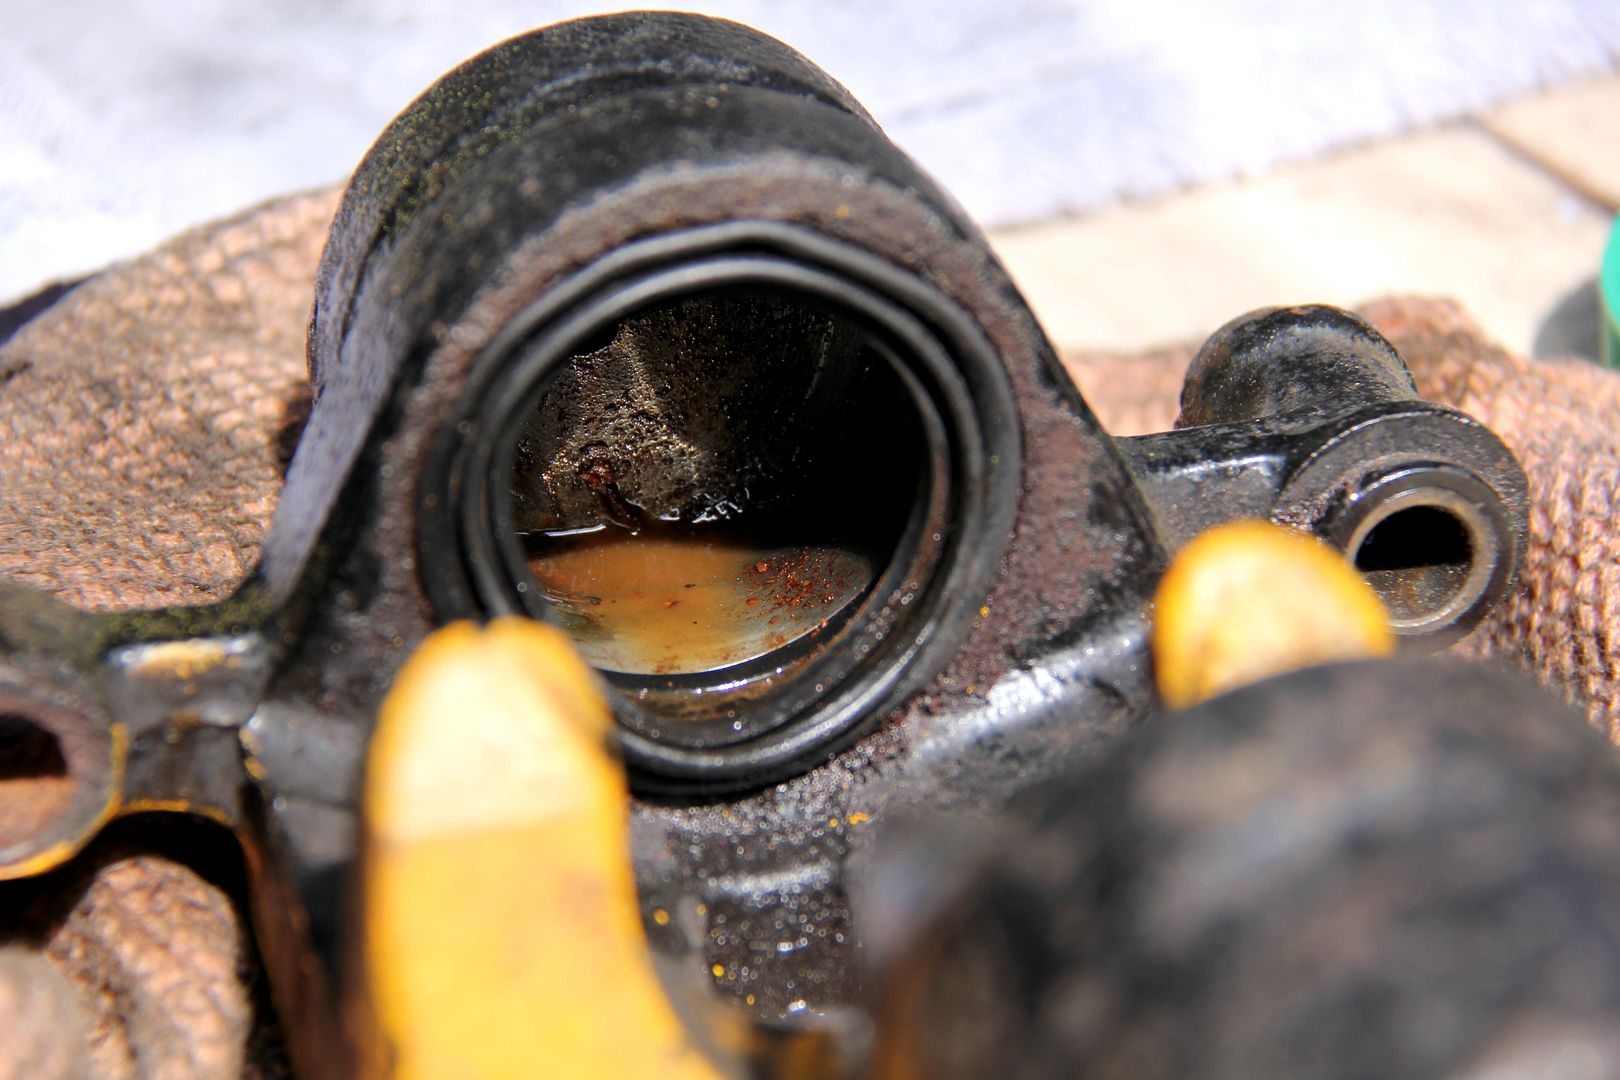
but once I got into cleaning them up it seemed I'd been lucky (lol). The bores were actually in really good shape. The dust seal groove was corroded, but the one for the square-cut fluid seal was OK. They both came up really well with those little Dremel chimney-sweep style wire brushes, which could have been made for this very application
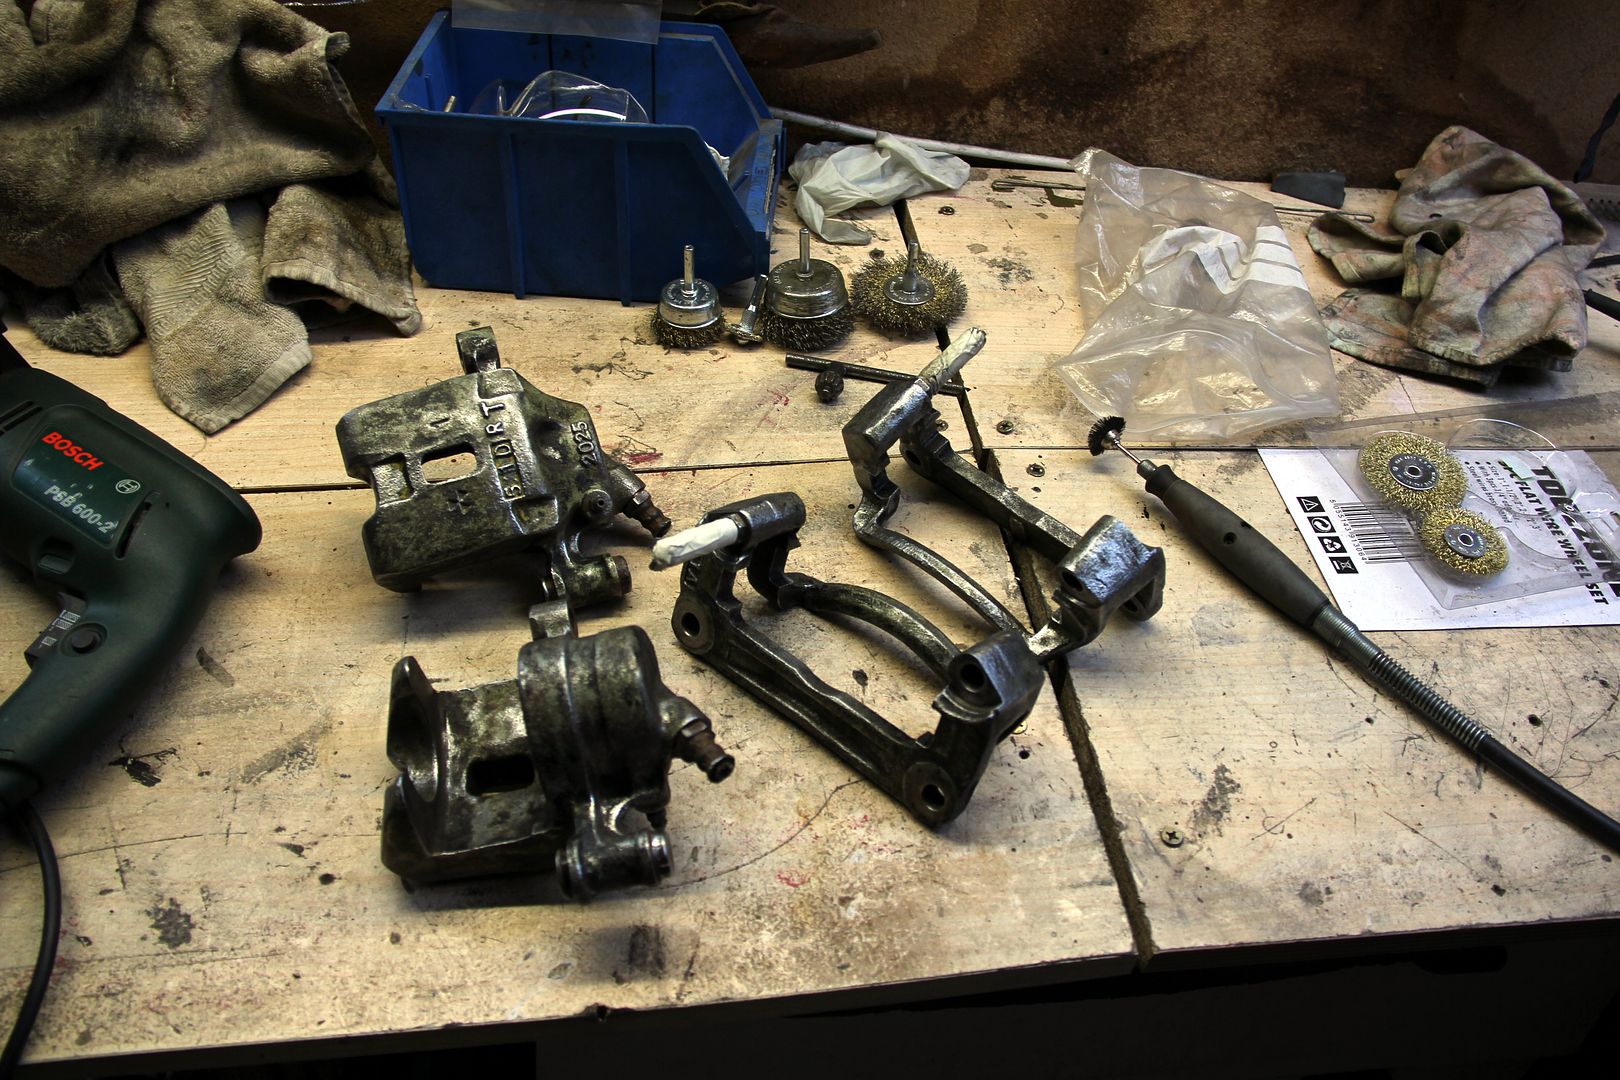
For the main clean-up of the actual caliper bodies it took something a bit more manly, though and a drill-powered wire brush set was sacrificed for the greater good
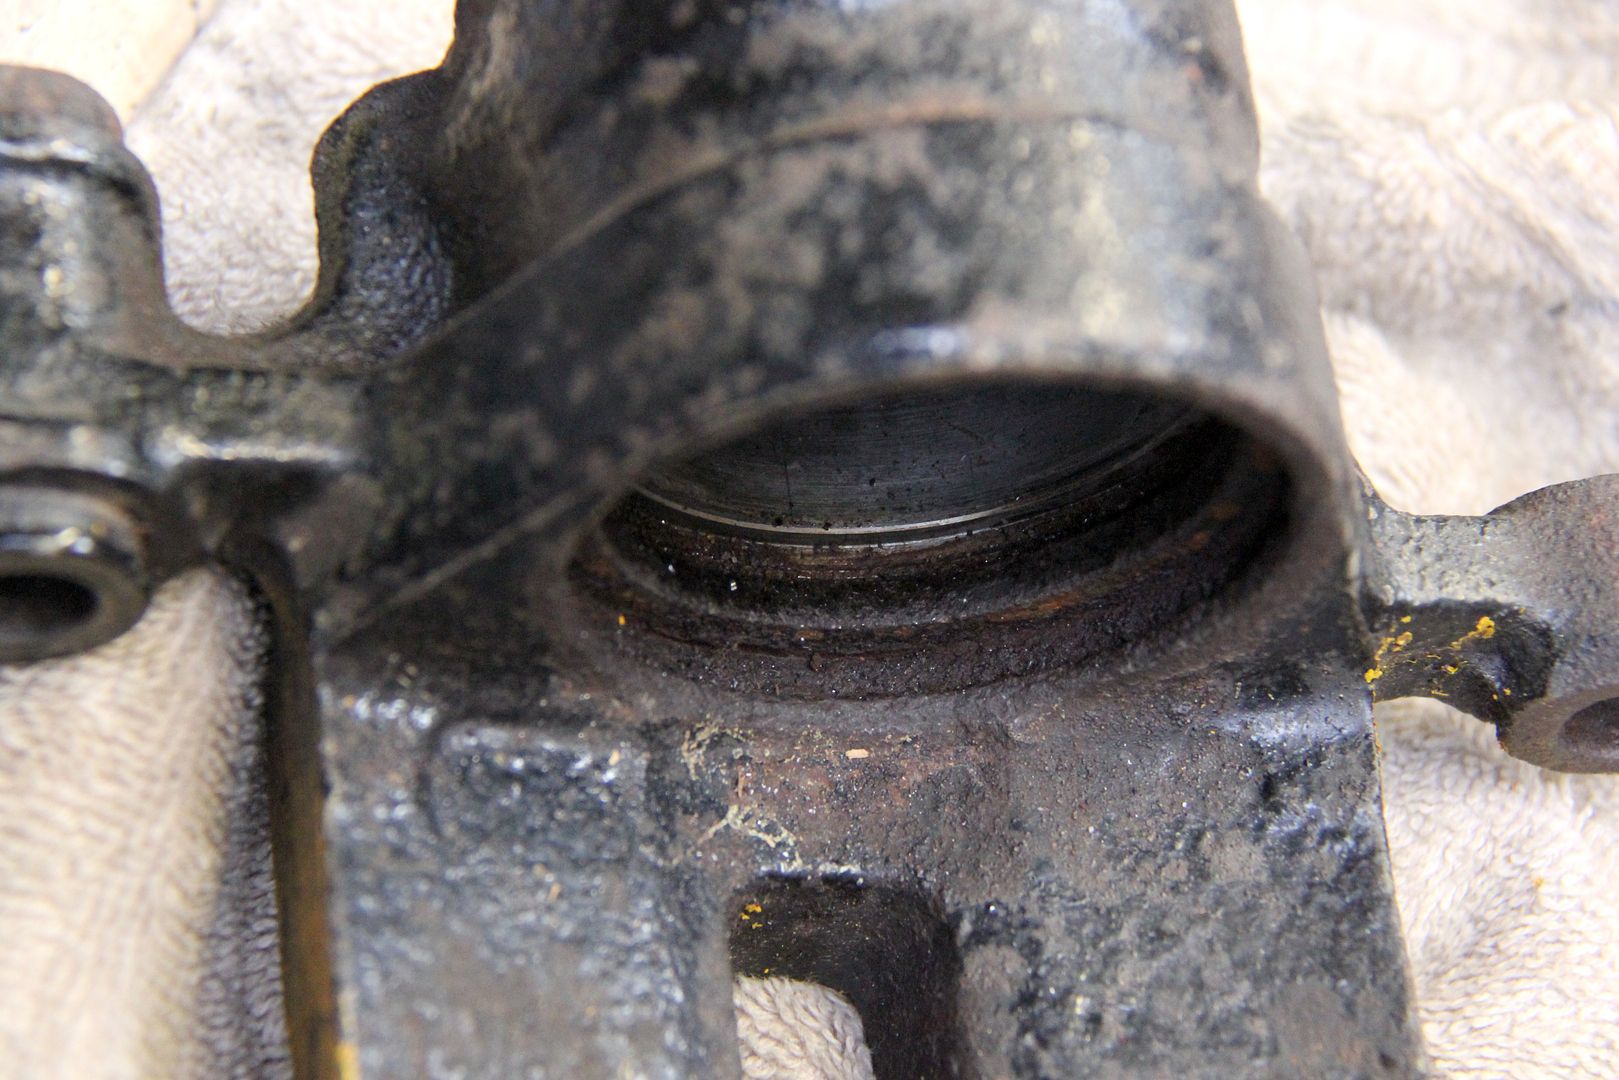
They don't look too lovely even cleaned up, to be fair, but I thought it best to take them as far back to bare metal as I had the patience to, in order to ensure as good a finish as possible
This shows the bore cleaned up as best as possible. There' nothing I could really do about the corrosion in the dust seal groove, it is what it is. Since the top seal isn't the working one and is really just to stop crap getting in the bore, it's not crucial and I elected to do a thin coat of paint to stop it rusting back again once built up

and then basically I could mask up and get painting. I debated about what colour to go for. I always think (for no especially cogent reasoning, I admit) that brakes should be either gold or red. What can I say, I'm a sucker for shiny things and "motorsport" styling. With that said, those colours work well on big, manly multi-piston calipers but on these sliding one-pots red would probably look a bit daft and M*x P*wer. Also, it had to be a heat-tolerant paint and the only gold colour I found in proper caliper paint was a nasty bright yellow. Since I did my FD calipers with Hammerite several years back and they're still holding up well, I went for Hammerite Copper Smooth in the end. Which is actually gold. Unlike their Gold, which is metallic yellow. Odd, but true...

Took a couple of coats on all the parts to get a nice coverage. I masked up all the bearing surfaces first, obviously, and sacrificed the old bleed nipples and flexi lines as bungs to protect the threads. Hammerite isn't something you want to be trying to remove from unwanted places!
And once the painting was finished, the re-assembly. I used proper red rubber grease, because nothing else is good for rubber components; most other greases will make the rubber seals swell or react with brakefluid. I've had great results with this stuff on rebuilt bike calipers in the past. The trickiest part of the whole thing was getting the stupid circlip for the dust seals seated properly; they seem to have a spring force in them that could fire a human cannonball (and nearly did, several times). In addition, there's no means of actually holding them with a tool (no detent for circlip pliers and normal snipe-nosed ones just slip off). There's probably a technique that makes it easy, but I never discovered it. I eventually held one end in place with a small screwdriver and then worked round the spring with another screwdriver to the other end, seating it as I went. This took several attempts, and all the while I was painfully aware how easy it would be to tear the fragile seal. A most annoying part of the job!

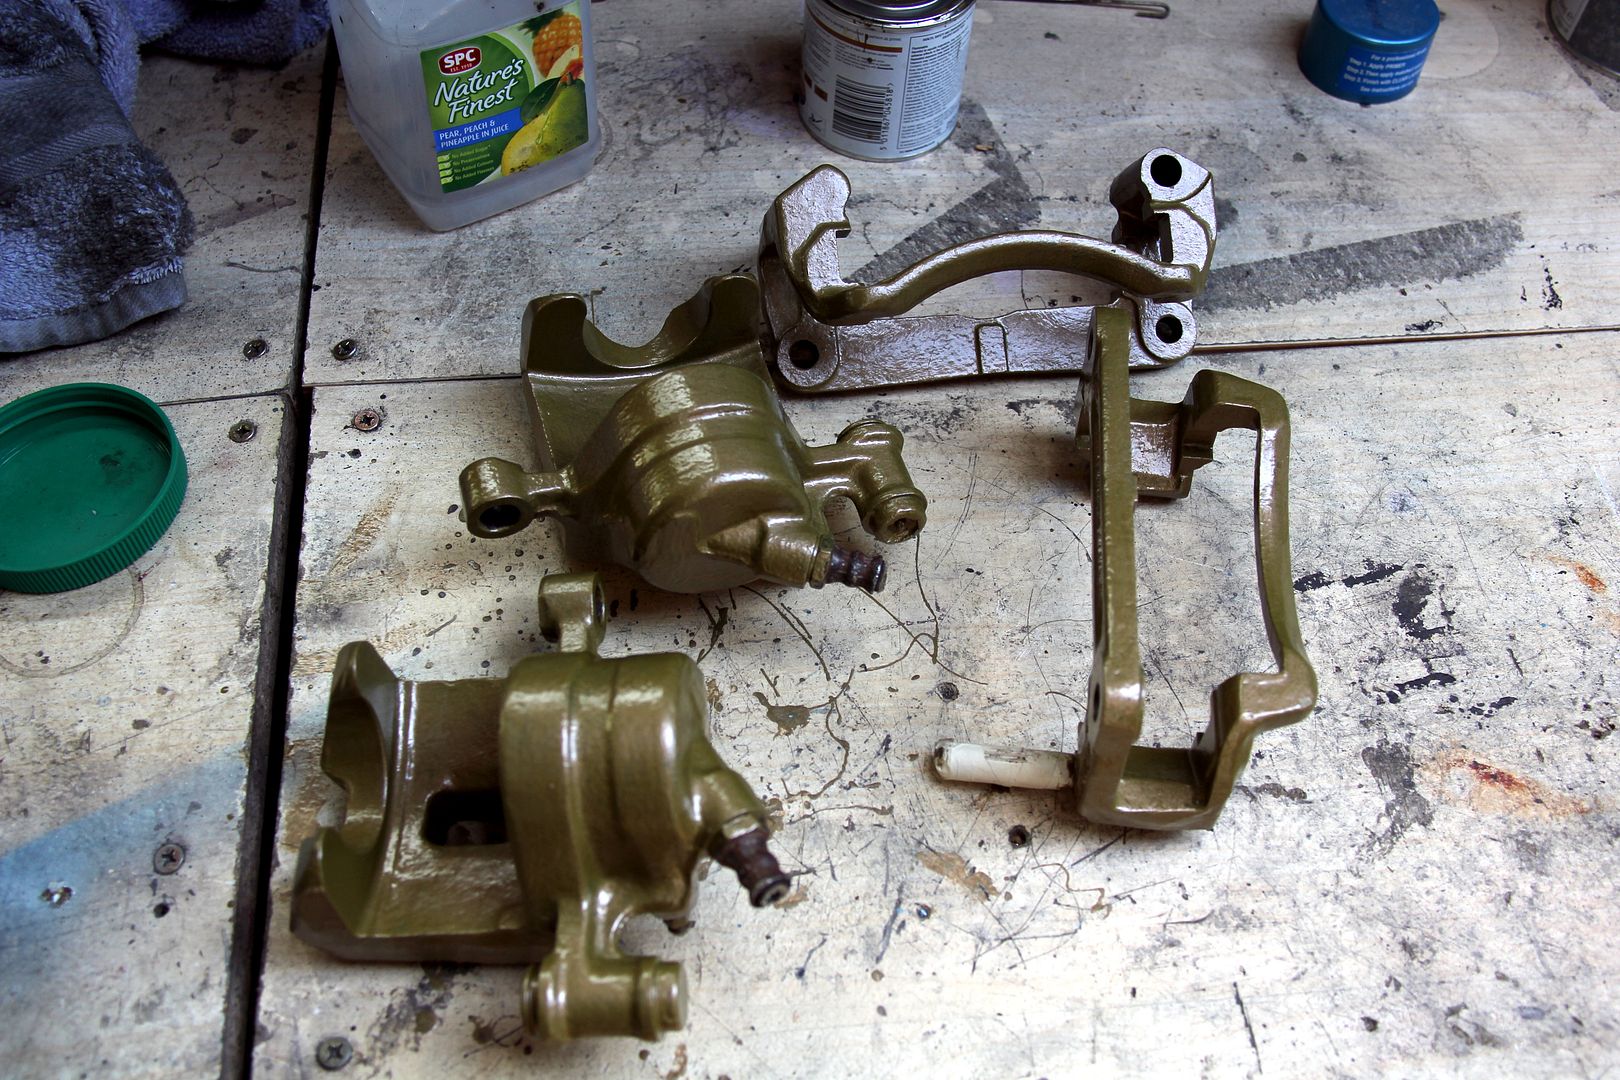
However, finally it was done and a quick whizz over all the brake pad shim clips with the wire brush, all new rubber bushes from the rebuild kit inserted and it all greased up with red rubber grease all that remained was to connect up the new braided lines (with new copper washers) and add these little critters...
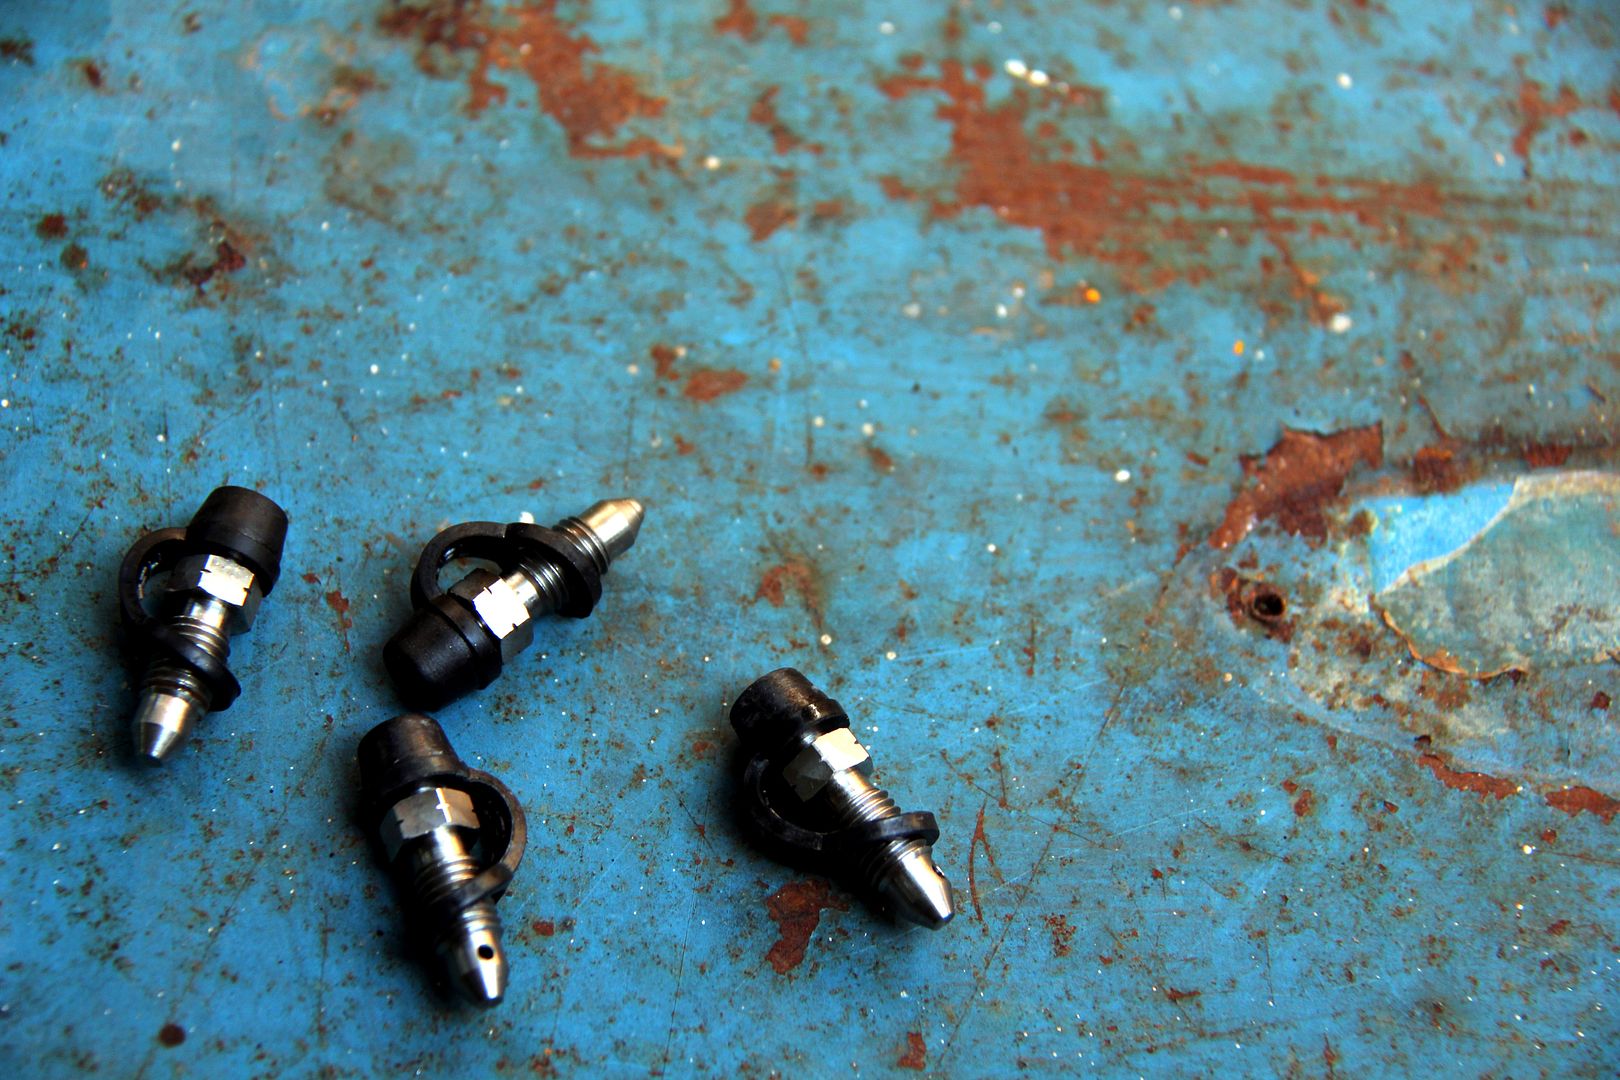
...some nice new stainless steel bleed nipples with new dust boots. Hopefully you'll agree that when you compare how they were to start with;
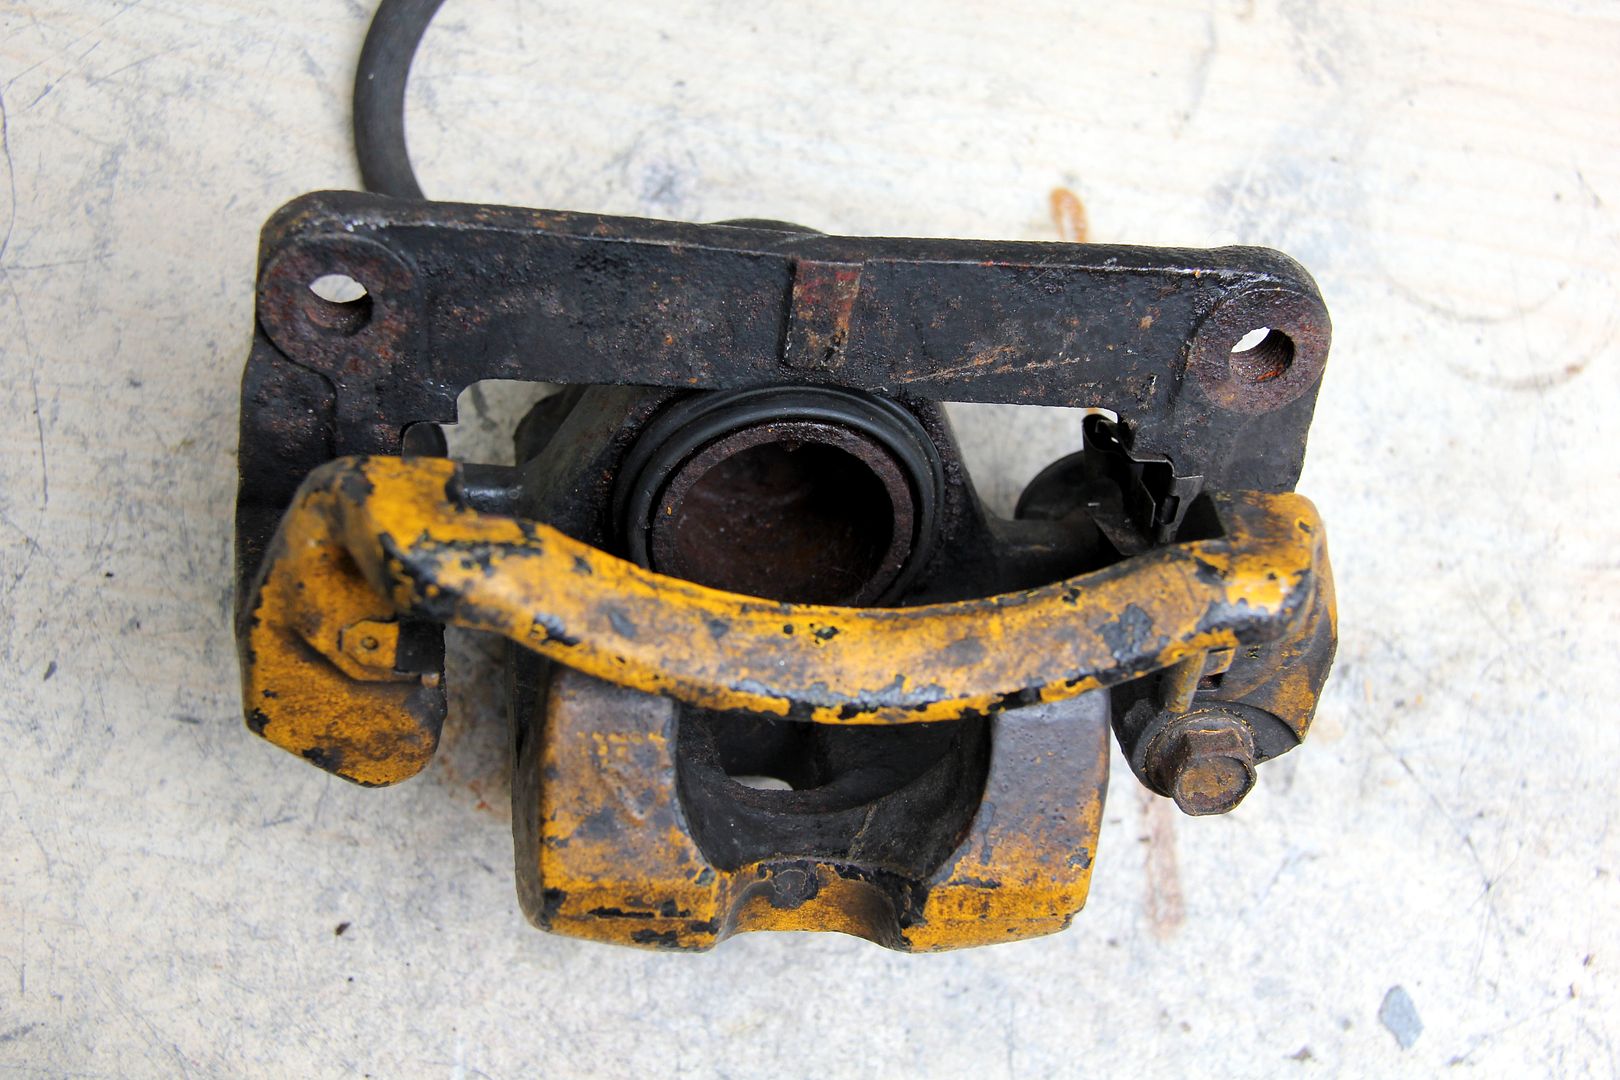
with how they ended up;
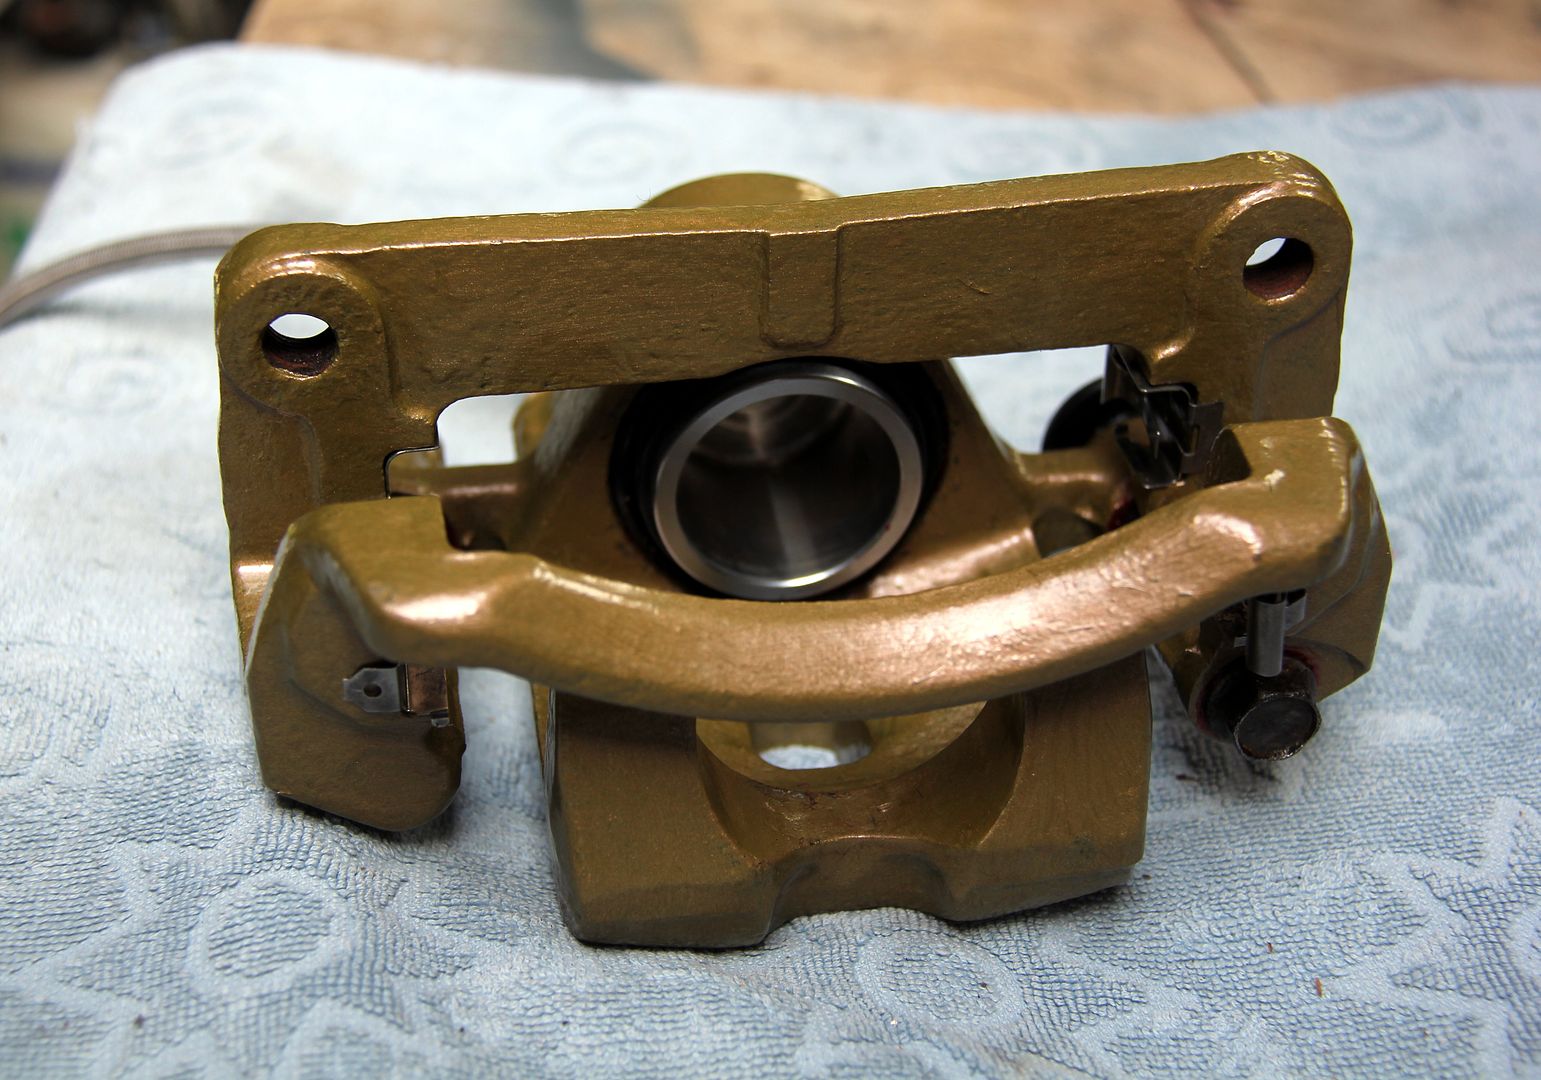
it was worth all the faffing about! More...

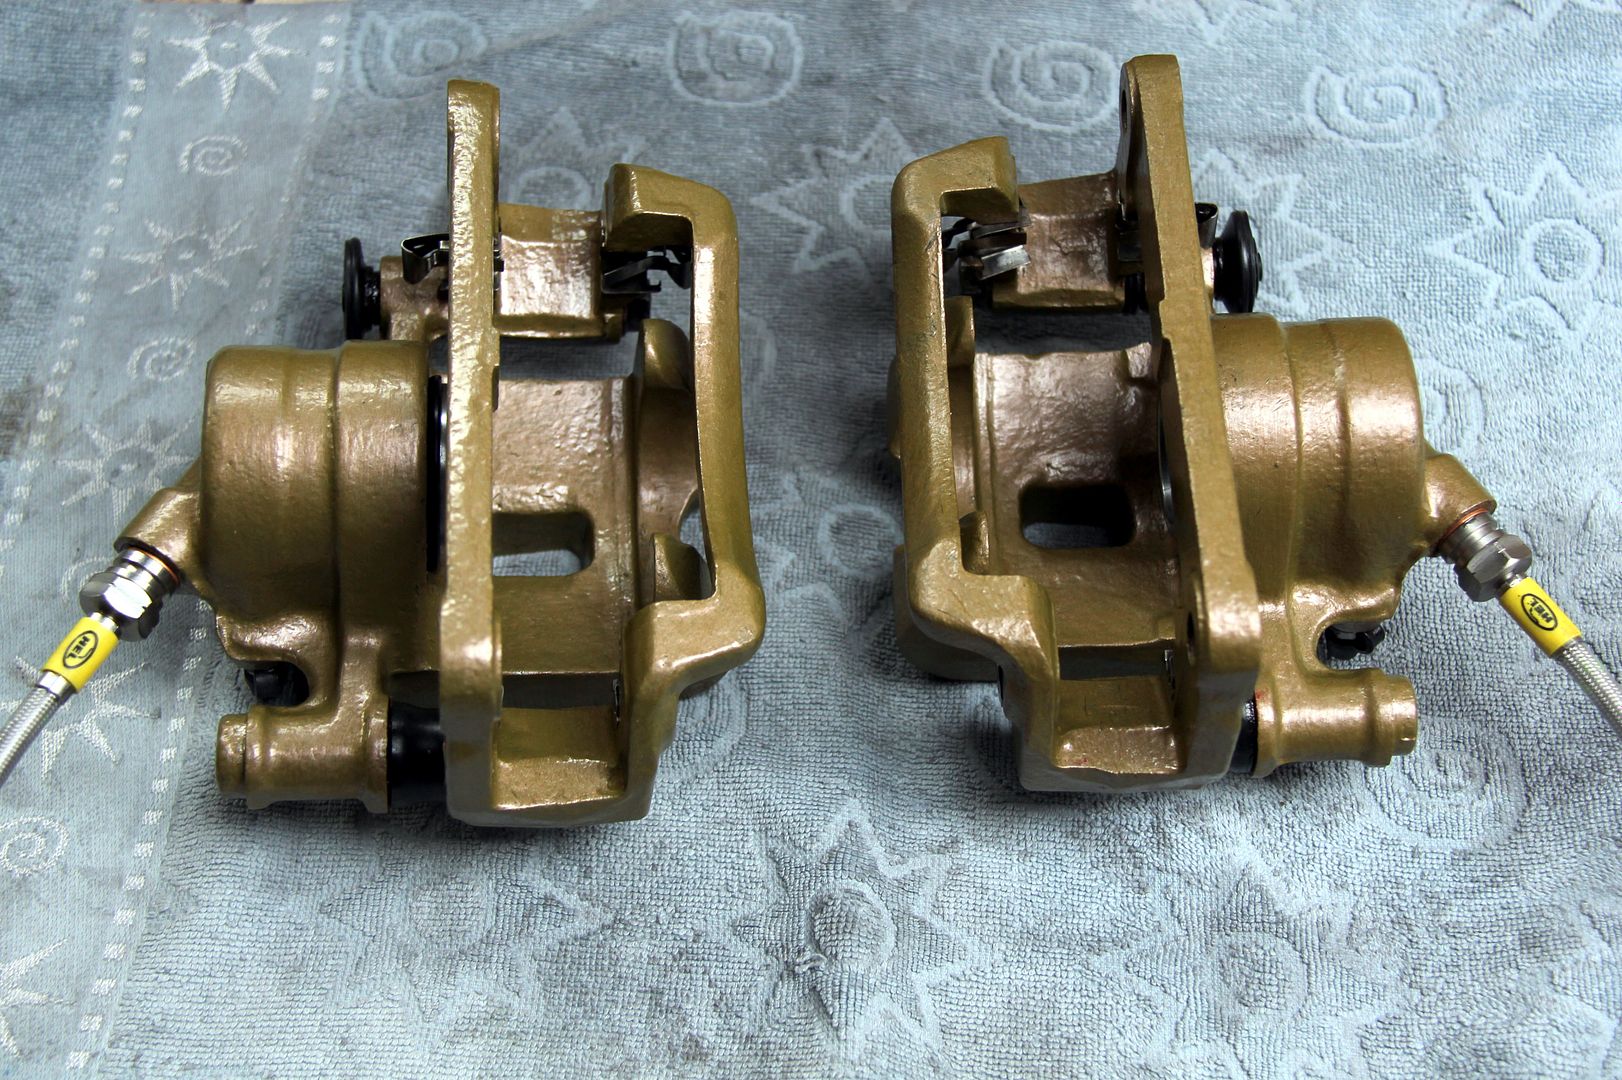
Almost too nice to bolt onto a car and get all covered in crap! But at least I can have reasonable confidence when I do that these ones won't be trying to have me into a ditch and set fire to the car!


errrr, yeah, they were a bit grimy. OK, a lot grimy. And they'd fallen prey to Mark's fetish for painting everything yellow, lol. But it was a start

Actually, I owe a debt of thanks and respect to Mark because as I started stripping them down it became clear they'd been in the hands of someone with sense and foresight; plenty of copperslip meant that they came apart a lot easier than I was dreading, and the important slider bearing surfaces were in good nick. The only thing I had to get a bit medieval with were the brakeline fittings, which were pretty well stuck. A bit of heat and cutting them short enough to get a long socket over and thus use a breaker bar got them out eventually. I had some stainless lines to go on, so wouldn't need these and could afford to sacrifice them

Even the bleed nipples came undone, despite being rusty enough that they might have come off the Lusitania. But then I hit a brick wall. The pistons were absolutely bloody welded to the bores

Every time I've previously worked on brakes they've been off a bike where the multipiston calipers make it a bit less of a brute force exercise. On this occasion, the old trick of putting an airline in the brake hose hole and blowing the piston out had no effect whatsoever. They didn't budge one mil. Neither could they be levered out with a pry bar, nor a massive set of Stilsons. Soaking in diesel or WD40 seemingly made no difference. One of the mechanics at Super 7 made a suggestion when I went to blag the use of their airline, and though made half-jokingly, it made sense, having seen what it does to 2p pieces and stuff. He said he used to use it on old Triumph Stags where the head bolts had cold-welded themselves to the rocker boxes and the only way to dissolve the bond was to soak in this particular solvent. The one in question?

Coke. I figured, what the hell? Coke is cheaper per litre than diesel or WD40, and I'd rather use it to clean brake components than drink it. I had a tub that just fitted two litres of coke and one caliper, so I left it soaking for a few days just out of scientific curiosity as anything else. And guess what? Yep, it didn't work. In the end, I had to resort to the extremely long-winded method of enlisting a brake-pedal monkey, then unbolting one caliper from the car, connecting one of the seized ones, bleeding it up to pressure, using the hydraulics to blow out the piston, connecting the second one, bleeding it, blowing out the piston, re-connecting the original, bleeding it, and finally mopping up the gallons of spilled brake fluid that had gone everywhere. Still, a morning well spent and at the end it seemed I owed Chris the mechanic an apology. It appears the Coke had actually worked, and if I'd been more patient and left it a while longer it may have broken the corrosion bond completely. See if you can spot which one was soaking in the Coke;

Remarkable, really! just imagine what it's doing to your insides... It might have been possible to clean these pistons up but I figured why go to all this trouble and do half a job, so I ordered new ones along with the seal kits. Why trust my brakes to corrosion like this? I know already how easy it is to end up with seizing brakes, I might as well do it properly

So this was what I ended up ordering in from the excellent Brakeparts.co.uk as directed to by MR TOOL. The guy there was really helpful on the phone, and they gave very quick professional service on stuff. At one point I was actually going to order in new calipers as well... until I found out you can't get them any more!

The scunge left behind the pistons' eviction was pretty gnarly; a delightfully heady cocktail of rust, Coke and brakefluid. So quite a lot like Dr Pepper, really.

but once I got into cleaning them up it seemed I'd been lucky (lol). The bores were actually in really good shape. The dust seal groove was corroded, but the one for the square-cut fluid seal was OK. They both came up really well with those little Dremel chimney-sweep style wire brushes, which could have been made for this very application

For the main clean-up of the actual caliper bodies it took something a bit more manly, though and a drill-powered wire brush set was sacrificed for the greater good

They don't look too lovely even cleaned up, to be fair, but I thought it best to take them as far back to bare metal as I had the patience to, in order to ensure as good a finish as possible

This shows the bore cleaned up as best as possible. There' nothing I could really do about the corrosion in the dust seal groove, it is what it is. Since the top seal isn't the working one and is really just to stop crap getting in the bore, it's not crucial and I elected to do a thin coat of paint to stop it rusting back again once built up

and then basically I could mask up and get painting. I debated about what colour to go for. I always think (for no especially cogent reasoning, I admit) that brakes should be either gold or red. What can I say, I'm a sucker for shiny things and "motorsport" styling. With that said, those colours work well on big, manly multi-piston calipers but on these sliding one-pots red would probably look a bit daft and M*x P*wer. Also, it had to be a heat-tolerant paint and the only gold colour I found in proper caliper paint was a nasty bright yellow. Since I did my FD calipers with Hammerite several years back and they're still holding up well, I went for Hammerite Copper Smooth in the end. Which is actually gold. Unlike their Gold, which is metallic yellow. Odd, but true...

Took a couple of coats on all the parts to get a nice coverage. I masked up all the bearing surfaces first, obviously, and sacrificed the old bleed nipples and flexi lines as bungs to protect the threads. Hammerite isn't something you want to be trying to remove from unwanted places!

And once the painting was finished, the re-assembly. I used proper red rubber grease, because nothing else is good for rubber components; most other greases will make the rubber seals swell or react with brakefluid. I've had great results with this stuff on rebuilt bike calipers in the past. The trickiest part of the whole thing was getting the stupid circlip for the dust seals seated properly; they seem to have a spring force in them that could fire a human cannonball (and nearly did, several times). In addition, there's no means of actually holding them with a tool (no detent for circlip pliers and normal snipe-nosed ones just slip off). There's probably a technique that makes it easy, but I never discovered it. I eventually held one end in place with a small screwdriver and then worked round the spring with another screwdriver to the other end, seating it as I went. This took several attempts, and all the while I was painfully aware how easy it would be to tear the fragile seal. A most annoying part of the job!

However, finally it was done and a quick whizz over all the brake pad shim clips with the wire brush, all new rubber bushes from the rebuild kit inserted and it all greased up with red rubber grease all that remained was to connect up the new braided lines (with new copper washers) and add these little critters...

...some nice new stainless steel bleed nipples with new dust boots. Hopefully you'll agree that when you compare how they were to start with;

with how they ended up;

it was worth all the faffing about! More...


Almost too nice to bolt onto a car and get all covered in crap! But at least I can have reasonable confidence when I do that these ones won't be trying to have me into a ditch and set fire to the car!
