
A Kiwis Series 3
-
Hobbawobba

- VIP User

- Posts: 1949
- Joined: Tue Nov 01, 2011 9:44 pm
- Location: Worcester - UK
- Has thanked: 441 times
- Been thanked: 181 times
Re: A Kiwis Series 3
I'll try and ground down a dinner fork so it's thin enough to wedge under. If it still doesn't wanna budge, do you guys reckon it'd be safe to carefully drill out? Ill be taking the radiator off and flushing it good anyway
-
KiwiDave
- VIP User
- Posts: 2268
- Joined: Sat Nov 05, 2011 8:07 pm
- Location: Feltham, Southwest London
- Has thanked: 300 times
- Been thanked: 146 times
Re: A Kiwis Series 3
NOTE This will not work if your name is Uri Gellercodge wrote: Find a fork shaped piece of metal or make one, to push into the join and give upwards leverage whilst you turn.
1985 Sunrise Red S3 TWR
2006 Mercedes CLK 280 Sport AMG
2006 Mercedes CLK 280 Sport AMG
-
ian65

- Admin

- Posts: 6402
- Joined: Wed Mar 30, 2011 12:11 am
- Has thanked: 232 times
- Been thanked: 276 times
Re: A Kiwis Series 3
get some heat on itHobbawobba wrote:I'll try and ground down a dinner fork so it's thin enough to wedge under. If it still doesn't wanna budge, do you guys reckon it'd be safe to carefully drill out? Ill be taking the radiator off and flushing it good anyway
1999 Jaguar XJR V8 Supercharged
1992 Peugeot 205 1.9 GTI
2003 Mercedes SLK 200 Kompressor
-
codge
- RX7fb LEGEND

- Posts: 2668
- Joined: Fri Apr 01, 2011 11:41 am
- Location: South Yorks.
- Been thanked: 4 times
Re: A Kiwis Series 3
Hacksaw a slot into a piece of flat steel, about 1'16th" thick. As you turn a spanner on the nut, push the flat plate in and exert some upwards leverage. It should then unscrew upwards.
It could be drilled but be careful with the threads in the radiator top.
It could be drilled but be careful with the threads in the radiator top.
-
Lucky
- VIP User
- Posts: 2685
- Joined: Mon Nov 07, 2011 8:30 pm
- Location: Worthing, UK
- Been thanked: 3 times
Re: A Kiwis Series 3
I have a couple of trim removal tools that would be good for this. Basically a bent screwdriver with a slot in it like this;

and as Codge says, lever up under the plastic with one of them ^^ whilst unscrewing the nut. Pick them up cheaps at any motor factors (even Halfrauds, lol)
and as Codge says, lever up under the plastic with one of them ^^ whilst unscrewing the nut. Pick them up cheaps at any motor factors (even Halfrauds, lol)
-
Hobbawobba
- VIP User
- Posts: 1949
- Joined: Tue Nov 01, 2011 9:44 pm
- Location: Worcester - UK
- Has thanked: 441 times
- Been thanked: 181 times
Re: A Kiwis Series 3
Thanks guys. I actually have one of those, Nik! Was looking at it earlier thinking it just needs to be ground down a bit thinner. Will go all out on my next days off with heat and the trim remover 
Got my exhaust booked in for next weekend at a local shop (A44 Exhausts). Headers are fine but the rest is pretty worse for wear. £372 for stainless replacement which I think is pretty good aye
Got my exhaust booked in for next weekend at a local shop (A44 Exhausts). Headers are fine but the rest is pretty worse for wear. £372 for stainless replacement which I think is pretty good aye
-
codge
- RX7fb LEGEND
- Posts: 2668
- Joined: Fri Apr 01, 2011 11:41 am
- Location: South Yorks.
- Been thanked: 4 times
Re: A Kiwis Series 3
Maybe if the plug still turns even with leverage it might be possible to cut it off across and then VERY VERY carefully use a padded junior hacksaw blade to cut a couple of vertical slots......down to the metal threads but just to stop there without nicking the metal?
Then a pair of snipe nose pliers to physically pull the remains of the plug out? Tricky job all round this one.
Then a pair of snipe nose pliers to physically pull the remains of the plug out? Tricky job all round this one.
-
Hobbawobba
- VIP User
- Posts: 1949
- Joined: Tue Nov 01, 2011 9:44 pm
- Location: Worcester - UK
- Has thanked: 441 times
- Been thanked: 181 times
Re: A Kiwis Series 3
Little update.

Got the damn thing out!!
I grinded a trim remover so it'd fit under the sensor, but it still wouldn't budge! Steve ended up at mine with a torch and tried to get some heat into it. Nope, still not wanting any of it . Before I knew it, we had managed to make the top of the sensor fly off across the road and were left with the metal rod thing and the threaded portion inside the radiator. Tried to use some grips on the metal piece that was slightly poking out the top. Nope, it was spinning freely. Next up for some reason Steve grabbed the sharp, ground down interior tool and pressed it into the remaining threads. This is where the sensor unscrews perfectly fine! Not even any crossthreading
Got this made up also. Some of you may of heard or seen my exhaust at Retro Rides. It was rusty and full of holes in the mufflers. I'm not fussed about a loud exhaust but the tone was so harsh on the ears.
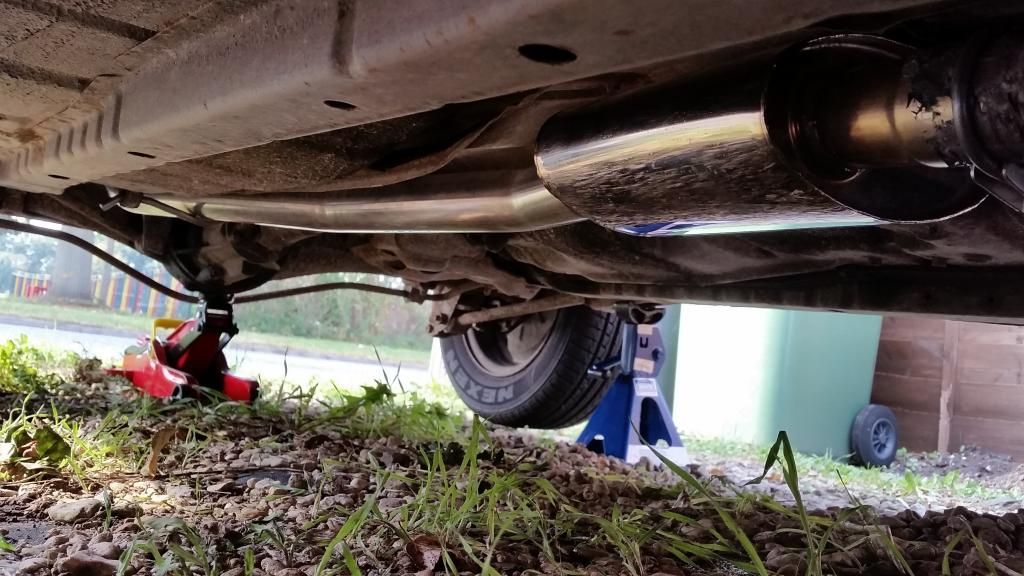
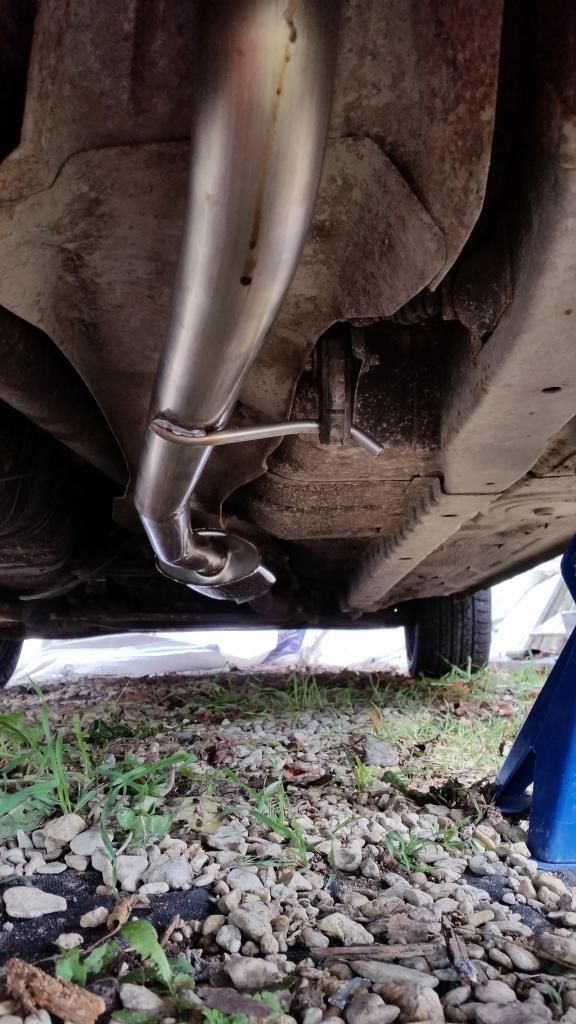
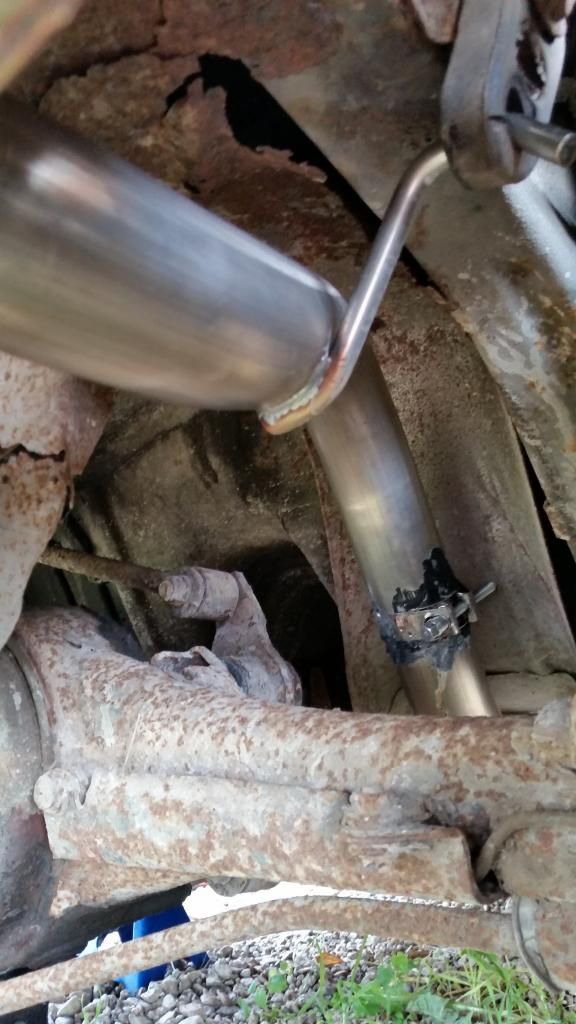


A local shop A44 Exhausts in Worcester done it for me. Great guys to deal with and good price I reckon! Cost me £372 in total. Very happy with it even though I've hardly driven it since. Not as loud as the last exhaust but its a MUCH nicer tone! I probably could of got a better tip as im not the biggest fan of rolled ends. But I suppose I could always chop the rounded bit off? I'll try get a video up at some point.
Anyway. I've had my car up in Droitwich at a friends place getting a few pieces welding up (anyone wanna guess where?). He took it for its MOT yesterday and it did unfortunately fail  . Here is the report.
Reason(s) for refusal to issue Certificate
Nearside Headlamp not working on dipped beam (1.7.5a)
Nearside Headlamp not working on main beam (1.7.5a)
Offside Rear sill end plate Suspension component mounting prescribed area is excessively corroded (2.4.A.3) - He knew this would fail - will sort it out
Advisory Notice issued
Vehicle structure has slight corrosion (6.1.A.1) - I plan to get underneath and coat in POR-15 soonish
Body has slight corrosion (6.1.B.2) - Yep. A few smaller patches I will be sorting in the near future
Nearside Rear wheel bearing has slight play (2.6.2) - Hmm? Anyone got any comments on this?
Now when I drove up to Droitwich I never noticed a headlight being out at all? I've text my mate to ask if he noticed it being out at all when I arrived to his place (it was night). He reckons its probably just the bulb. But there's a slight possibility it could be the whole light unit? He will try and sort it during the week. Anyone have any input? Haha.
Can't wait to get it back as I have a load of goodies for her!

Got the damn thing out!!
I grinded a trim remover so it'd fit under the sensor, but it still wouldn't budge! Steve ended up at mine with a torch and tried to get some heat into it. Nope, still not wanting any of it
Got this made up also. Some of you may of heard or seen my exhaust at Retro Rides. It was rusty and full of holes in the mufflers. I'm not fussed about a loud exhaust but the tone was so harsh on the ears


A local shop A44 Exhausts in Worcester done it for me. Great guys to deal with and good price I reckon! Cost me £372 in total. Very happy with it even though I've hardly driven it since. Not as loud as the last exhaust but its a MUCH nicer tone! I probably could of got a better tip as im not the biggest fan of rolled ends. But I suppose I could always chop the rounded bit off?
Anyway. I've had my car up in Droitwich at a friends place getting a few pieces welding up (anyone wanna guess where?
Reason(s) for refusal to issue Certificate
Nearside Headlamp not working on dipped beam (1.7.5a)
Nearside Headlamp not working on main beam (1.7.5a)
Offside Rear sill end plate Suspension component mounting prescribed area is excessively corroded (2.4.A.3) - He knew this would fail - will sort it out
Advisory Notice issued
Vehicle structure has slight corrosion (6.1.A.1) - I plan to get underneath and coat in POR-15 soonish
Body has slight corrosion (6.1.B.2) - Yep. A few smaller patches I will be sorting in the near future
Nearside Rear wheel bearing has slight play (2.6.2) - Hmm? Anyone got any comments on this?
Now when I drove up to Droitwich I never noticed a headlight being out at all? I've text my mate to ask if he noticed it being out at all when I arrived to his place (it was night). He reckons its probably just the bulb. But there's a slight possibility it could be the whole light unit? He will try and sort it during the week. Anyone have any input? Haha.
Can't wait to get it back as I have a load of goodies for her!
-
ian65
- Admin
- Posts: 6402
- Joined: Wed Mar 30, 2011 12:11 am
- Has thanked: 232 times
- Been thanked: 276 times
Re: A Kiwis Series 3
Hey, Jesse, that exhaust looks the nuts  ....... very nice job..... I tend to agree about the rolled end but as you say, you could cut it back and sleeve it with a tip that you do like.... that's what I did with mine.
That fail sheet is nothing to be worried about on a 30 year old car, especially if you've got a tame welder and a headlight bulb is an easy, cheap fix so overall, happy days.
That fail sheet is nothing to be worried about on a 30 year old car, especially if you've got a tame welder and a headlight bulb is an easy, cheap fix so overall, happy days.
1999 Jaguar XJR V8 Supercharged
1992 Peugeot 205 1.9 GTI
2003 Mercedes SLK 200 Kompressor
-
TOOL
- VIP User
- Posts: 2598
- Joined: Thu Sep 01, 2011 10:30 am
- Location: Switzerland
- Been thanked: 10 times
Re: A Kiwis Series 3
I agree with Ian. Easy fix.
Re the rear wheel bearing. Ignore. It's such a subjective comment.
There's no adjustment anyway. The bearing is pressed onto the axle. The axle is bolted up with shims and a backing plate.
So long as it's not rumbling and everything's nipped up tight, happy days.
Re the rear wheel bearing. Ignore. It's such a subjective comment.
There's no adjustment anyway. The bearing is pressed onto the axle. The axle is bolted up with shims and a backing plate.
So long as it's not rumbling and everything's nipped up tight, happy days.
Back in the UK for the summer, maybe longer......