
A new challenger 'The Beast from the East'

-
Hobbawobba

- VIP User

- Posts: 1938
- Joined: Tue Nov 01, 2011 9:44 pm
- Location: Worcester - UK
- Has thanked: 628 times
- Been thanked: 218 times
Re: A new challenger 'The Beast from the East'
This is something I'd like to do one day. I'm not too keen on the series 3 greyish colour aye Haha. Looks like it turned out fairly well
-
ian65

- Admin

- Posts: 6402
- Joined: Wed Mar 30, 2011 12:11 am
- Has thanked: 315 times
- Been thanked: 376 times
Re: A new challenger 'The Beast from the East'
looking good. 
In my silver series 3 I changed the interior from the wine colour to Mazda black..... some parts I couldn't find at the time ( the arm rest / centre switch console and the gear knob so I sprayed them black... this was 5 years ago and they still look great, even a high wear area like the gear knob.
I washed them, wiped them over with brake cleaner then primed them with a plastic primer. I then just used a standard satin black car spray, nothing special about it at all and it's been great, no fading, peeling or any problems....
A few photos here...
viewtopic.php?f=2&t=2400
1999 Jaguar XJR V8 Supercharged
1992 Peugeot 205 1.9 GTI
2003 Mercedes SLK 200 Kompressor
-
rotarypower
- Posts: 221
- Joined: Thu Dec 06, 2018 7:16 pm
- Has thanked: 94 times
- Been thanked: 71 times
Re: A new challenger 'The Beast from the East'
Cheers Ian, I'll give the satin black a blast for the next bits.
First day back on the beach, I had intended to just potter on the car a bit, but the more I saw the sheep damage the more it bothered me.
First port of call was to ring Mazda parts locally, wings are still available for this car new in the USA, unfortunately none of their vendors seem to post internationally, plus I guess that would be pretty damn expensive as well.
Anyway Mazda didn't recognise the part number, couldn't find the part on their system, and they're now apparently contacting Mazda HQ to see what they can do, the US guys don't realist how lucky they have it!
Anyway I decided to start stripping it down anyway, given the age of the vehicle I expected seized and snapped fasteners, I wasn't disappointed.
First up remove the lights:


I was struggling to get the headlamp assembly out, and for some reason I decided bumper off was the way to do it.
Lots of this:

First the air dam thing.

Then the bumper, it put up a fight and I had to remove it with the bracket still attached and unbolted from the car due to seized fasteners.

Yeah its pretty rusty in there!

These next two photos show part of the wing misalignment issue, as can be seen the left hand bracket has been bent by the impact, right hand one is normal.


Luckily there doesn't appear to be any damage in the rest of this area, so I kind of got away quite lucky.


Next out was the wing:


And this is the state of play as of the end of the day:


I've split apart the two sections of the bumper in the garage, both low bolts on the wing sheared when I removed them along with a couple of others.
I've also made a start on splitting the bumper from its support bracket as its in a bit of a rusty state.
Given the state of things under there I can't rightly put it all back together until I deal with all the rust, there seems to be no rot, so I'm thinking I'll give the arches and front end the epoxy treatment while I'm waiting on the body work parts.
The plan is to make a list of all the fasteners and bits I've removed and replace it all, with stainless where possible, and get everything looking good before it goes back together. Watch this space.
First day back on the beach, I had intended to just potter on the car a bit, but the more I saw the sheep damage the more it bothered me.
First port of call was to ring Mazda parts locally, wings are still available for this car new in the USA, unfortunately none of their vendors seem to post internationally, plus I guess that would be pretty damn expensive as well.
Anyway Mazda didn't recognise the part number, couldn't find the part on their system, and they're now apparently contacting Mazda HQ to see what they can do, the US guys don't realist how lucky they have it!
Anyway I decided to start stripping it down anyway, given the age of the vehicle I expected seized and snapped fasteners, I wasn't disappointed.
First up remove the lights:
I was struggling to get the headlamp assembly out, and for some reason I decided bumper off was the way to do it.
Lots of this:
First the air dam thing.
Then the bumper, it put up a fight and I had to remove it with the bracket still attached and unbolted from the car due to seized fasteners.
Yeah its pretty rusty in there!
These next two photos show part of the wing misalignment issue, as can be seen the left hand bracket has been bent by the impact, right hand one is normal.
Luckily there doesn't appear to be any damage in the rest of this area, so I kind of got away quite lucky.
Next out was the wing:
And this is the state of play as of the end of the day:
I've split apart the two sections of the bumper in the garage, both low bolts on the wing sheared when I removed them along with a couple of others.
I've also made a start on splitting the bumper from its support bracket as its in a bit of a rusty state.
Given the state of things under there I can't rightly put it all back together until I deal with all the rust, there seems to be no rot, so I'm thinking I'll give the arches and front end the epoxy treatment while I'm waiting on the body work parts.
The plan is to make a list of all the fasteners and bits I've removed and replace it all, with stainless where possible, and get everything looking good before it goes back together. Watch this space.
-
rotarypower
- Posts: 221
- Joined: Thu Dec 06, 2018 7:16 pm
- Has thanked: 94 times
- Been thanked: 71 times
Re: A new challenger 'The Beast from the East'
Got a bumper box from Rock Auto today, with nice shiny new bits. Including new clutch line and master cylinder, exhaust hangers, engine mounts, gearbox mount, carb rebuild kit, new hoses for the engine bay, new strong arm boot lifter. And plenty of other bits I forgot.

I also picked up 2 second hand headlights (to replace my damaged one), they're in red so they've been dropped off with the body shop guy to spray up at the same time he fixes my wing.

While I'm waiting for that to be done it was time to crack on with the getting the front area de-rusted and ready for my fixed wing and light to go back on.


Both wings now off, good thing on these older cars is that its a simple job, usually a bolts and screws, none of these plastic clips that you can't work out how to undo until they already broken off!

Wing was actually in good condition with just the beginnings of some rust at the bottom, I decided that I wouldn't bother coating the interior inner side of it, just the bottom 3rd or so where the water and dead leaves collect. Hopefully they'll be on and off enough for me to keep an eye on them, and with stainless fasteners it should be an easy job in future.

Fixed a couple of bolts that had sheered on the bumper brackets, had to drill them out and helicoil them.
My drilling was a bit off centre, but its hard to do while supporting the bumper bracket and trying to stop the tab deflecting.


Next up I decided that due to the awful condition of the bumper support bar I'd use epoxy mastic, I had some red left over from the FC which I didn't want to use anywhere visible on this car, but for jobs like this out of sight it would be a shame to waste it.
I'd forgotten how hard this stuff was to brush on, next time I'm going to have a go at spraying it, its quite hard to brush a good finish and still get into every nook and cranny. I'll most likely go over with paint as well after just to get any areas I may have missed.
The smaller brackets were done with a black epoxy spray can. Its only one part though so I'm not sure how it can be real epoxy.
(The bolts are in to save me re-tapping all the holes)


Finally I fitted my boot support strut, I wish I'd bought two now. One holds it up perfectly fine, but I'd prefer it to lift of its own accord once I get it started.


Next up is to get the front end sorted. I'm not sure how far to go with this area, if I should just do the arches and then come back for the wings when the engine bay gets painted, or just do everything I can get too right now.
I also picked up 2 second hand headlights (to replace my damaged one), they're in red so they've been dropped off with the body shop guy to spray up at the same time he fixes my wing.
While I'm waiting for that to be done it was time to crack on with the getting the front area de-rusted and ready for my fixed wing and light to go back on.
Both wings now off, good thing on these older cars is that its a simple job, usually a bolts and screws, none of these plastic clips that you can't work out how to undo until they already broken off!
Wing was actually in good condition with just the beginnings of some rust at the bottom, I decided that I wouldn't bother coating the interior inner side of it, just the bottom 3rd or so where the water and dead leaves collect. Hopefully they'll be on and off enough for me to keep an eye on them, and with stainless fasteners it should be an easy job in future.
Fixed a couple of bolts that had sheered on the bumper brackets, had to drill them out and helicoil them.
My drilling was a bit off centre, but its hard to do while supporting the bumper bracket and trying to stop the tab deflecting.
Next up I decided that due to the awful condition of the bumper support bar I'd use epoxy mastic, I had some red left over from the FC which I didn't want to use anywhere visible on this car, but for jobs like this out of sight it would be a shame to waste it.
I'd forgotten how hard this stuff was to brush on, next time I'm going to have a go at spraying it, its quite hard to brush a good finish and still get into every nook and cranny. I'll most likely go over with paint as well after just to get any areas I may have missed.
The smaller brackets were done with a black epoxy spray can. Its only one part though so I'm not sure how it can be real epoxy.
(The bolts are in to save me re-tapping all the holes)
Finally I fitted my boot support strut, I wish I'd bought two now. One holds it up perfectly fine, but I'd prefer it to lift of its own accord once I get it started.
Next up is to get the front end sorted. I'm not sure how far to go with this area, if I should just do the arches and then come back for the wings when the engine bay gets painted, or just do everything I can get too right now.
-
Casey
- Admin
- Posts: 1322
- Joined: Sat May 07, 2011 5:46 pm
- Location: Colchester, UK
- Has thanked: 505 times
- Been thanked: 451 times
Re: A new challenger 'The Beast from the East'
More good progress 
So much of it is like deja-vu! Taking the front bumper off and sorting out what you find under there - did that just last year, slapped on loads of POR-15 after dealing with the worst of the rust (which wasn't too bad)
So much of it is like deja-vu! Taking the front bumper off and sorting out what you find under there - did that just last year, slapped on loads of POR-15 after dealing with the worst of the rust (which wasn't too bad)
KIMI 1 : 1st Gen, "hybrid" 1983 silver S2 running gear in a 1985 S3 shell, SORN'd, long term resto project
KIMI 2 : 1st Gen, 1983 silver S2 - now sold to Ian Mothersole on here.
KIMI 3 : 1st Gen, 1983 red S3
Plus a 2004 Full Bridgeported RX-8
KIMI 2 : 1st Gen, 1983 silver S2 - now sold to Ian Mothersole on here.
KIMI 3 : 1st Gen, 1983 red S3
Plus a 2004 Full Bridgeported RX-8
-
rotarypower
- Posts: 221
- Joined: Thu Dec 06, 2018 7:16 pm
- Has thanked: 94 times
- Been thanked: 71 times
Re: A new challenger 'The Beast from the East'
Thanks man.
Today started off well and ended very badly.
I fully stripped the front arches and sanded the inner wings, awful job that took most of the day and left me covered in rust.
My Jotunmastic 90 had turned up (in white colour) and this time I was determined to spray it, however despite thinning it per instructions & having a proper LVLP 1.8 tip gun, it just wouldn't spray. Barely any air was making it through the gun despite having 100psi at one point as I tried to get it to work and the pattern was just a light spatter. So I decided to pour the paint out, thin it more and try again. During this part the gun got knocked over spilling epoxy mastic all over the garage floor, over my shoes, the motorbike (which very luckily had a cover on), my paper overalls which as it turns out don't actually stop anything and the through onto my jeans.
Not only that when I tried to paint it on instead it had been thinned far to much and wasn't covering properly.
I've packed it in for a bad job and will try again tomorrow. Very frustrating as the paint finish of mastic isn't that great.
The plan was 2 coats and then UPOL Raptor for stone chip.
-
Casey
- Admin
- Posts: 1322
- Joined: Sat May 07, 2011 5:46 pm
- Location: Colchester, UK
- Has thanked: 505 times
- Been thanked: 451 times
Re: A new challenger 'The Beast from the East'
A very frustrating end to the day 
Ah well, a fresh start in the morning and I wish you success on the next attempt
Ah well, a fresh start in the morning and I wish you success on the next attempt
KIMI 1 : 1st Gen, "hybrid" 1983 silver S2 running gear in a 1985 S3 shell, SORN'd, long term resto project
KIMI 2 : 1st Gen, 1983 silver S2 - now sold to Ian Mothersole on here.
KIMI 3 : 1st Gen, 1983 red S3
Plus a 2004 Full Bridgeported RX-8
KIMI 2 : 1st Gen, 1983 silver S2 - now sold to Ian Mothersole on here.
KIMI 3 : 1st Gen, 1983 red S3
Plus a 2004 Full Bridgeported RX-8
-
rotarypower
- Posts: 221
- Joined: Thu Dec 06, 2018 7:16 pm
- Has thanked: 94 times
- Been thanked: 71 times
Re: A new challenger 'The Beast from the East'
Time for the next thrilling installment on how to take one step forward and several leaps back.
I picked up a couple of bits to have a play around with, won't be doing anything with them any time soon, but they were at a price I couldn't turn down, worse case scenario if I don't end up needing then I'll just sell them down the line.


Next up I cracked on with the front bumper support, I went over the epoxy coating with a couple of coats of Frost Chassis black I had around the garage, I'm fairly confident that should hopefully stop the bastard rusting for at least another 5 years.


Next I turned to the front arches and the front end, whilst I hadn't wanted to get stuck into this area just yet, it would be criminal to box it all back up in the state it had been so I donned the gloves, glasses, mask and ear defender and set to work with Mr 115mm.
I found the rotary brass wheel was the most effective way to cut through underseal rather than the steel one.


If you look closely in the second photo you can see where someone has 'repaired' the chassis rail with car body filler. My first alert to this was the distinctive smell of filler dust, followed by the obvious white patch.
I wasn't ready to repair these areas yet, so I made a note of them and cracked on. The plan had been to spray the wheel arches with epoxy mastic, however this turned into a disaster despite following the instructions carefully. My gun clogged, then I managed to knock it over while I was adding more thinners, epoxy went all over the garage, ruining my shoes, jeans (through my overalls!) and various other bits & pieces.
I decided to apply it by brush and accept that I wouldn't end up with the best of finishes.


Those pics were after the first coat.
The following are after the second coat. Eventually she'll be getting a coat of white Raptor bed liner, but I've some metal repairs to make first.


At this point I got told by the body guy that the wing wouldn't be ready in time for me going away to work again, given that I get it done for 'mates rates' and save a fortune I was absolutely fine with it and decided to proceed with getting some of the bits I took off refitted.
I'd been measuring all the fasteners I removed and apart from in certain areas where proper high tensile strength fasteners were required I'm putting it back together using stainless fasteners. Hopefully I'll never have issues taking it apart again!

Snapped off bolts were drilled out & heli-coiled.


Highlighted areas that needed future repair with a sharpie.

New plastic clips for the wheel guard screws.

Shiny new bolts & clean paint makes me happy!

Suspension back in, this was a royal PITA to do, I had to unbolt the adjustment bar that goes forward to allow the arms to drop far enough for me to get in the shock assembly back in.

And with the wing in place.

Panel gap getting there, still needs some tweaking.

Same with the front bumper, not happy just yet.

Sprayed up the lights, (not photos of finish yet) they didn't come up great and will need replacing eventually, this is more an interim measure.

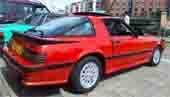
Finally bled the brakes, refitted the wheel & dropped her off the axle stands. This is how she currently sits until I get back from offshore. Looking forward to finally being able to drive her again.

I picked up a couple of bits to have a play around with, won't be doing anything with them any time soon, but they were at a price I couldn't turn down, worse case scenario if I don't end up needing then I'll just sell them down the line.
Next up I cracked on with the front bumper support, I went over the epoxy coating with a couple of coats of Frost Chassis black I had around the garage, I'm fairly confident that should hopefully stop the bastard rusting for at least another 5 years.
Next I turned to the front arches and the front end, whilst I hadn't wanted to get stuck into this area just yet, it would be criminal to box it all back up in the state it had been so I donned the gloves, glasses, mask and ear defender and set to work with Mr 115mm.
I found the rotary brass wheel was the most effective way to cut through underseal rather than the steel one.
If you look closely in the second photo you can see where someone has 'repaired' the chassis rail with car body filler. My first alert to this was the distinctive smell of filler dust, followed by the obvious white patch.
I wasn't ready to repair these areas yet, so I made a note of them and cracked on. The plan had been to spray the wheel arches with epoxy mastic, however this turned into a disaster despite following the instructions carefully. My gun clogged, then I managed to knock it over while I was adding more thinners, epoxy went all over the garage, ruining my shoes, jeans (through my overalls!) and various other bits & pieces.
I decided to apply it by brush and accept that I wouldn't end up with the best of finishes.
Those pics were after the first coat.
The following are after the second coat. Eventually she'll be getting a coat of white Raptor bed liner, but I've some metal repairs to make first.
At this point I got told by the body guy that the wing wouldn't be ready in time for me going away to work again, given that I get it done for 'mates rates' and save a fortune I was absolutely fine with it and decided to proceed with getting some of the bits I took off refitted.
I'd been measuring all the fasteners I removed and apart from in certain areas where proper high tensile strength fasteners were required I'm putting it back together using stainless fasteners. Hopefully I'll never have issues taking it apart again!
Snapped off bolts were drilled out & heli-coiled.
Highlighted areas that needed future repair with a sharpie.
New plastic clips for the wheel guard screws.
Shiny new bolts & clean paint makes me happy!
Suspension back in, this was a royal PITA to do, I had to unbolt the adjustment bar that goes forward to allow the arms to drop far enough for me to get in the shock assembly back in.
And with the wing in place.
Panel gap getting there, still needs some tweaking.
Same with the front bumper, not happy just yet.
Sprayed up the lights, (not photos of finish yet) they didn't come up great and will need replacing eventually, this is more an interim measure.
Finally bled the brakes, refitted the wheel & dropped her off the axle stands. This is how she currently sits until I get back from offshore. Looking forward to finally being able to drive her again.
-
Casey
- Admin
- Posts: 1322
- Joined: Sat May 07, 2011 5:46 pm
- Location: Colchester, UK
- Has thanked: 505 times
- Been thanked: 451 times
Re: A new challenger 'The Beast from the East'
KIMI 1 : 1st Gen, "hybrid" 1983 silver S2 running gear in a 1985 S3 shell, SORN'd, long term resto project
KIMI 2 : 1st Gen, 1983 silver S2 - now sold to Ian Mothersole on here.
KIMI 3 : 1st Gen, 1983 red S3
Plus a 2004 Full Bridgeported RX-8
KIMI 2 : 1st Gen, 1983 silver S2 - now sold to Ian Mothersole on here.
KIMI 3 : 1st Gen, 1983 red S3
Plus a 2004 Full Bridgeported RX-8